Sunday, November 30, 2014

Love and Kisses {Sparkle N Sprinkle Dec Reveal}


Welcome to Sparkle N Sprinkle's December 1 Reveal.

This month FOUR new stamp sets are being introduced.   These sets are 20% off their regular price, until Dec. 3rd.  All the new reveal sets are available on Cling Mounted Rubber and as a digital image.  Sweetheart Frog, set #677 is the stamp set featured in  This Month's Technique Video.

The sets are:


Toyland Bear #674   (digi version DIGI674)
Gymnast #675   (digi version DIGI675)
Love and Kisses #676  (digi version DIGI676)
Sweetheart Frog #677   (digi version DIGI677)


On Dec 3rd,  one Grand Prize Winner will be selected from the comments left on the designers' blogs listed below.  The Grand Prize Winner will receive

all FOUR of the new rubber stamp sets (or digi sets, if you prefer)


The new SNS Creative Challenges also begins today, with lots of prizes and recognition badges. 

The winner of the blog hop will be announced on Dec 3 on Facebook, the SNS blog, and on our blogs.  This month's Blog Hop order is:

(Tip: if you have a problem with a particular link, try clicking on the person's blog title to send you to their Home page.)

Don't forget to leave a comment with each Designer to be eligible for the Grand Prize.  We love reading your comments and hope we have inspired you as well.  If you absolutely can not leave a comment for some reason, please email icinganne@yahoo.com with your comment and the name of the blog or Designer you are commenting about.

We hope you enjoy the New Reveals as much as we do!
Last month the winner came from April's blog.  Wonder which Designer contains the Grand Prize winner this month?

Now for the details on how I created my easel card.  I stamped my image with Distress Ink (Black Soot) and heat embossed it with Clear embossing powder.  Next the image was colored with Copic markers and fussy cut out.  A Sakura glue pen was used to add glue to all the small hearts on their clothing and then covered with Gypsy Red velvet glitter.

Lifestyle Crafts (Nesting Hearts) were used to create the glittery hearts  front panel.  I started out by die cutting Sticker Paper and glittered two of the hearts with Gypsy Red velvet glitter and the middle heart with Cloud Nine velvet glitter.  These nesting hearts were then adhered to white cardstock using Tear-ific tape, which was then adhered to the front of the easel card.  The image was pop dotted on top of the hearts.

I used the direct to paper method and Staz-On Blazing Red ink to color the inside of the card.  (My ink pad had some dry spots and I didn't have a reinker, but I liked the pattern it created.)

The sentiment, which is part of the stamp set, was stamped onto a strip of ribbon and adhered to the inside with 1/4" Tear-ific Tape.  I added strips of adhesive backed pearls to finish it off.

It's time to head on over to see what Marie has created for you.  Don't forget to leave all of us a comment to better you chance to win all four of the New Reveal stamp sets.

Thursday, November 27, 2014

Miss You {cut out}


Today I'm featuring one of the new Cut-Out dies from Die-Versions, the Miss You Cut Out.  


To create the card front, I started out by dry embossing the DV Blocks Background die.  Then I covered the raised areas with VersaMark and heat set it using Stampendous White Pearls embossing powder.  Next I die cut the Miss You and added a strip of black cardstock behind the panel.  Dimensional dots were used to add dimension and raise this panel from the card base, which is also white.

Happy Thanksgiving everyone here in the US.  

Monday, November 24, 2014

Christmas Doves


Christmas Doves by Sparkle N Sprinkle makes a sweet Holiday card.  After printing the digi version and coloring it with Copic markers, I adhered a piece of Super Adhesive Sheet over the top and die cut the image using Spellbinder's Grand Labels Four.  After exposing the adhesive, Sparkling Snow glitter was used to cover the entire image.

A VersaMarker embossing pen was used to add embossing ink around the edges of each of the layers and Glisten embossing powder was heat set onto the ink.  The Mon Ami Gabby Diamond Mesh Silver Flowers was also coated with a VersaMarker and heat set using Glisten embossing powder to change the color.  Copic markers were used to highlight around the center.


Thursday, November 20, 2014

Birthday {cut out}


If you haven't heard, Die-Versions just released 20 new dies, including new fonts, cut-out dies, and new pop-up dies.  This is the new Birthday Cut Out die (and this is the sample project you see on the inclosed packaging when you purchase this die).


I folded my double sided cardstock in half to create my card base, and die cut the word directly onto the bottom of the front panel.  When it's closed, you can see the decorative pattern peeking out from the inside of the card.  I added a quilled flower and some rick-rack ribbon and created a quick and easy card.  

Wednesday, November 19, 2014

I {HEART} U {Scrapy Land Challenge #6)


front

inside

Today is the start of a new challenge from Scrapy Land and the theme is to add texture plus use any brand of die that Scrapy Land sells. 

Now there are lots of ways to add texture to your projects, including embossing paste, dry embossing, glitter, mesh, paint....just to name a very few.  I've added texture by adding strips of glitter and ribbon to the front of the card and covering my Die-Versions I {Heart} U Pop Up die with lots of glitter.  Plus the cardstock itself is also textured.

The strips of glitter on the front of the card were created by attaching 1/2" and 1/4" Tear-ific Tape to the front, exposing the adhesive, and covering with Lavender Iris glitter from Sparkle N Sprinkle.  The ribbon is also attached with 1/4" Tear-ific Tape.

The pop up on the inside was covered with Brushable Glue and then more Lavender Iris glitter and allowed to completely dry.  One more strip of glittered adhesive and ribbon complete the inside.

Now it's your turn to create a project that incorporates texture and any brand of die that Scrapy Land sells.  Upload your projects to the Scrapy Land Challenge Blog for your chance to win a $15 gift certificate from Scrapy Land.  I can't wait to see what you come up with.  

Monday, November 17, 2014

Birthday Friends


Birthday Friends is a fun new stamp set from Sparkle N Sprinkle released this month and who better to help celebrate other than Gerty and Eunice? 


I used the digi version, printed the image out twice and colored everything with Copic markers.  I doodled the "wallpaper" behind the girls onto the white cardstock with Copic markers and colored in.  The party hats were fussy cut from the second printed image, colored with Copics, and Bubble Gum glitter was added to the hat stripes and Berry Pudding tinsel glitter to the bottom of the party hats and to the pom poms on top.  Spirited Green glitter accentuates Gerty's eyeglasses and Sparkling Snow gives Eunice's necklace a high sparkle.  Bubble Gum glitter also adds sparkle to the birthday cake and candles.

The sentiment banner was die cut from Sticker paper using the MFT Party Banner die and Die-Versions Tide Pool font die.  I randomly sprinkled some Berry Pudding tinsel glitter around (after placing the letters onto the sticker paper) and then covered the rest of the adhesive with Sparkling Snow.  Glossy Accents covers the letters for more of a shine.

1/8" Tear-ific tape covers the seams between the card base and the first layer of patterned cardstock.  After exposing the adhesive, more Berry Pudding tinsel glitter was added for a festive look.

Friday, November 14, 2014

Bring in the Clowns


Birthdays are the theme for the 104th challenge at Pattie's Creations, as both Pattie and Sandi have birthdays this month.  Happy Birthday to you both!

I've colored the Clown with Balloons from Pattie's Etsy shop with Copic markers and added Sun Dazzle flock from Sparkle N Sprinkle to the end of the clown hat.  The background was created using Pan Pastels and a bit of doodling was added around the edges.

Glossy Accents covers the shoes (Green Iris glitter was sprinkled in the wet glue) and to the birthday balloons.

Head on over to see what the rest of the crew has created to celebrate birthdays.

Wednesday, November 12, 2014

'Anything Goes' Blog Hop with Die-Versions and Repeat Impressions


Welcome to the Die-Versions and Repeat Impressions Blog Hop!  

We hope you are ready for some great inspiration - our theme is 'Anything Goes', and what awesome creations there are to see!
  
And...what's a blog hop without prizes?
  
There will be one lucky winner of a $20 gift card from Repeat Impressions
and one lucky winner for a $20 gift card from Die-Versions!  

Let's get hopping!

You should have arrived here from Karen Hasheck's blog.  
If you didn't, and you'd like to start at the beginning, you can find the entire hop list on the Die-Versions and Repeat Impressions' blogs.

Be sure to start at the beginning, so you have the maximum chances of winning!  

The more you comment along the way, the more chances you have of winning!
You will have until midnight CST on Saturday, November 15th, to comment.
Winners will be announced on the Die-Versions and Repeat Impression blogs on Sunday, November 16th.


Now for a little bit about my project.  I stamped the Repeat Impressions Portland Head Light (lg) with Archival ink (Coffee) and colored it with Copic markers. The sentiment, also by Repeat Impressions is 424-G, Wishing you a season, was stamped in Barn Red Distress Ink onto vellum and heat set with Clear embossing powder.

Die-Versions Sweet Wordlet "Merry Christmas" was die cut from Sticker paper and covered with Fire Engine Red glitter from Sparkle N Sprinkle.  The moon, Santa with his reindeer, and the "stars" are the negative pieces from the DV Christmas Eve Scene, which was also die cut from Sticker Paper.  The stars were originally snowflakes, but I colored them yellow with Copic markers.  The moon is covered in Firefly embossing powder and heat set and Santa's silhouette is covered with Blue Raven glitter.  Spica glitter pens were also used throughout for a touch of sparkle here and there.


We hope that we have inspired you to be creative, and that you'll do a bit of shopping at the Die-Versions and Repeat Impressions' websites!

Thanks for stopping by today!  

Your next stop on the hop is Patti Gilliam's blog! 

Monday, November 10, 2014

Finn's Scarf


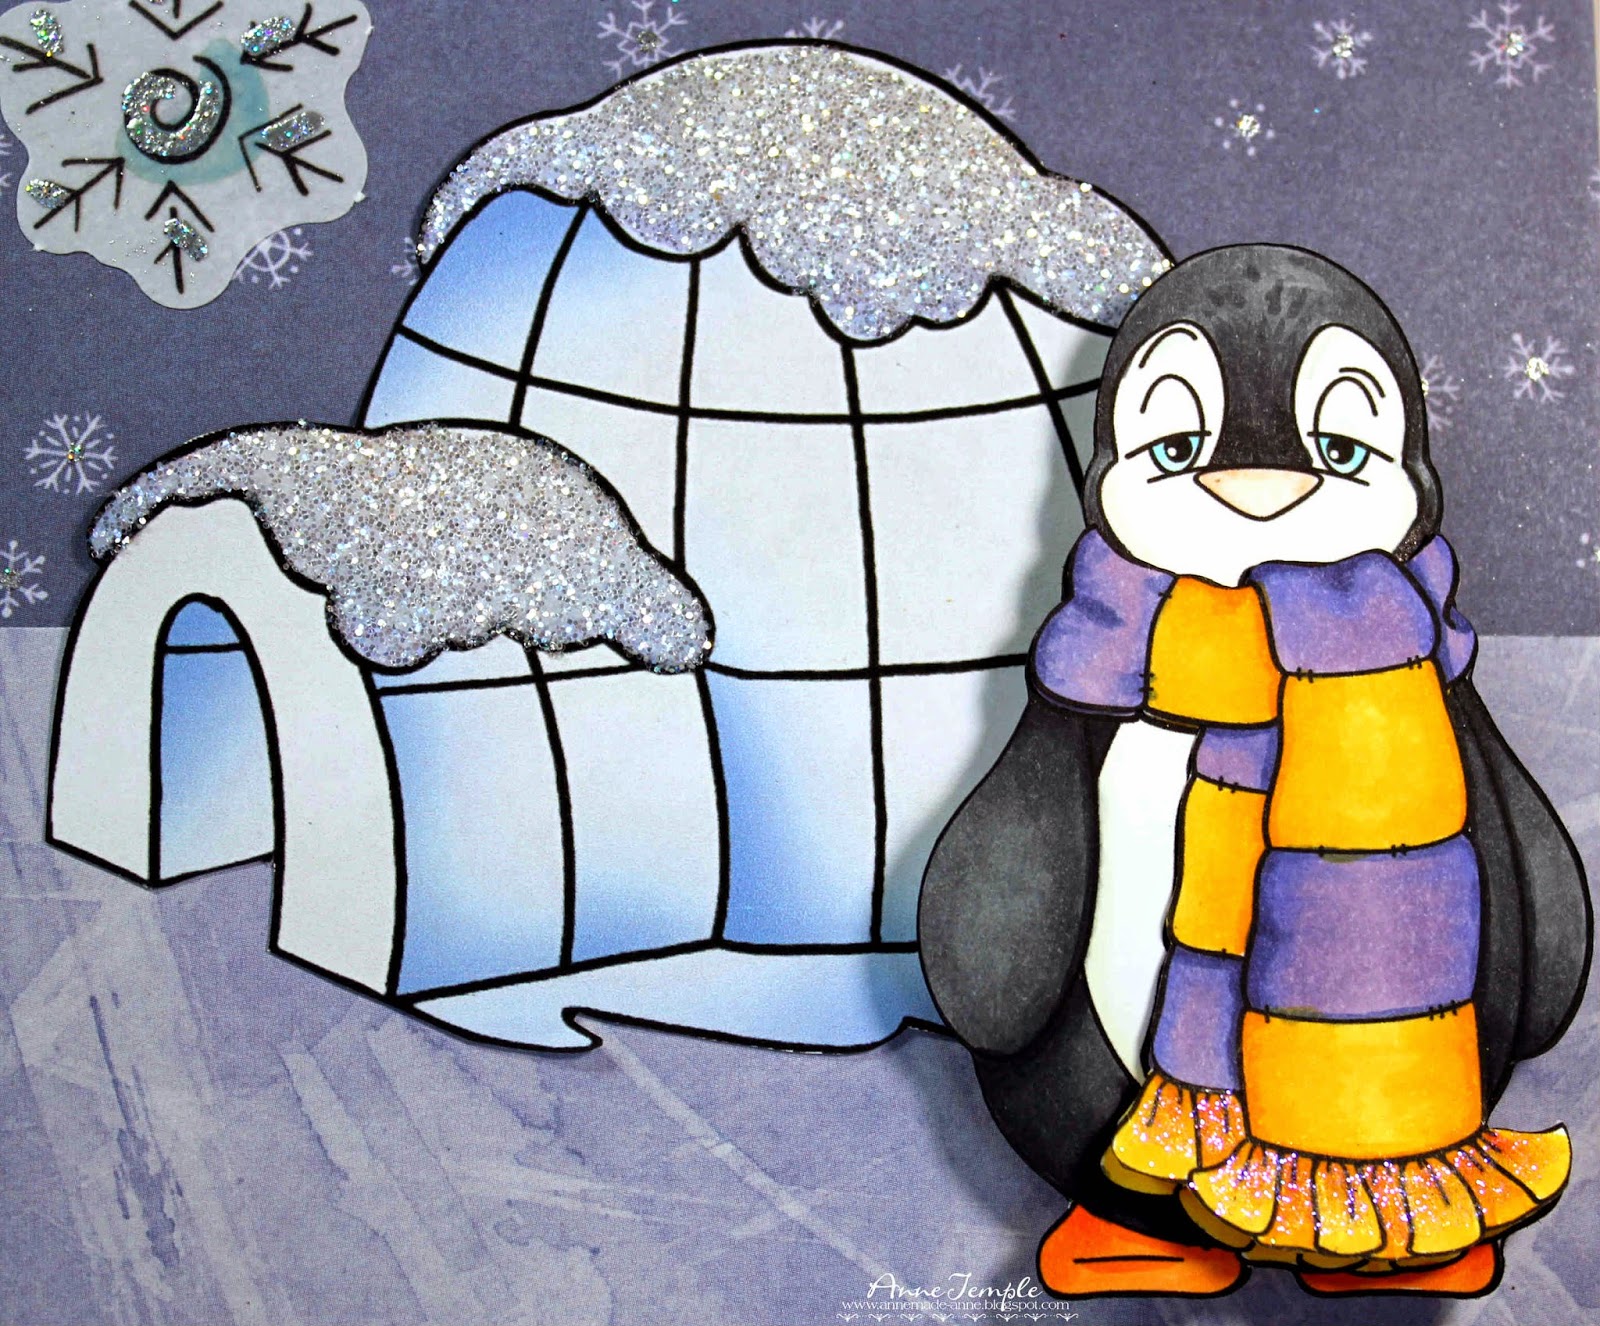
Finn's Scarf is one of the new reveals from Sparkle N Sprinkle this month.  Instead of a normal card, I decided to create a little wall hanging to celebrate winter.

I used the digi version and printed him out twice.  I fussy cut out the entire image form the first one and the scarf from the second one and colored everything with Copic markers,  I also added a little Lavender Iris glitter to the bottom of the scarf and pop dotted the ruffles up from the rest of the card after adhering it to the main image.  The sentiment, which is part of the set, was manipulated to all be in a single line and was printed on colored vellum.


I found the igloo from some free clip art and added a bit of bling to the snow with Diamond Dust glitter.  The large snowflakes are vellum embellishments that I've had for quite a while.  To spruce them up, I added accent marks with a VersaMarker, covered the embossing ink with Silver Lightning embossing powder and heat set it.  I also added VersaMarker to each individual snowflake in the patterned paper and heat set more Silver Lightning embossing powder.

Friday, November 7, 2014

Woofie's Christmas


Woofie Under the Christmas Tree is a new rubber stamp set released by Sparkle N Sprinkle this month.  The digi version was used and printed out twice.  Woofie and the package was fussy cut from one of the printed images and the entire image was fussy cut from the other printed copy.  Everything was colored with Copic markers.


Firecracker Red embossing powder was heat set onto the ribbon on all of the packages (except for Woofie's package, which was covered in Silver Lightning embossing powder and heat set).  Brushable glue was added to Woofie and covered with Buff flock.  Twinkling Clouds Sparkle N Soft was added to the white portions of the Santa hat and Firecracker Red embossing powder was heat set for the red portion of the hat.  Christmas Red Marbled embossing powder was heat set onto the rug and Gold Detail embossing powder enhances the ornaments on the Christmas tree.

Spellbinder's Grand Labels Twenty Three was used to die cut a piece of Sticker Paper.  The image and the sentiments were then placed on the exposed adhesive.  The rest of the adhesive was covered with Cloud Nine Velvet glitter.

The mat behind the focal point was created by applying Versamark to white cardstock, covering with Firecracker Red embossing powder and heat set.  A small strip of Mon Ami Gabby Diamond Mesh - Green was added for a touch more bling.


Wednesday, November 5, 2014

Scrapy Land Challenge #5


Welcome to Challenge #5 for Scrapy Land.  The theme for this challenge is Anything Goes using any brand of die that Scrapy Land sells.

Today's card is a wedding card created using the new Die-Versions Congrats cut out die.  These new cut put dies are fun, easy, and are perfect if you need to create a card in a hurry.

Basically these Cut-Out dies die cut the negative space around the letters, leaving the letters as part of the cardstock.  I die cut my word out of patterned cardstock and layered it on top of solid cardstock, so the color would show through the negative spaces.  I also added some ribbon and a touch of glitter with a Spica glitter pen to all of the flowers on the patterned cardstock.

This die is perfect for lots of occasions besides an upcoming wedding....like graduation, getting a new job, new baby.....

Now it's your turn to create a project for the latest Scrapy Land Challenge.  Just be sure to use a brand of die that Scrapy Land sells (there are over 40 and here is the list if you need it).


Monday, November 3, 2014

SNS Nov 1 Reveal Winner

Thanks to everyone who participated in this month's release.  One Grand Prize winner will win the entire collection revealed this month!

This month FIVE new stamp sets were  introduced.  All the new reveal sets are available on Cling Mounted Rubber and as a digital image.  Finn's Scarf, set #671 is the stamp set featured in  This Month's Technique Video.

The sets are:

Christmas Doves #649   (digi version DIGI649)
Brighten the Holidays #663   (digi version DIGI663)
Finn's Scarf #671  (digi version DIGI671)
Woofie Under the Christmas Tree #672   (digi version DIGI672)


Birthday Friends #673   (digi version DIGI673)

 One Grand Prize Winner was selected from the comments left on the participating Designers' blogs.  The Grand Prize Winner will receive 

 each of the New Reveal rubber stamp sets (or digi versions, if preferred)


Congratulations goes to 
LouLou

who said "loulouNovember 2, 2014 at 6:34 AM
Wow April your card is absolutely stunning. The mirror card gates are gorgeous. I love your glittery doves. I can see this design changed up to a wedding or anniversary card too."
who commented on April's blog.


Please email Anne at icinganne@yahoo.com to claim your prize.  Be sure to include your mailing address and phone number (if you are an international winner).


Hugs from The Sparkle Team,

Thanks {pop up}


front
opened
Today I'm showcasing the new Die-Versions Thanks Pop Up.  These new pop ups are fun to use and for this one, I used the Bokeh technique.  The products I used to create this technique were Distress Ink (Tumbled Glass, Tea Dye) and Sparkle N Sprinkle Surf glitter.  (This is the card that's used as the sample on the DV packaging insert.)


For those of you who might like a quick tutorial on how I made all of the pop-ups, I've written some simple instructions:  

Pop-Up card Instructions:

1.  Once you have decided the paper size for your card, lightly mark with a pencil where the center fold will be on the pop up portion of your card.  You only need to mark about ¼” from each edge as this will be your placement guide for the next step.
2.  The nubs on the die indicate the middle of the die.  Line this up with the pencil marks showing where the center fold of the card will be. 
3.  Tape the die down with removable tape and run it through your die cutting machine.
4.  If you are not using a crease pad, go back over the crease marks with your scoring tool for easier folding.  Score the way you want the fold to go: valley folds scored on the front of the die cut piece and mountain folds scored on the back of the die cut piece.
5.  Connection points with the card are valley folds and where the portion of the die pops out will be mountain folds. 
6.  Gently train the paper folds to go the direction you want.  Squeeze valley folds from the back side to train the paper to fold in the correct direction and pinch mountain folds from the front side.  Fold the pop up portion of the card in half a couple of times to make sure the card will properly close. 
7.  You will also need to create a backing card to hide the hole created with the pop ups.  It can be the same size as the pop up or slightly larger, giving you a border around the inside edges.
8.  When adhering the pop up portion to the backing card, always place adhesive on the pop up portion and not the backing card.
9.  It is easiest to insert your pop up portion into the backing card, lining up the center fold, and then apply adhesive to one side of the pop up portion.  Fold the backing card over to meet up with the adhesive.  Repeat on the other side.

I hope these help.  If you have any questions about the Pop Up cards, please let me know and I'll try to answer them as best I can.  (Be sure to leave a way to contact you.)