Showing posts with label Concord & 9th. Show all posts

Friday, July 21, 2023

Hugs


Stitching on card fronts is all the rage right now. This one is by Concord and 9th. This set (dies and coordinating stamps) was one of the many things we received in the C9 Summer Camp 2023 Event kit.  If you haven't joined one of their virtual events, I highly recommend it. 👍


Until next time,


Thursday, July 20, 2023

Birthday Wishes


Love this new stencil/die/stamp bundle from Concord and 9th called Cottage Garden. I created this fun shaker card using the stencil and dies. The frame is from PinkFresh and the sentiment is by Taylored Expressions.

After completing the stenciling, I die cut the frame from the center and added clear packaging over it to hold my sequins and taped the edges to the back.  Then I adhered the remainder of my stenciling to a card base and popped up the center with adhesive foam.

I also die cut the flower using the C9 die set and added it to the front of my shaker.  The sentiment completes the card.


Until next time,


Monday, July 10, 2023

Needle Little Love?


This fun slimline card was created using one of the Concord and 9th dies that came in the C9 Summer Camp 2023 kit. 

I die cut the cactus a couple of times so that I could add more "arms" to it. The pot was also die cut several times to give added dimension. Such a fun die set to use.


Until next time,


Thursday, July 6, 2023

Thank You


This quick and easy card uses the negative portion of a die cut. I participated in the Concord and 9th C9 Summer Camp 2023 event (my third) a couple of weeks ago and one of the projects needed a couple of black "thank you" die cuts. I though it would make a cool card front to repeat the sentiment. I saved all the little inside letter pieces so I could add them back to the card front. 

To create this, I ink blended their new Dragonfruit ink to a 4.25x5.5 card base. I went from dark to light and then dark again.  I love all the C9 inks and this one is so vibrant.

Once the card front was inked up, I adhered the black negative piece, along with all the little pieces. I also die cut the sentiment out of white to adhere into one of the negative spaces.

Easy peasy! The only hard thing about this card is making sure your thank and you is evenly spaced on the cardstock. I eyeballed that, so it was even easier 😆.


Until next time,


Tuesday, February 1, 2022

Turner Syndrome Awareness Card Auction


I'm so happy to say that I'm participating in the Turner Syndrome Awareness Card Auction again this year. It is hosted by my friend and fellow card-maker, Lori Kobular on her Instagram page. Her daughter, Julie, has Turner Syndrome and Lori is doing all she can to improve awareness of this rare genetic disorder.  

The card auction begins Feb 4 and 100% of the proceeds are donated to Turner Syndrome Foundation. Just click on the link above to view and bid on some gorgeous cards crafted by many talented card makers. Please make your bids in the comment section in US Dollars. If you see a card that you love, please bid with your heart!

This is a collaborative Card Auction for the benefit of the Turner Syndrome Foundation, which operates solely on donations.  With Covid the last couple of years, it has been very difficult for the Turner Syndrome Foundation to raise donations, since most of their big fundraisers are held as "in-person" events. The pandemic has put all of that on hold.  The TS Foundation provides support, guidance and educational programs for families impacted by Turner Syndrome.  TS is a genetic disorder where a female is born missing part or all of her second X chromosome leaving her with lifelong medical issues and learning disabilities.

Here is a link to the Turner Syndrome Foundation if you would like to learn more about TS:  https://turnersyndromefoundation.org/


For my card, I chose this stamp from Concord and 9th and colored it with Copic markers. The sentiment is from The Ton and is a stamp/die combo called Easy Expressions.


So be a Card Hero and go bid on some amazing cards, and remember, all proceeds go to the Turner Syndrome Foundation.


Until next time, 


Sunday, May 16, 2021

Read with Dandelia {Fairy Stampers}


Hey everyone, today it is my turn to share a project with the Fairy Stamper Hugs Facebook groupFor today's project I used the following Fairy Hugs products and you can find all of these at Fairy Stamper

For this fun bookmark, I die cut the preprinted cardstock using a Taylored Expressions die (Banner Stacklets 2) and then stamped Dandelia in the center. I used one of the smaller nesting dies, outlined it with a glue pen, and then added Artic giltter to highlight the shape.

The sentiment is an old Die-Versions font die set called Marker Micro. I love all those font dies that they sold. You can still find them arond every now and then.

The ribbon for the bookmark was accented with two small tassels that were created using the Concord & 9th tassel die from the Everyday Purse Buillder die set. Touches of glitter were also added to the edges.

Gel pens were used to add color and accents to the stamped image.

We'd love for you to join us in the Fairy Stamper Hugs Facebook group for lots of amazing inspiration from both the Design Team as well as the amazing projects shared by our members. Once you're there,  join in on the Fairy Stamper challenge every other Thursady for a chance to win a $15 gift code to Fairy Stamper.


Until next time,

Monday, April 5, 2021

Fairy Hugs/The Craft Store (formally Hochanda TV) - April

Today I'm sharing samples created for the Fairy Hugs April New Release. There are 22 new designs and they are making their debut on Hochanda Craft TV today. You can catch the shows any time during the next 60 days.

Tree Condo
Skunks - FSH-120
Raccoons - FSH-119
Rocks - FSH-116
Flower Vine - FSH-121
Ducks - FSH-118
Grass - FSH-114
Pond - FSH-117
Fairy Hugs Glitter - Pixie Dust

Angela - FSH-111

April
Pine Branch - FSH-115
Raindrops - FSH-101
Dotted Mushrooms - FSH-112
Whimsical Flowers - FSH-113
Grass - FSH-114

Zippy - FSH-104
Condo Dwellers2 - FSH-108
Fairy Wind - FSH-103
Fairy Hugs Stencil - Woody

Dandelia - FSH-102
Fairy Hugs Glitter - Arctic

Elaina 
Fairy Hugs Stencil - Woody
(clear acetate floating frame - shown on top of black cardstock)

Elaina 
Fairy Hugs Stencil - Woody
(clear acetate floating frame - shown on top of woodgrain cardstock)

Estrella - FSH-105
Fairy Gate
Whimsical Flowers - FSH-113
Grass - FSH-114
Wooden Walkway - FSH-066

Lila and Robin (Lila) - FSH-110
Moon Dust - FSH-106
Magically Made By
Fairy Hugs Glitter - Pearl
Fairy Hugs Glitter - Bumblebee

Lila and Robin (Robin) - FSH-110
Pond - FSH-117


Thanks so much for stopping by.  Until next time....


Thursday, February 27, 2020

Fairy Purse {Lavinia World #21}


Hey everyone, it's time for the bi-weekly Lavinia World Challenges #21.  The theme is always anything goes using a stamped image (no digis please) and the winner will receive a generous $15 gift certificate to go shopping at Lavinia World.

I had so much fun creating today's project and can't wait to make more of these!

I used the following Lavinia stamps on this project:


To begin, I created a "master board" using white cardstock and Distress Oxides (Scattered Straw, Fossilized Amber Wild Honey).   

After I was satisfied with the background, I stamped the Fairy and the Hearts using VersaFine Clair (Chianti) randomly all over the "board".  I added small dots by dipping the round end of a wood skewer into the ink and then "stamping" it onto the "board".


I then began die cutting the pieces of my purse using a Concord & 9th die set (Everyday Purse Builders die set).  There are lots of wonderful options on how to accessorize this purse.  I kept this one pretty simple, but had to add the little paper tassel 😍.  

Here is a side view, with the clasp open:


And here is the back of the purse:


Now it's your turn to join us.  You can either upload your current project to the Challenge Blog or you can join our Anything Lavinia Facebook group and upload your project there.  

If you upload into the Anything Lavinia album, your project must include something Lavinia (stamps, paper); if you upload to the Challenge Blog, anything goes as long as you have used a physical stamp on your project.  

You can share your projects with us on the Challenge BlogFacebookInstagram, and our Anything Lavinia Facebook group:

Anything Lavinia


STORE ** CHALLENGE ** FACEBOOK ** INSTAGRAM

Like us on Facebook
Follow us on Instagram: LaviniaWorldStore

Don't forget to include #laviniaworldstore on your projects and tag us at @laviniaworldstore so we can be sure to see and comment on your Lavinia projects!


You have until Monday, March 9 to enter in either Lavinia World Challenges or Anything Lavinia.  Don't forget, the winner will receive a very generous $15 gift code to do some shopping at Lavinia World.


Until next time.....


Wednesday, October 2, 2019

Grateful {Scrapy Land #123}


Hey everyone, it's the first Wednesday of the month and I've created this fall card for the Scrapy Land Challenge #123 that begins today.  The winner of this challenge will receive a $15 gift certificate to Scrapy Land!

I used the following dies in this home decor piece:

Concord & 9th: Autumn Harvest Masking Dies
Concord & 9th: Autumn Harvest stamp set
Sizzix: Ticket Fold A Long

A number of people asked how I created my Rolled Edge Frame cards that I recently created, that I decided to do a tutorial on it.  Once you see how easy it is, you'll be amazed.  It's one of those techniques that is so easy but has a huge WOW factor that makes it look like it took forever and is so complicated 😀.


To start off, you will need two sheets of double sided paper or cardstock that are the same and a third sheet that coordinates.  They all need to be cut the same size.  This one is 8.5" x 6.5" and the previous ones I created were 9" x 7" and 5" x 7".  You could also create a square frame as well.

The patterned paper I decided to use was not double sided, so I photocopied them using my color printer.  Instant double sided paper 😁.


Take the two sheets that are the same and position them so that the same patterned paper is facing each other.  As you can see in the photo above, the 'pumpkin' side of the paper is facing each other.  (If you alined these together with your hands, you would see that the 'thankful' paper is on the front and back and you wouldn't see the 'pumpkin' papers at all.  I hope that makes sense.)

The two pieces that are on the "inside" will be what will be showing once you have rolled the edges (this will become more clear a little bit later.)


Now you have two options: you can either do the next step separately to each sheet of patterned paper or you can adhere the two sheets together before beginning the next step.

If you adhere the two pieces together beforehand, be sure to ONLY add adhesive around the very edges.

Now you are ready to create the rolled frame.  I prefer to adhere both pieces beforehand, so that's what I did and that's how the instructions are written.  If you decide to do each sheet separately, then adhere the two sheets together (only along the edges) after you have rolled all eight points.


Place your paper onto a cutting mat and using a ruler and an X-acto knife, cut a large X in the center of your papers.

Leave approximately 1" from each point for a margin.  So starting approximately 1" from one point, cut through the paper (or both papers if you adhered them together in the previous step) diagonally to the opposite corner, stopping approximately 1" from the end of the point.  Repeat this step so that you have created an X.

Time to begin rolling your edges.


Begin by lightly spritzing the top layer with water. Take one of the points and begin rolling it toward the outside of the cardstock using a pencil (or other rounded object).  If you like a tighter roll, leave the pencil in there for a few seconds more as the water dries. If you like it looser, then take the pencil out as soon as you have finished rolling.  You can roll all the way to the end of the cut line, or stop a little short of the cut.  It's personal preference.


Continue rolling until all four points have been rolled.  You do not need to spritz your paper with water each time.  As you can see above, now the inside 'pumpkin' paper is showing.

Now you should lightly spritz the inside points and roll with a pencil, as you did above.


This is what your rolled frame should look like once you have rolled all 8 points.  As you can see, the second rolled edge shows the patterned paper that was on the back.  At this point, you can leave the rolled edges as is or you can also add a bit of adhesive or a glue dot underneath if you want them to stay more tightly rolled.


Now it's time to add the final piece of patterned paper/cardstock to the back and begin decorating the inside of your frame.


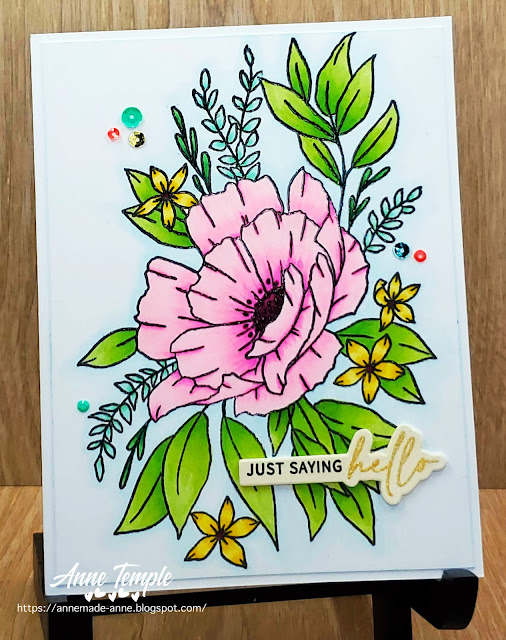
Using the stamp and die cut set from Concord & 9th (anything will work), I stamped multiple colors of the images.  I colored my stamped images with a combination of Copic markers and colored pencils.


One trick I used was to leave the stamps placed on my stamp positioner until after I finished coloring the images (and before die cutting the images out).  I placed the stamped and colored images back onto the stamp positioner and stamped the image again using VersaMark (be sure to clean your stamps before doing this step though 😀).  Then I heat set them with Clear embossing powder.  This gives lots of details and added dimension. 

Now you're ready to die cut the stamped images. I love how these dies have a cut line that is right on the edge of the die, so you don't have a white border around your die cut.  These are super easy to line up for perfect cuts each time.


As a finishing touch, I cut four strips of black cardstock, each 1/4" thick, metered the corners, and adhered it to the edges of my rolled frame.


In order to make this truly a piece of home decor that would stand upright on it own, I created an easel backing for it.  This is another super easy thing to do for any card or home decor you want to display.

You want to cut a piece of cardstock 7.5" in length by however wide your card is, or a tad shorter).  In my case, this project is 6.5" wide, so my width was 6.25".  Score at 3", 6", 6.5", and 7".  Create an accordion fold at the bottom and adhere to the back side of your project.

Here's a final look at my completed project:


Wow, this was a LONG post 😁.  Now it's your turn to join us and upload your creation to the Scrapy Land Challenge #123.  It can be anything from a CAS card to mixed media, a scrapbook layout to altered art, or anything in between.  The theme is always anything goes using any brand of die that Scrapy Land sells.  You have until Oct 13th.  We can't wait to see what you create 😀!

Until next time......