Showing posts with label Smooch Spritz. Show all posts

Monday, July 13, 2015

Moonlit Night


Today's card features both the Reindeer digi image and the Tree Scene digi image from Sparkle N Sprinkle

In order to get lots of dimension on the trees, I first applied Dimensional glue to the snowy areas and then covered it with Twinking Clouds Sparkle N Soft.  After that was dry, I added some more dimensional glue and then covered it with Cloud Nine Velvet glitter.  The snow on the ground is Swan Wing tinsel glitter.  I applied a thin layer of Brushable glue and then covered it with the tinsel glitter.  
A Memory Box die (Pine Needle Border) was die cut twice to cover the top of the frame I created.  I started out with plain kraft cardstock and then spritzed it with Smooch Spritz (Electric Blue and Emerald Sprinkle).  I took the photo outside in the sunlight and I loved the shadows the pine branches cast over the moon-lit night, which was created using Pan Pastels.  

Wednesday, February 18, 2015

Iris Garden {Scrapy Land Challenge #12}


This month is just flying by and since it's the third Wednesday of the month, that means it's time for a new bi-monthly Scrapy Land Challenge.  The theme for Challenge #12 is Splat!, plus use any brand of die that Scrapy Land sells in your project.  There are lots of different ways to create some splats on your page, including using spray mists, inks, paint, etc.


For my card, I decided to create the Splat background by combining a couple different Smooch Spritzes as I knew from experience that when I spray them, I get larger splats along with the fine mist.  Normally I don't want the large drops of color, but this is exactly what I wanted for today's challenge.

After spraying the colors onto white cardstock, I stamped the Iris Garden image from Sparkle N Sprinkle with VersaMark and heat set it with Black Detail embossing powder.  This is one of their new stamp sets they released this month.  I added touches of color here and there with Copic markers.  Canary flock was added to the throats of the iris for a velvety, soft look.

The sentiment was also stamped in VersaMark and then heat set with Amethyst Spray embossing powder.  A Sue Wilson Designs (Italian Collection - Umbria) die cut was used to cut out the sentiment.  This was then pop dotted above the image for added dimension.  Mon Ami Gabby Diamond Mesh adds the final touch of bling to complete the card.

Now it's your turn to head on over to the Scrapy Land Challenge blog and upload your Splat! creation.  We can't wait to see what you create, but be sure to do it before March 1.  Check out even more inspiration from the rest of the Design Team while you're there.  The winner of the challenge will receive a $15 gift certificate to Scrapy Land.

Friday, July 25, 2014

For the Birds!


Time for a new challenge at Pattie's Creations.  As you can probably guess from my titile, the theme for the next two weeks is: For the Birds!  You're image must have one or more birds on it.  For this fun challenge, I've used Flamingos and you can find it in Pattie's Etsy Shop.

 The image is colored with Copic markers and highlighted with.....what else but glitter :-).  The flamingos have Mauvelous glitter by Sparkle N Sprinkle and the water ripples are highlighted with Waterfall glitter.  I also added Glossy Accents to the lily pads for a shiny look.

The sentiment was die cut from black cardstock that I spritzed with Smooch Spritz (Silver Foil) before cutting the letters.  The Gatsby font from Die-Versions was used to create the sentiment.  The Smooch Spritz gives the letters a bit of subtle shimmer.

The big pink bow is a die from Lil' Inkers Designs.  I started off by adhering double adhesive tape to cardstock, die cutting the image, and then adding more Mauvelous glitter to the exposed adhesive.

Be sure to check out what the rest of the team has created for this fun For the Birds! challenge.


Wednesday, February 12, 2014

Musical Kids


Die-Versions new release this month is all about music and I've incorporated four of the new dies into this card, plus a few handmade flowers that remind me of carnations.  The new releases are the Music Stand, Musical Boy, Musical Girl, and Harmony Wee Petites (music notes).

I started out by creating my background using a technique which combines embossing powder and embossing paste.  (You can see a video of it here by Jennifer McGuire.)  I placed the Dreamweaver metal stencil down onto white cardstock and applied the embossing paste.  After carefully removing the stencil, I covered it with Lagoon Blue embossing powder from Sparkle N Sprinkle and let it completely dry.

Once it was dry (I waited a couple hours), I heat set the embossing powder.  This gave it a really nice, but subtle, shimmer.  I didn't like the white background, so I spritzed the entire thing with Dylusions Ink Spray (Dirty Martini).  The raised embossing paste/embossing powder design acted like a resist and I was able to take a paper towel and remove all the ink from that portion, leaving a nice variegated background.

I wanted the boy and girl in silhouette and decided they were playing a duet together.  The little girl is pop dotted beside the boy to give the illusion she's standing right beside him, reading the sheet music from the music stand.

After adhering everything together, I felt it needed a little something more.  I remembered seeing these flowers several years ago and decided to make a few.  It's so easy too.... just die cut or punch a bunch of scalloped circles, all the same size.  Then lightly spritz them with water or a spritz (I added Smooch Spritz Vanilla Shimmer) to soften the fibers of the paper.  This allows you to crumple them up in a ball easier.  Once they are dry, punch a hole in the center and begin threading the layers through a brad.  Unfurl the layers as you go.  You can add as many or as few layers as you want to determine the size of the flower.  As I mentioned, these remind me of the carnations I taught people how to make out of gum paste or fondant for cakes.

You're definitely going to want to check out this new release as well as what the rest of the DV Dynamos have come up with.  I think you're going to be pretty impressed.

I'm entering this in the Dreamweaver's challenge: February Flutters.


Tuesday, July 30, 2013

Better at the Beach


This is a commission piece created for an anniversary card for a guy who loves the beach, old VW bugs, and Tennessee football.  I was given a few other options as well, but this is what I came up with.

inside
To start off, I inked up my background sky and sun with Distress Inks (tumbled glass, mustard seed) and tore strips of paper for my water and sand.  I added some "white caps" on the waves with my Uniball white pen.  A number of dies and stamps were used in the process.  You got to love it when a stamp and a die coordinate.  That's exactly what's going on with the large palm tree on the left.  It's from Taylored Expressions stamp set Hangin' Out at the Beach and the coordinating palm tree die.  The sentiment is one of the new Cute Cubes from Die-Versions and so is the Palm Tree Sweet Petite on the right.

The doodlebug (as we used to call them) is from another stamp set by Taylored Expressions called Feelin' Groovy.  I colored the image with Copic markers and then fussy cut it out.  Did you notice that I rolled down one of the windows so you can see the waves through it?  The "T" is the actual font of the University of Tennessee.  I downloaded the image and resized it to what I needed, creating one of those magnetized signs cheering for your favorite football team that you see around here.

I continued my sentiment on the inside with a Die-Versions font called Missy Micro and a Big Splash border from Memory Box.  I also spritzed the inside with Smooch Spritz for a subtle bit of sparkle (although it doesn't show up in the photo).

Wednesday, July 24, 2013

Get Well Bookmark


Swirls, one of the new stamp sets from Sparkle N Sprinkle is so versatile.  I've created a Get Well Soon bookmark using a few of Tim Holtz's techniques.

To start off, I created the background by smearing Distress Ink, Distress Paint, and Distress Stains on my craft sheet and then ran the tag through the colors.  I heat set it after I was happy with the results.  Next I stamped the flowers with Archival Ink (Sienna and Saffron).  Goosebumps Texture Spray was added to create texture and interest and a little Smooch Spritz (Vanilla Shimmer) was added for a subtle bit of sparkle.

Next I stamped the flowers again with VersaMark and heat embossed them with Black Detail embossing powder.  After fussy cutting out each of the flowers, I applied Viva Decor's Inka Gold (Cobalt Blue and Green Yellow) to the flowers.  You need to use embossing powder instead of just ink so the Inka Gold won't cover up (obliterate would be a better description) the design.  Ask me how I know :-).    Love the metallic look of these paints.

One of the things I love about fussy cutting images is that the paper naturally curls.  You can really see it in on the blue flower.  Since I wanted to keep that natural curl, I only adhered the center of the flower to the tag base.

The bookplate is part of the Sizzix (Tag and Bookplate) die I used.  I inked it up with  some metallic Distress Stains and a little Distress Ink.  The sentiment, which is part of the set, is heat embossed with Black Detail embossing powder as well.

Lastly, I coordinated the seam binding ribbon by using the same color combination as the background.  A few randomly placed pearls complete the bookmark.


Thursday, February 28, 2013

Butterfly Garden


Here is a simple card I created using rubber stamps and the Butterfly Garden border die from Die-Versions.  The background was created using a couple different background stamps from Impression Obsession and the little girl is a retired clear stamp from My Favorite Things, colored with Copic markers.  After spritzing white cardstock with Smooch Spritz (Vanilla Shimmer) for more shimmer, I die cut the Butterfly Garden border twice so I could fussy cut out a couple of the butterflies.  I bent the wings and adhered them directly to the background.


What gives this card a bit more interest is that I bowed the border to make it look like the little girl and her dog are sitting on a bolder surrounded by butterflies and flowers. Easy to do and it looks pretty good in person.

For more inspiration, be sure to visit the Die-Versions blog.

Wednesday, February 20, 2013

Pink Hat Lady


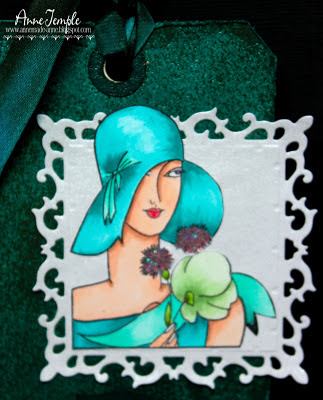
If you like the Art Deco style, this set called the Art Deco Ladies from Sparkle N Sprinkle is such a versatile set.  I've colored the image with Copic markers and fussy cut her out.  The backdrop is spritzed with various inks and I added a gem swirl.


Here's a close up of her.  There are lots of wonderful stamps and stamp sets in this genre, plus lots others too.   This was a pretty quick card to put together, so it would be easy to mass produce, and I think it's perfect for any occasion.  Enjoy.

Friday, February 1, 2013

SNS Monthly Challenge


It's time for a new monthly challenge from Sparkle N Sprinkle Creative Challenge and they've changed the rules for 2013 to make it even easier to participate.  Now you can use any image or stamps (not just SNS stamps - although we love seeing SNS images), as long as you follow the theme.  Anyone who uses a SNS rubber or digital image though, will receive a FREE digital image.  The winner of the challenge will still receive a rubber stamp set of their choice.   How cool it that?  This month's theme is a color challenge:

Color swatch courtesy of Design Seeds® 


My hands got really inky making this tag, but it was so fun to make.  To create the background for the tag and the bookplate, I used Tim Holtz' Rusted Enamel technique along with various Distress Inks (Peacock Feathers, Gathered Twigs, and Brushed Corduroy).

Meet Jasmine, part of the Art Deco - Ladies rubber stamp set from Sparkle N Sprinkle.  Love this set!  She's colored with Copic markers and fussy cut out.  I've added a touch of Cloud Nine velvet glitter to the flowers for a bit of sparkle and the Fleur-de-Lis square is spritz with Smooch Spritz (Vanilla Shimmer) for some additional bling.  The sentiment is also part of the set and I heat embossed it with Clear-Transparent embossing powder (for a very subtle message).  The bottom ruffle is made out of silk ribbon, as is the tie on the top.

Now it's your turn to show us your creativity by using the colors above.  Remember, you have a whole month to upload your projects.  Be sure to visit the rest of the designers to see what they came up with using this color combo too.

I'm also entering this in the Oozak challenge (favorite colors), as these are some of my favorite color combos.


Copics used: G40, G82    E00, E01, E13   E22, E27   BG32, BG23, BG45, BG49    YG03, YG97

Monday, January 28, 2013

Never too late...


This Free Spirited Hat Ladies rubber stamp set from Sparkle N Sprinkle is full of fun images and sentiments.  I've paired Sadie and Gertie with the Never Too Late sentiment.  


Both ladies are colored with Copic markers (Gertie just loves her animal prints!) and then I added Gypsy Red velvet glitter to Sadie's dress, head band, and shoes.  Not to be outdone, Purple Potion velvet glitter is Gertie's favorite color choice for her accessories.  Goldenrod velvet glitter is the finishing touch for their earrings.

The image is then die cut using the Lifestyle Crafts Nesting Sketchbook die.  The backdrop for the girls is actually a recycled piece of copy paper.  Whenever I spritz or spray something with any of the shimmery spritz bottles that on the market, I lay down a piece of white copy paper.  When it's covered with color, I then try to use it in one of my projects.

To create the glittery sentiment, I used Stickum powder  to adhere the Gypsy Red velvet glitter.  (Be sure to read the instructions on how to use this product- but it's easy to do.)

Although I don't use too many flowers on my projects, I decided that was exactly what was needed here.  I created the handmade roses using the Spellbinders' Rose Creations dies and the Foliage die for the leaves.  I added some brushable glue to the edges and sprinkled them with Cloud Nine velvet glitter for a bit of sparkle and the look of morning dew.  The final steps were to add some fibers and a vintage button.

Tuesday, December 11, 2012

Congratulations


Here are a couple of quick and easy projects using the new Congratulations Presents die from Die-Versions.  The top one celebrates a new engagement with a retired stamp from MFT.  I cut the presents twice so I could have a frosted look to the sentiment and the image is colored with Copic markers.  Glossy Accents was used to really make that huge rock sparkle.


The second example is a single layer interactive card where the recipient has to pull the tag out to see the sentiment.  Although I had this in mind for a younger person, it could be applicable for any age.  The font used on the top is Die-Version's Middle School.  

Be sure to visit the Die-Versions Blog to check out what the rest of this super creative team is creating with all these fun dies.  There are some amazing projects!


Wednesday, November 14, 2012

Patty and Paul Pilgrim


Meet Patty Pilgrim and Paul Pilgrim.  They want to invite you to join us for the Freebie challenge at Dude Time Doodles this week.  You can pick up either one as this week's freebie.  Then create something with either one to join our challenge.  The winner will receive an image from the Dude Time Doodles store.

This was a pretty quick tag to make.  I heat embossed the sentiment first and then  used several different Distress Inks to create my background.  Once I was happy with that, I stamped different images with Picket Fence Distress Stain and Black Soot ink.  Finally,  I liberally spritzed it with Smooch Spritz.  Added just a touch of ribbon at the bottom, and it's all set.

Be sure to check out the other fun creations using these two characters created by the rest of the Dudettes.

Tuesday, August 28, 2012

Jen's Sunshine

Photobucket

For the Dude Time Doodles August New Release post, please scroll down, or click HERE.


Paper Makeup Stamps and Party Time Tuesdays Challenge Blog proudly presents 
"Jen's Sunshine" Blog Hop
This hop will remain open till Tuesday, Sept. 4th
Winners announced Sept. 7th

Today we take time to honor our friend and fellow crafter Jen Scull.  If you are here hopping with us, then I am sure you know Jen is battling breast cancer.  She has been fighting this nasty disease since February.  On behalf of Jen, we thank you for being here.


We ask as you hop along with us, please consider donating at least $1 using the paypal donation button at any stop along the way.  Your donation will go directly to Jen. Thank you.


It wouldn't be a hop without prizes.  To see a full list of the prizes up for grabs, please visit 
and

To be eligible to win a prize from our sponsors, collect the hidden letters located throughout the hop.  Once you spell out the secret phrase, please email Jenn Cochran at partytimetuesdays@hotmail.com.  This will get you entered to win one of several fabulous prizes.


I will also have a $15 Paper Makeup Stamps gift certificate to one lucky person who leaves a comment on my blog.  

Mister Linky's Magical Widgets -- Easy-Linky widget will appear right here!
This preview will disappear when the widget is displayed on your site.
For best results, use HTML mode to edit this section of the post.

Thursday, August 9, 2012

Core Cards Creative Frenzy


Core'dinations is having a design team call and these are the three projects I've made for this call, all using Core'dinations cardstock.

For the first card, I've incorporated Sizzix rolled roses (3D Flowers) and Spellbinders foliage.  The first step is to sand down the Core'dinations cardstock to reveal the pattern.  Deckle cut the bottom edge for added interest.   Next, cut out three rolled roses and assemble.  Add pearls or brads to the flower centers and spritz with Smooch Spritz for a bit of sparkle.  Adhere to the front of your card and add a sentiment on the inside.


For my second card, I chose Core'dinations swiss dots and sanded down the top 2/3s, leaving the bottom as is.  Die cut several Chevron stripes from My Favorite Things and arrange.  The sentiment is die cut from a die by Savvy Stamps.  A very quick, easy, and fun card to make.


My third card incorporates a digital image from Pattie's Creations and a rubber stamp sentiment from Our Craft Lounge.  The first thing you need to do is choose some Core'dinations cardstock that is double sided with different colors.  Sand down portions of the pattern, letting the underlying color show through.  Using a Memory Box border die (Sanibel border), die cut the edge of the card, allowing the color from the inside to show through.  Color the image (I used Copic markers) and fussy cut out.

Add your favorite ribbon, or dye seam binding ribbon to coordinate with your image.  If dying your own, choose the reinkers associated with the colors in your image.  Cut a length of seam binding ribbon and spritz fairly heavily with water.  Place in plastic bag and add a few drops of the reinkers.  Massage/manipulate the bag until the seam binding is dyed.  (I used BG05,  BG07 Various reinkers to dye my seam binding.)  Stamp your sentiment on coordinating cardstock and cut out using Primo Labels from Memory Box.  Adhere ribbon and sentiment, placing the sentiment underneath the ribbon.

The deadline is tomorrow, so I just made it :-).  Good luck to all who enter.


Friday, May 4, 2012

Tulips for Mom

card closed (front)
pop up card opened (inside)


Mother's Day is a little over a week away.  And Pattie's Creations has the perfect challenge for you: a Mother's Day card.

For this challenge, I decided to make a pop up card using Pattie's Tulip in aVase image from her Esty store.  I printed the image twice as I also wanted to add dimension to a few of the tulip heads.  The pop up base is a die from Sizzix that I adhered the Copic marker colored image.  I added a rub-on or two, and the inside was complete.

Next I had to decide how to decorate the front panel.  After playing around a bit, I decided to used a VLVS rubber stamp for my sentiment.  I stamped this in the center of a Spellbinder's Lacey Oval die cut (#4) and wove twine around the outside of the die cut as well as the first layer of the front.  I must confess that this color twine was a happy accident.  I had sprayed the quilled strips of paper with Smooch Spritz (Electric Blue) and some of it had gotten on my fingers.  I was moving one of the twine bobbins out of the way and some of the ink got on parts of the twine.  Instead of throwing it away, I decided that it was worth a try to see if I could dye it like you can ribbon.  I retrieved a plastic bag, put the cantaloupe striped twine in the bag and spritzed more Smooch Spritz inside the bag and just swooshed  it around.  Needless to say, I was very happy with the results.  Parts of the twine didn't get dyed, but other parts became different colors.

I pop dotted the sentiment and completed the card with my quilled pieces.  Now it's your turn to show us your Mother's Day creation at Pattie's Creations Challenge Blog.  You'll have two weeks, and remember, you must use an image (either digi or rubber) for our challenges.

I'm entering this in the following challenges: Shopping Our Stash (Mothers' Day or girly); Sweet Stamps (for mom); Whoopsi Daisy (flowers); Creative Inspirations paints (flowers).


Copics used: R21, R32, R43, YR09    G12, G14, G07, G17    B0000    Y00