Showing posts with label pearls. Show all posts

Wednesday, May 17, 2017

Just A Note {Scrapy Land Challenge #66}


Today is the start of a new Scrapy Land Challenge.  The theme is Add Pearls and/or Lace, plus use any brand of die that Scrapy Land sells.

For my project, I created a very simple, yet elegant card using just two dies.


I die cut the Petite Arched Adornment die five times and then adhered the pieces together.  This is what the adornment die looks like I was finished with my arrangement.


The sentiment was die cut from white cardstock and then white fun foam (for added dimension).  I colored the sentiment with Zig Watercolor Brush markers.  Pearls were added to the four corners of the Adornment piece as well as the corners of the first mat.


We hope that you will join us for this Scrapy Land Challenge.  You have until June 4 to upload your project.  The winner, which is chosen by the Design team members,  will receive a $15 gift certificate to go shopping at Scrapy Land.

Sunday, August 31, 2014

Thanksgiving Friends


Welcome to Sparkle N Sprinkle's September 1 Reveal.

This month SIX new stamp sets are being introduced.   These sets are 20% off their regular price, until September 3rd.  All the new reveal sets are available on Cling Mounted Rubber and as a digital image. The Magic of the Season, set #653 is the stamp set featured in  This Month's Technique Video.

The sets are:


Autumn Splendor #651   (Digi version - DIGI651)
Farm Sweet Farm #652  (Digi version - DIGI652)
Magic of the Season #653  (Digi version - DIGI653)
Thanksgiving Friends #656  (Digi version - DIGI656)
Bountiful Blessings #658  (Digi version - DIGI658)
Sweet Holiday #655  (Digi version - DIGI659)

On Sept 3rd,  one Grand Prize Winner will be selected from the comments left on the designers' blogs listed below.  The Grand Prize Winner will receive their choice of:

1) all SIX of the new rubber stamp sets
or 
2) all the new digital stamps and digital stamp sets. 

The new SNS Creative Challenges also begins today, with lots of prizes and recognition badges. 

The winner of the blog hop will be announced on Sept 3 on Facebook, the SNS blog, and on our blogs:


(Tip: if you have a problem with a particular link, try clicking on the person's blog title to send you to their Home page.)

Wonder which Designer contains the Grand Prize this month?

Here's a bit about my project today.

I've combined both the Thanksgiving Friends and the Bountiful Blessings stamp sets today.  Copics were used to color the images and lots of glitter and embossing powder.  In my mind's eye, Gerty is the eccentric one, so she always is wearing funky glasses.  Today, her glasses coordinate with her dress and are covered with Laser Blue glitter.  Surf glitter was added to all of steam coming from the turkey and the pot on the counter.  Eunice's outfit was hand drawn using a Copic red multi-liner.  The sentiment on her apron was added with a Copic Black mulit-liner.


The frame around the girls was die cut using Spellbinders Petite Scalloped Ovals, covered with VersaMark and heat set with Indian Corn embossing powder.  I used the Distressed Embossing technique around the card base with Distress Ink (Pine Needles) and Sparkle embossing powder.  Cloud Nine velvet glitter was added to the strips of 1/8" Tear-ific Tape holding down the string of pearls.  This gives it a bit of sparkle and takes care of any sticky adhesive that might be showing at the same time.  For even more details, you can visit my SNS Art Gallery.

Hope you've enjoyed this month's SNS New Reveal.  Don't forget to leave each Designer a comment and you could be the lucky winner to receive all six of the new rubber stamp sets!  The winner will be announced on Sept 3.


Monday, August 25, 2014

Sunflowers


Sunflower from Sparkle N Sprinkle is another new reveal this month.  The technique I used for this card is the Coloring on Glitter technique.


I stared out by stamping the image with Memento ink (Rich Cocoa) and then covering the stamped image with a Super Adhesive Sheet.  Then I die cut the image with a Spellbinders Beaded Circles die. Using an Exacto knife, I then cut through the beaded edges protective sheet (without cutting all the way through).  After exposing the adhesive, Sunset glitter was applied to the outside ring of beads and Cloud Nine Velvet glitter was applied over the center of the die.

Next I added color to the flower using Distress Markers.  Adhesive backed pearls were placed along the outside ring.  Burlap ribbon and a heat embossed sentiment (using Distress Ink and Clear embossing powder) are final touches to the card.

Wednesday, May 28, 2014

Life's Simple Pleasures


The Garden Silhouette is one of the new rubber stamp sets making it's debut this month from Sparkle N Sprinkle.  Although there are several images with this set, as a cat person, I knew right away which one I was going to play with.

The image is stamped with VersaMark ink and heat set with Blackened Bronze mixed media embossing powder.  These mixed media embossing powders leave a halo around an image, so you need to be selective on which types of images you use them on.  (Be sure to watch the video to see lots of great ways to use these new powders.)  It did leave a halo around the silhouette, but on the blue cardstock, it looks more like a shadow - so I was ok with the halo.  Also note that the halo effect looks much starker/harsher in the up-close photos than it does in person.  The sentiment, part of the set was stamped with Distress Ink (Salty Ocean) and heat embossed with Clear embossing powder.

The lattice behind the focal point is a Spellbinders background die (Criss Cross) that is covered with Opaline embossing powder to give it a soft shimmer.  Most of the butterflies are from punches and were given to me.  I spiced them up a bit by scribbling a Sakura glue pen on the wings and added Cloud Nine Velvet glitter.  The very small butterflies are from the Butterflies Delight die by Memory Box.  The banner, a die from MFT (Fishtail Flags Stax), is also heat set with Opaline embossing powder.  The edges of the card base is distressed with Distress Inks (Spun Sugar, Tea Dye) as is the blue card stock (Salty Ocean).


Saturday, May 10, 2014

Peace Roses


Challenge #39 at Time4Scrap is all about being feminine.  The theme going forward is always Anything Goes.  Our sponsors for this challenge are Aurora Wings and Dilly Beans.

I've used Peace Roses by Aurora Wings and she is colored with Copic markers with touches of Spica glitter pens here and there (of course the camera doesn't capture these very well).


The petals behind the image is one of those large flowers that I've had forever and cut in half.  I also spruced up the individual petals with Copics and Spica glitter pens.  The Lifestyles Crafts (Nesting Rick Rack Squares) frame was heat embossed with Sparkle N Sprinkle's Velvet Sparkle embossing powder for even more subtle shimmer.  Pearls frame the image itself to add the finishing touch.

You have two weeks to upload your feminine creation to Time4Scrap.  We can't wait to see what you do.

Monday, April 14, 2014

Hibiscus (and tutorial)


Hey everyone.  Today I'm using one of the exclusive Sparkle N Sprinkle digi stamps, the Hibiscus, and the dryer sheet technique to create this fun card.  I think most people think of this using this fuzzy and glittery technique on snow themed focal points.  But I wanted to try something different.  Plus, I want to show you how easy it is to use digital images.  So, I'm combining a tutorial on the basics of using a digi and how to do the dryer sheet technique.

To start off, download the digi onto your computer and save it in a folder.   (I have folders for each digi company that I have images from - but save them however makes the most sense to you.)  Then I upload the image I want, in this case the Hibiscus, into Microsoft Word.  The beauty about digis is that you can resize them to make them larger or smaller than a rubber stamped image (plus they are easy to store).  Once you're happy with the size, you can copy and paste if you want multiples of the same image.  I normally do this when I want to add dimension and layers to the image I'm working on.  Print it out. 


The somewhat tricky part come in when coloring an image and it's a trial and error process to find out what works best with the printer you have (unless you have a laser printer, then no worries) and the markers you use.  For an inkjet printer, you may need to let the ink dry a bit before coloring with Copic markers (that'w what I use).  Some people heat set the ink with a heat gun.  I usually print out several images at a time and then set them aside until I'm ready.  So I don't really have any problems.  Every now and then, the black ink from the inkjet wants to bleed when I touch it with a Copic marker, even after the ink is completely dry.  Although, luckily, this is fairly rare for me, the best way around this is to be a bit more conscientious about coloring over the lines.  You can go right next to them, but try not to color over them and smear the ink.  Again, most of the time I don't have any problems with this whatsoever.  If I do, it's usually right after I've changed the cartridge on my printer.  So don't let this frighten you away from trying digis.


Once the Hibiscus digi was colored, I adhered a piece of Super Adhesive Sheet on top.  Next, take a used dryer sheet and spread it over the image and the adhesive sheet.  It should look like the photo above (please ignore the die cut edges).  Tip: if you do plan to us a die cut (and you shouldn't have any problems cutting through the dryer sheet and cardstock), cut it after you've added the dryer sheet.  Otherwise, you'll have to cut the edges by hand - no big deal, but an extra step.


Cover the adhered dryer sheet with glitter.  I used Cloud Nine Velvet glitter, but any color would work.  Lightly burnish into the surface.  Shake off the excess glitter and return it to the bottle.  What your left with is a fuzzy, sparkly image.

Proceed to create your card as you normally would.  For this one, I decided against the die cut edges (as seen in the photos) and decided to fussy cut the image out.

The next layer is vellum that was die cut using a Just Rite die (Vintage Frame Label).  I added color to the vellum with a Copic marker.  The layer behind the vellum is a die cut from Taylored Expressions (Retro cutting plate) that I heat embossed using SNS Indian Spark embossing powder.

I also added some coordinating ribbon and a triple looped bow for more interest.

I hope you found this informative and given you one more reason to try a digi (if you haven't already).  Also, if you have any questions, please let me know and I'll try my best to answer them.

Saturday, April 5, 2014

Easter Blessings


Time4Scrap has a new challenge for you, beginning today.  This two week challenge is to create an Easter themed project.  The two sponsors for the challenge are Robyn's Fetish and A Day for Daisies.

I've chosen the Lily Wedding image from A Day for Daisies.  Although Easter lilies are mostly white, I've added touches of soft yellows for shading (it's really hard to tell in the photo) and greens for the throat.  Sparkle N Sprinkle flock (Canary) was added to the yellow anthers in the flower center for a more realistic look.  (You are supposed to remove these on a real plant to prolong the life of the plant. )

The dies used are mostly from Spellbinders (Timeless Rectangle for the mats and the cross is from the Cross Collection) and a Simon Says Stamp die was used to die cut the computer generated sentiment.  While the cross was still in the die, I smushed VersaMark through the openings and then heat set it with Silver Pearl embossing powder from Sparkle N Sprinkle.  I also added a few pearls here and there.  The card base was dry embossed with Spellbinders Dainty Dots embossing folder.

Be sure to visit the blog at Time4Scrap to see what the rest of the team has created for you.

Saturday, March 15, 2014

Pearls and Lace


The new challenge at Time4Scrap is all about Pearls and Lace and our sponsors for this challenge is The Stamping Chef and Ikesart.  For my card, I chose Jolene from The Stamping Place.

She was a pleasure to color and as usual, I used Copic markers.  The image was then die cut using a Lifestyle Crafts die (Nesting Doily Ovals) and the background was sponged in using Distress Inks (Dusty Concord).  I left the die in place to create the white portion.  Large pearls were adhered around the oval.

The flowers are very tiny and are a low profile die from Sizzix (Forsythia - one of the many flower dies from the Susan Tierney Cockburn.)  I doubled up the blossoms though, to create a two-toned blossom.  Tiny pearls were added to each flower center.

The purple polka dots are an overlay that I've had forever and worked perfectly with the colors I had chosen.  I added a double lace bow and adhered more small pearls along the tails of the bow.

You have two weeks to add your creation to the Time4Scrap Challenge Blog.  I can't wait to see what you come up with.


Saturday, February 15, 2014

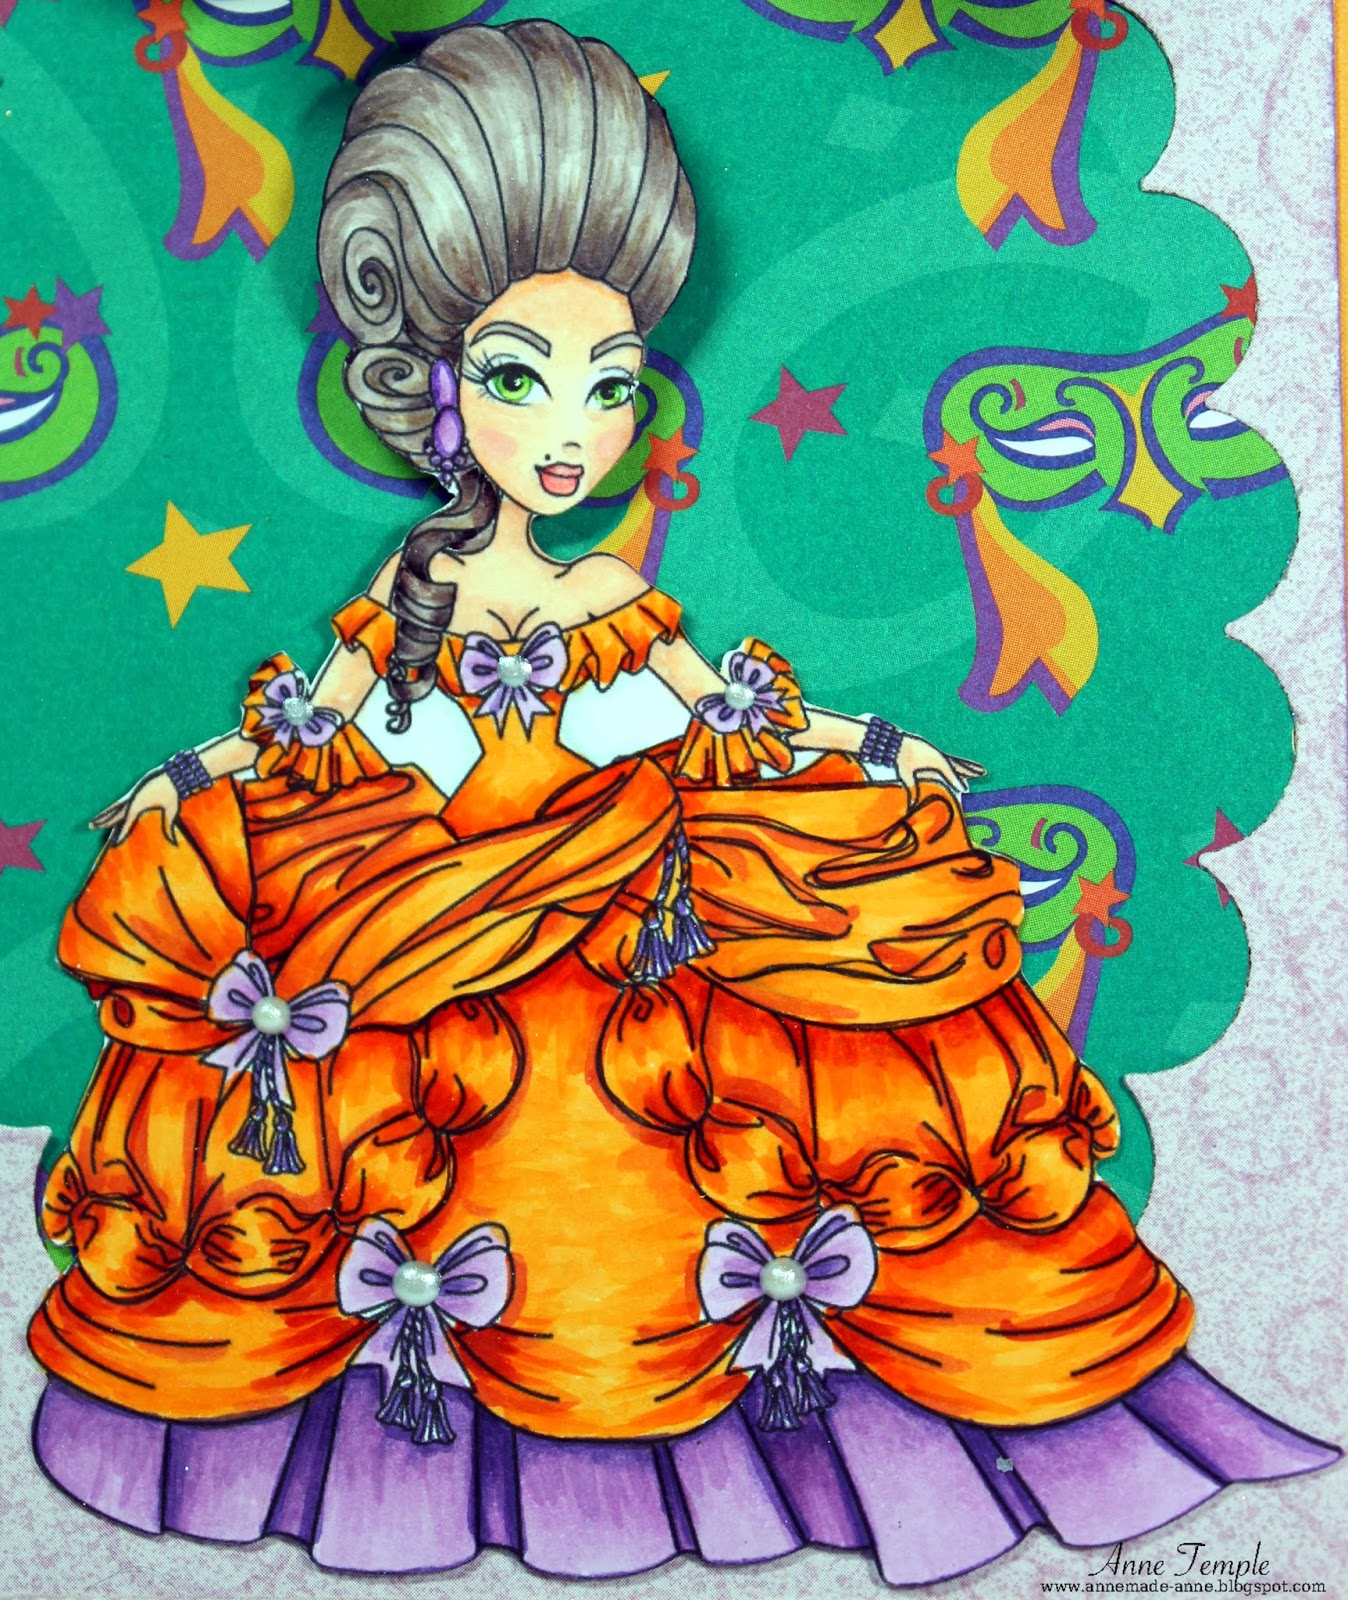
Carnival


Carnival is the theme for this bi-weekly challenge from Time4Scrap.  We have two sponsors, Sassy Studio Design and Aurora Wings.  My digi is by Sassy Studio and is Classic Marie Antoinette.  She just looked like she was going to a masquerade ball to me.  

Normally, I color my images with Copic markers and then find paper to coordinate.  I happened to be going through my scraps and discovered this masquerade masks paper and decided this would be perfect.  And her ball gown colors were instantly decided upon.  I didn't really add many embellishments because I though her dress spoke volumes :-).  


The bow at the top was created with a WR Memory Keepers envelope punch board (thanks Brenda for the idea).  You can find the You Tube tutorial here.

Now it's your turn.  You've got two weeks to upload your projects to Time4Scrap.  Don't forget to check out what the rest of the team has created (they've used some really cute images).

Friday, September 27, 2013

Cherish your Friendship


Sparkle N Sprinkle's Solid Butterfly rubber stamp set and embossing powders were used to create this shaped card.  The butterfly was stamped three times and heat embossed with Indian Spark, Antique Gold, and Spring Willow embossing powders and fussy cut out.

The bright background (since butterflies like bright flowers) they are resting on is heat embossed with Bahama Mama embossing powered - one of the new marbleized embossing powder.  The green base, which represents the leaves of a flower was cut with the Grand Scallop Circle from Spellbinders.

The sentiment is stamped with StazOn ink onto Cloud Nine velvet glitter for a sparkly message.

Friday, September 13, 2013

Winter Wonderland


Sparkle N Sprinkle's Winter Swirl rubber stamp set and Sparkle N Soft was used to create this oh so soft card.  The entire panel is made from three different colors of Sparkle N Soft flock - Night Sky, Glistening Emeralds, and Twinkling Clouds.

Here is a different angle so you can see all the glitter that's incorporated into the flock.  It's very sparkly and soft in person.

To start off, I stamped the image onto an adhesive sheet and used my exacto knife to cut around the trees.  I then exposed the adhesive for each section separately and applied the flock.

The sentiment was heat embossed with Black Detail embossing powder and a couple rows of pearls finish it off.

Monday, September 9, 2013

Regal Reindeer


The Regal Reindeer is just one of the 29 new releases for September called "Tis The Season" from Die-Versions.  Tissue paper background, pearls, and Merry Christmas ribbon make fast work of this holiday card.  

Thursday, August 1, 2013

Hearts


This month's Sparkle N Sprinkle Creative Challenge is a color challenge based on the following image from Design Seeds.
Color swatch courtesy of Design Seeds®

I've chosen the new Swirls rubber stamp set from Sparkle N Sprinkle and tried a new technique (to me) called Blurred Lines technique.  You can find the tutorial here, although it's super simple to do.  Stamp your image with pigment or dye ink and go around the edges with a damp water brush (or one of those blender pens).  I went around the lines as well as on the right side of the heart, using the color from the stamped image to color it in.  Can't get much quicker than that!  I tried this with several different types of inks and the results are slightly different each time, even if the ink pad is by the same company.

I also added a bit of bling by adhering a strip of 1/4" and 1/8" Tear-ific tape to the side and covering with Navy glitter.  For even more sparkle, I die cut a strip of Super Adhesive Sheets with a Lifestyle Crafts border die and the I heat embossed it with Sparkle embossing powder.  The cool thing about this embossing powder is that it's basically clear on steroids - lots of glittery goodness added in.  So whatever color the background paper is, it will show through - just super sparkly.

You have the entire month of August to play along with our color challenge.  I can't wait to see what you create with these fun colors.


Wednesday, July 24, 2013

Get Well Bookmark


Swirls, one of the new stamp sets from Sparkle N Sprinkle is so versatile.  I've created a Get Well Soon bookmark using a few of Tim Holtz's techniques.

To start off, I created the background by smearing Distress Ink, Distress Paint, and Distress Stains on my craft sheet and then ran the tag through the colors.  I heat set it after I was happy with the results.  Next I stamped the flowers with Archival Ink (Sienna and Saffron).  Goosebumps Texture Spray was added to create texture and interest and a little Smooch Spritz (Vanilla Shimmer) was added for a subtle bit of sparkle.

Next I stamped the flowers again with VersaMark and heat embossed them with Black Detail embossing powder.  After fussy cutting out each of the flowers, I applied Viva Decor's Inka Gold (Cobalt Blue and Green Yellow) to the flowers.  You need to use embossing powder instead of just ink so the Inka Gold won't cover up (obliterate would be a better description) the design.  Ask me how I know :-).    Love the metallic look of these paints.

One of the things I love about fussy cutting images is that the paper naturally curls.  You can really see it in on the blue flower.  Since I wanted to keep that natural curl, I only adhered the center of the flower to the tag base.

The bookplate is part of the Sizzix (Tag and Bookplate) die I used.  I inked it up with  some metallic Distress Stains and a little Distress Ink.  The sentiment, which is part of the set, is heat embossed with Black Detail embossing powder as well.

Lastly, I coordinated the seam binding ribbon by using the same color combination as the background.  A few randomly placed pearls complete the bookmark.