Showing posts with label lace. Show all posts

Wednesday, June 17, 2015

Key to my Heart


This week's Scrapy Land Challenge was an easy one for me.  The theme is Use Your Favorite Color plus any brand of die that Scrapy Land sells.  Hope that it's obvious that my favorite color is RED.

The dies I used for this tag were all from Die-Versions:
Die-Versions: Vintage Heart Locket
Die-Versions: Vintage Keys
Die-Versions: Frank font
Die-Versions: Heart Doodles

Deco Foil is such a hot trend right now and I wanted to join in on the fun.  There are lots of You Tube videos out there showing you how to use a laminating machine, how to use embossing powder, how to use Thermo-Web's specifically designed adhesive, and the list goes on and on.   Well, I didn't feel like fooling with my laminating machine and I didn't have the special adhesive, but.....I thought "Why won't it work with my SNS Tear-ific Tape?  It's super sticky and holds just about anything."  So I gave it a go and am so happy with the results.

I used my 2 1/2" double sided Tear-ific Tape and adhered one side to cardstock and die cut out my Vintage Locket, Heart Doodles and my letters.  Next, I peeled off the protective liner from the die cuts and placed the Deco Foil (non colored side) against the adhesive.  I burnished the foil into the adhesive with my fingertip and peeled off the remaining piece of Deco Foil.  I didn't have any bare spots or gaps or wrinkles.  Worked like a charm!  (Of course, after I did this and created my project, I saw yet another blog where that person thought the same thing I did and used the adhesive she had on hand.  Great minds.... :-).)

If you frequent my blog, you'll know that one of my favorite ways to add dimension to a die cut is to use fun foam.  What if you don't have any fun foam handy?  What do you do then?  Well, die cut 3 or 4 pieces of the shape you want and glue them together.  That's what I did today for the key.  I then covered the top layer with Versamark, sprinkled a heavy amount of Silver Lightning embossing powder on it, and heat setting it (after replacing the excess embossing powder back into my container.

I did use fun foam to add dimension to my KEY letters and adhered them to the fun foam after applying the Deco Foil.


For the background on my manilla tag, I started out by adding Distress Ink (Spun Sugar) to the entire thing.  Then I used my Falling Snow stencil and added Tattered Rose and Victorian Velvet Distress Inks.  It left a soft background which made the red Deco Foil pop even more.   A couple layers of lace and ribbon finish off my vintage looking tag quite nicely.  The ribbon was white and I dyed it using the same colors of Distress Stains.

Now it's your turn to upload your project using your favorite colors to the Scrapy Land Challenge #20.  Be sure to include any brand of die that Scrapy Land sells.  You will have until June 28th and the winner will receive a $15 gift certificate to go shopping at Scrapy Land.


Wednesday, June 10, 2015

Steampunk Hat


I have to admit, Steampunk is a bit out of my comfort zone, but when someone described it as Victorian meets Industrial, it made more sense to me :-).  So today, I'm using the new Steampunk Hat from Die-Versions as the focal point of my card.

After die cutting it out of watercolor paper, I used several Zig Clean Color Real Brush markers to color the image and just a little bit of water.  To tone it down some, I added white Wink of Stella on top.  The gears on the hat were inked using a VersaMarker, covered with Silver Bells embossing powder from Sparkle N Sprinkle and heat set.  I also added a pearl string from Mon Ami Gabby.

The background was created using white cardstock and a Dreamweaver stencil (Gears) and embossing paste.  While the embossing paste was still wet, I sprinkled Blackened Bronze and Silver Detail embossing powders on it and then heat set it.  When you heat set embossing paste, it tends to make the paste bubble and that was exactly what I wanted.  It gave it a rough texture plus the Blackened Bronze gave it a rusted look to certain spots.  To add color to the white cardstock, several Distress Stains were applied.  I kept adding different colors until I was happy with the results.  And since most embossing pastes act as a resist, the Distress Stains didn't change the color of my gears.

Some floral paper, lace and a rosette (plus a couple more layers :-) ) add my finishing touches .


Monday, May 25, 2015

Sew Fun


To showcase the Vintage Sewing Machine die by Die-Versions, I decided to create a small box to hold some basic sewing supplies and I based it on this tutorial (although I made mine slightly smaller).

To start off, I die cut the sewing machine from white cardstock and then "colored" it with various embossing powders from Sparkle N Sprinkle: Black Detail, Red Apple, Silver Detail, and my own concoction of Red Apple, Daffodil, and Tangy Tangerine mixed together for the thread.  The handle and the spool were colored with Copics.   A scrap of fabric was also added, just for fun.

To add dimension and raise it, I used one of my favorite techniques - die cut it from fun foam and glue it to the back of the die cut.  That way there's no fussing around those small openings, trying to make sure none of the dimensional foam shows through.  Quick and easy!!

I also wanted some sort of border for the front of the box, so I die cut the spool and thread part of the die several times and then cut off the parts I didn't want.  I also heat embossed it with my own mixture.


Lace was added to the front cover and along the sides and some (old) alpha chips by Doodlebug Design were added to the front as well.

Be sure to check out what the rest of the team is creating with the latest Die-Versions Vintage release.


Tuesday, September 30, 2014

Ellie's Dance Lesson {SNS Oct 1 Reveal}


Welcome to Sparkle N Sprinkle's October 1 Reveal.

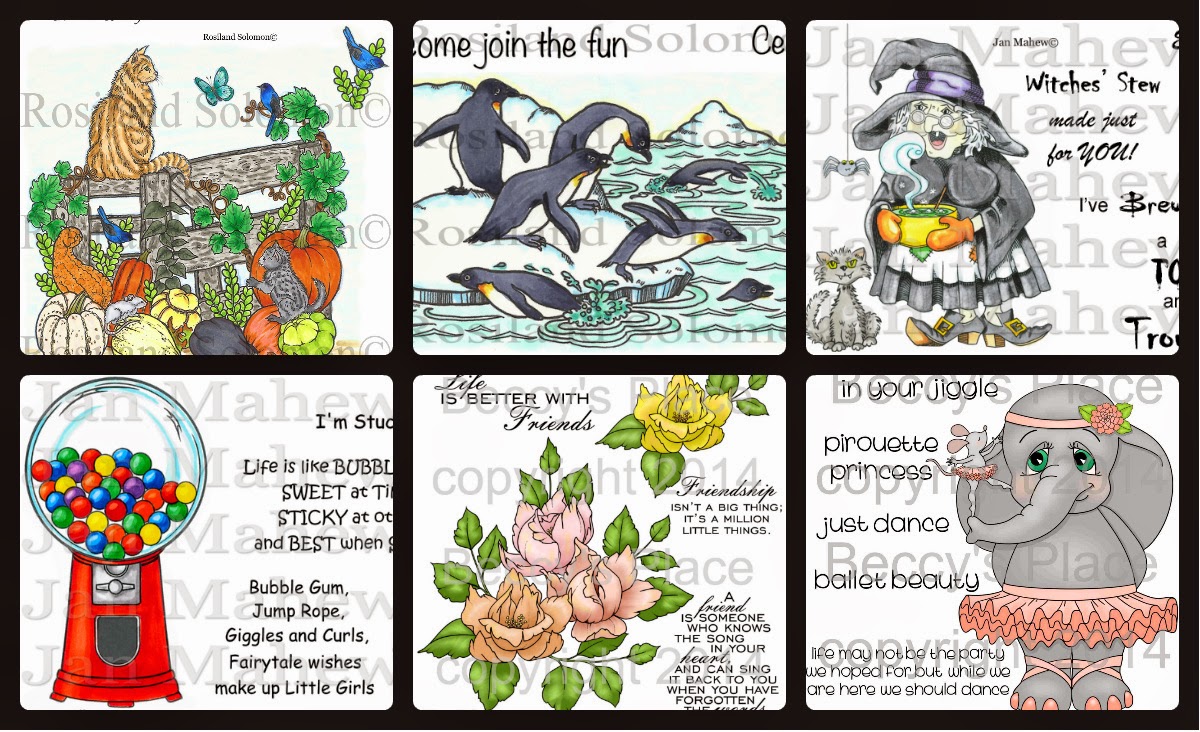
This month SIX new stamp sets are being introduced.   These sets are 20% off their regular price, until October 3rd.  All the new reveal sets are available on Cling Mounted Rubber and as a digital image. The Bubble Gum, set #664 is the stamp set featured in  This Month's Technique Video.

The sets are:


Welcome Autumn #650   (Digi version - DIGI650)
Party Penguins #654  (Digi version - DIGI654)
Witches Brew #660  (Digi version - DIGI660)
Bubble Gum #664  (Digi version - DIGI664)
Beautiful Friendship #665  (Digi version - DIGI665)
Ellie's Dance Lesson #667  (Digi version - DIGI667)


On Oct 3rd,  one Grand Prize Winner will be selected from the comments left on the designers' blogs listed below.  The Grand Prize Winner will receive their choice of:

1) all SIX of the new rubber stamp sets
or 
2) all the new digital stamps and digital stamp sets. 

The new SNS Creative Challenges also begins today, with lots of prizes and recognition badges. 

The winner of the blog hop will be announced on Oct 3 on Facebook, the SNS blog, and on our blogs:

(Tip: if you have a problem with a particular link, try clicking on the person's blog title to send you to their Home page.)

Don't forget to leave a comment with each Designer to be eligible for the Grand Prize.  We love reading your comments and hope we have inspired you as well.  If you absolutely can not leave a comment for some reason, please email icinganne@yahoo.com with your comment and the name of the blog or Designer you are commenting about.

We hope you enjoy the New Reveals as much as we do!
Wonder which Designer contains the Grand Prize this month?
For today's reveal, I've chosen Ellie's Dance Lesson and colored her with Copic markers.  Touches of Mystical Mauve glitter was added to the waistband, headband and her toenails, as well as to the mouse's tutu.  A small dot of dimensional glue was added to the centers of the flowers on her head band and then covered in Lavender Iris glitter.

After die cutting the image using the Spellbinders Labels Four die, it was adhered to a panel of Mon Ami Gabby Silver Diamond Mesh.  The photo doesn't really do just to the sparkle that this panel adds to the card.  It's also light weight enough that it doesn't make the card feel heavy at all.

The two solid color flowers were hand cut in a spiral shape and rolled up to create the flowers.  The center flower is a Sizzix die (Flowers, 3D) that I die cut.  The "leaves" are actually a tree die from Memory Box (Small Adler Tree) that I cut off various parts and adhered to the back of the flowers.

I'm the last stop on the Oct 1 New Reveal Blog Hop. I hope you've enjoyed it and have gotten lots of inspiration.  Don't forget to leave each of us a comment for your chance to win the grand prize of all six of the stamp sets released this month.


Friday, September 19, 2014

Vintage Tea Cup


Today marks the 100th Challenge at Pattie's Creations and we are going Vintage.  I've created a vintage looking card using Pattie's Vintage Tea Cup from her Etsy Store.

I started out by creating the background with Distress Inks (Antique Linen, Victorian Velvet, Vintage Photo, Old Paper).  I smooshed the ink pad down on my craft sheet, spritzed them with water, and ran the white cardstock through the inks until I was happy with the results.  Quick and easy :-).

Whenever I think of vintage china, I always think of gold rimmed pieces.  I added VersaMark pen around the edges of the china and heat set using Gold Detail embossing powder from Sparkle N Sprinkle to replicate this idea.  I also added Green Nugget glitter and Daisy glitter to the tea cup as well.

Added a touch of lace, found some cardstock that reminded me of old fashioned wallpaper, and voila - a nice note card for someone.


Be sure to head on over and participate in our 100th Challenge at Pattie's Creations and while you're there, check out what the rest of the team has created.


Friday, April 25, 2014

Love You/Friends Forever


Hi everyone! Welcome to the Inspired by Stamping and Die-Versions Blog Hop.  Twenty two talented designers have united to celebrate the new season and shake off the malaise of a snowy winter.  Yay!!!  Inspired by Stamping, which designs and manufactures the highest quality of photopolymer stamps that bring superior stamping to all crafters, has teamed up with Die-Versions, makers of low profile metal dies which works with virtually every machine out there and cuts through most materials, to create this special eye candy of Spring themed projects.

One lucky "hopper" will get a total prize package of $100 in gift certificates, a $50 gift certificate from Inspired by Stamping AND Die-Versions, so you can stock up on some awesome products both of the companies have to offer.

For your chance to win the grand prize, visit all of the participating blogs, leaving a comment at each, then leave a comment telling us what you like the most about Spring at the Inspired by Stamping blog.  All comments entered between now and April 28th at 10pm (Pacific time) will be eligible for the grand prize.

Now a little about my project:


Inspired by Stamping graciously supplied all the DV Dynamos with clear stamp sets, trims, flowers, and a paper pack.  All of my patterned papers are from their Vintage Floral paper pad and my sentiment is a combination of the Arrows stamp set and It's Your Birthday stamp set.

I die cut the Butterfly Flourish from Die-Versions out of vellum and used Copic markers to quickly color it.  The flowers, also from Inspired by Stamping, were adhered on top of the flowers on the die cut.

The new Quatrefoil Background was die cut from a piece of white cardstock that I had applied Sea Foam embossing powder (from Sparkle N Sprinkle) and heat set.  The Love You Express Banner, also heat embossed with Sea Foam embossing powder was added on top of the crochet trim.

Your next stop on the hop is Archana .  If you ever get lost in the hop, you can always go back to the beginning, Die-Versions blog, for the complete order list.  Don't forget to leave comments along the way for your chance at that $100 prize package!


Saturday, March 15, 2014

Pearls and Lace


The new challenge at Time4Scrap is all about Pearls and Lace and our sponsors for this challenge is The Stamping Chef and Ikesart.  For my card, I chose Jolene from The Stamping Place.

She was a pleasure to color and as usual, I used Copic markers.  The image was then die cut using a Lifestyle Crafts die (Nesting Doily Ovals) and the background was sponged in using Distress Inks (Dusty Concord).  I left the die in place to create the white portion.  Large pearls were adhered around the oval.

The flowers are very tiny and are a low profile die from Sizzix (Forsythia - one of the many flower dies from the Susan Tierney Cockburn.)  I doubled up the blossoms though, to create a two-toned blossom.  Tiny pearls were added to each flower center.

The purple polka dots are an overlay that I've had forever and worked perfectly with the colors I had chosen.  I added a double lace bow and adhered more small pearls along the tails of the bow.

You have two weeks to add your creation to the Time4Scrap Challenge Blog.  I can't wait to see what you come up with.


Monday, January 6, 2014

Spunky's Valentine


Spunky, along with his friend Rocco, is making his debut this month from Sparkle N Sprinkle.  They will become regulars and will have lots of adventures.  This set is called Spunky Skunk Valentine (#521).

After stamping and fussy cutting out the image, or parts of the image, three times, I colored Spunky with Copics and added Black Ice glitter and Twinkling Clouds Sparkling Flock to his tail.  I then pop dotted his body onto the image base and finally pop dotted the heart to the second layer.  The sentiment on the heart is also covered with Black Ice glitter. This paper tole technique gives your image lots of dimension.


The mat was created using a Spellbinders die (A2 Polka Dots) and then I used the Emboss Resist technique, using one of the other stamps from this set.  After stamping with VersaMark and heat setting with Clear Detail embossing powder, I used Distress Inks to color the background.  I also blinged up my brads (they were originally silver) using the SNS Bling Your Brads technique and White embossing powder.


The lace flower was quick and easy to do and I have a few photos for a quick step by step tutorial.  The first thing you need to do is to make your own large glue dot with the Mega Tack Glue.  Save some of the backing papers from the Super Adhesive Sheets or even the sheet that you get with all those address labels you receive for free.  Just apply the glue to the backing sheet and make a circle as large as you want.  The hard part is that you have to let it dry over night.  As you can see by the photo, it starts out white, but when it dries, it's clear.  (You can also make homemade regular sized glue dots this way too.)  Once it's dry, your ready for the next step.


Cut a long piece of lace (or ribbon or fabric) and start pushing it down onto the glue dot, going from the outside edge and continuing in a circle until the entire glue dot is covered.  I also scrunched mine up just a bit as I was adhering it so I would have a small ruffle.


I added a couple vintage buttons to the center of my lace flower and tied them together with some embroidery floss.  I also glued them down to the lace with the Mega Tack Glue.  That's it!  Easy, easy.


You can also view more detailed instructions in my SNS Art Gallery, here.

Monday, March 25, 2013

Fairytale


When I received the Crystal Chandelier from the March release of Die-Versions, I thought it was very versatile and could be used in so many ways.  (If you missed my whimsical version, you can see that here.)  For this one, I die cut the image from a double sided adhesive sheet and covered most of the image with Diamond Dust for a chunky, sparkly look.  The candles are covered with Cloud Nine velvet glitter and the glittery flames are colored with Copics.  The background was sprited with Dylusions Ink Sprays (love the bright colors of these sprays).

My sentiment is from Unity Stamps and is heat embossed with Black Detail embossing powder.  I pleated the bottom "ribbon" from a scrap piece of cardstock and added a bit of lace on top.  Theoretically, I guess I should have sewn the top of the pleats to keep them closed, but I haven't quite gotten up the nerve to sew on paper yet (so I used my heavy duty adhesive tape).

I hope you've been checking the Die-Version Blog to see what the rest of the team has been coming up with.  There are some really adorable projects that you won't want to miss!

Friday, March 1, 2013

Birdhouse


Today begins the newest Sparkle N Sprinkle Creative Challenge and it's an easy one.  The challenge is Anything Goes, as long as you use glitter (any color).


If you don't have any glitter, I highly recommend you get some from Sparkle N Sprinkle!  You have an entire month to link up your creations, so you have plenty of time to get some.   I really didn't care for glitter too much before I discovered their products and I'm not saying that because I'm on the design team (and yes, I did try the big name stuff).   As a matter of fact, it's the other way around - I applied for the team after trying their glitter (and am SO happy I made it).  Now I use SNS glitter on almost all my projects.

For this month's challenge I chose one of the new stamp sets called Shabby Chic Birdhouse.  I colored the image with Copic markers and then fussy cut it out.  To create the background, I applied a piece of double sided adhesive sheet to a scrap piece of cardstock and adhered the negative portion of the Fleur de Lis die cut from Spellbinders.  I filled in the opening with Flaming Orange glitter.  I turned the square at a diagonal and adhered the birdhouse using pop dots for more dimension.  I also added a bit of Cloud Nine velvet glitter to the roses with a Sakura glue pen.  The corners are from Heartfelt Creations and the flourish is a die from Cheery Lynn Designs.

As I mentioned, you have one month to upload your glittery project to the SNS Creative Challenge.  The winner receives some fabulous product from Sparkle N Sprinkle.  In addition, everyone who enters the challenge and uses a Sparkle N Sprinkle rubber stamp or digital image that they've purchased, will be getting one free digital image drom SNS as well.


Thursday, February 28, 2013

Butterfly Garden


Here is a simple card I created using rubber stamps and the Butterfly Garden border die from Die-Versions.  The background was created using a couple different background stamps from Impression Obsession and the little girl is a retired clear stamp from My Favorite Things, colored with Copic markers.  After spritzing white cardstock with Smooch Spritz (Vanilla Shimmer) for more shimmer, I die cut the Butterfly Garden border twice so I could fussy cut out a couple of the butterflies.  I bent the wings and adhered them directly to the background.


What gives this card a bit more interest is that I bowed the border to make it look like the little girl and her dog are sitting on a bolder surrounded by butterflies and flowers. Easy to do and it looks pretty good in person.

For more inspiration, be sure to visit the Die-Versions blog.

Friday, February 8, 2013

Be Mine


It's time for a new challenge from Pattie's Creations: create a Valentine's Day card.  Perfect timing since Valentine's is only a few days away.  I've used the Valentine Bear Be Mine from Pattie's Etsy shop.

I printed him out multiple times so I could add lots of dimension and I used two different colors of ultra fine Flower Soft for his body.  Copics were used to color the small areas and Glossy Accents covers the "Be Mine" heart.  He's so soft and furry in person - just like a real teddy bear!


His backdrop is old patterned paper from Creative Memories and is cut using a Spellbinders die.  The outside rick-rack die is from Lifesyle Crafts.  I added a touch of lace colored with Distress Stains, and this little cutie is all ready to go in the mail.

You'll have two weeks to upload your Valentine's Day project to the Pattie's Creations Design Challenge blog.  Don't forget to visit the rest of the team and see what they've created for you as well.

Happy Valentine's Day!