Showing posts with label acetate. Show all posts

Thursday, March 12, 2020

Secrets {Lavinia World #22}


Hey everyone, it's Thursday and time for a new Lavinia World Challenges #22. The theme is always anything goes using a stamped image (rubber or clear, but no digis) and the winner will receive a generous $15 gift certificate to do some shopping at Lavinia World.

I used the following stamps for today's project:


For today's card I decided to play around with alcohol inks and glossy photo paper.  I know that people say you should only use glossy paper and the photo paper doesn't work.....but I have a bunch of it and decided to see if it would work or not.  Luckily, I had no problems using the photo paper and I liked the results.


As you can see from the above photo, I created two panels and used the same color combo on both of these.  The only difference is the way I applied my felt blending tool.  On the one on the left, I pounced the blending tool up and down on the paper.  For the one on the right, I swirled it around.  It created two completely different looks!

Next, using a Tonic Studio die set (Beautiful Bramble Square), I die cut the purple background using the outside die from the set.  Using a stamp positioner, I then stamped the Flower Fairy onto the patterned background.  I added glitter to her wings and to the berries.  This was a whiteish-pink looking, semi-transparent glitter from Tonic Studios (Sparkle Dust) that actually changed color when placed on this background.  I didn't realize it did that but I love the results.


I then used the alcohol ink panel that was on the left from the above photo and die cut the leaves using the same Tonic Studios die set. I added dimensional foam to the bottom and adhered it on top of my focal image.

Next I adhered these layers on top of the second alcohol ink panel I created.  I stamped the sentiment using VersaFine black ink and then framed it using the Poppy Stamps Stitchwork Rectangle Frames.  Glitter was also used to accent each of these frames.


Now it's your turn to join us.  You can either upload your current project to the Challenge Blog or you can join our Anything Lavinia Facebook group and upload your project there.  

If you upload into the Anything Lavinia album, your project must include something Lavinia (stamps, paper); if you upload to the Challenge Blog, anything goes as long as you have used a physical stamp on your project.  

You can share your projects with us on the Challenge BlogFacebookInstagram, and our Anything Lavinia Facebook group:

Anything Lavinia


STORE ** CHALLENGE ** FACEBOOK ** INSTAGRAM

Like us on Facebook
Follow us on Instagram: LaviniaWorldStore

Don't forget to include #laviniaworldstore on your projects and tag us at @laviniaworldstore so we can be sure to see and comment on your Lavinia projects!


You have until Monday, March 23 to enter in either Lavinia World Challenges or Anything Lavinia.  Don't forget, the winner will receive a very generous $15 gift code to do some shopping at Lavinia World.


Until next time.....


Wednesday, July 4, 2018

Fireworks


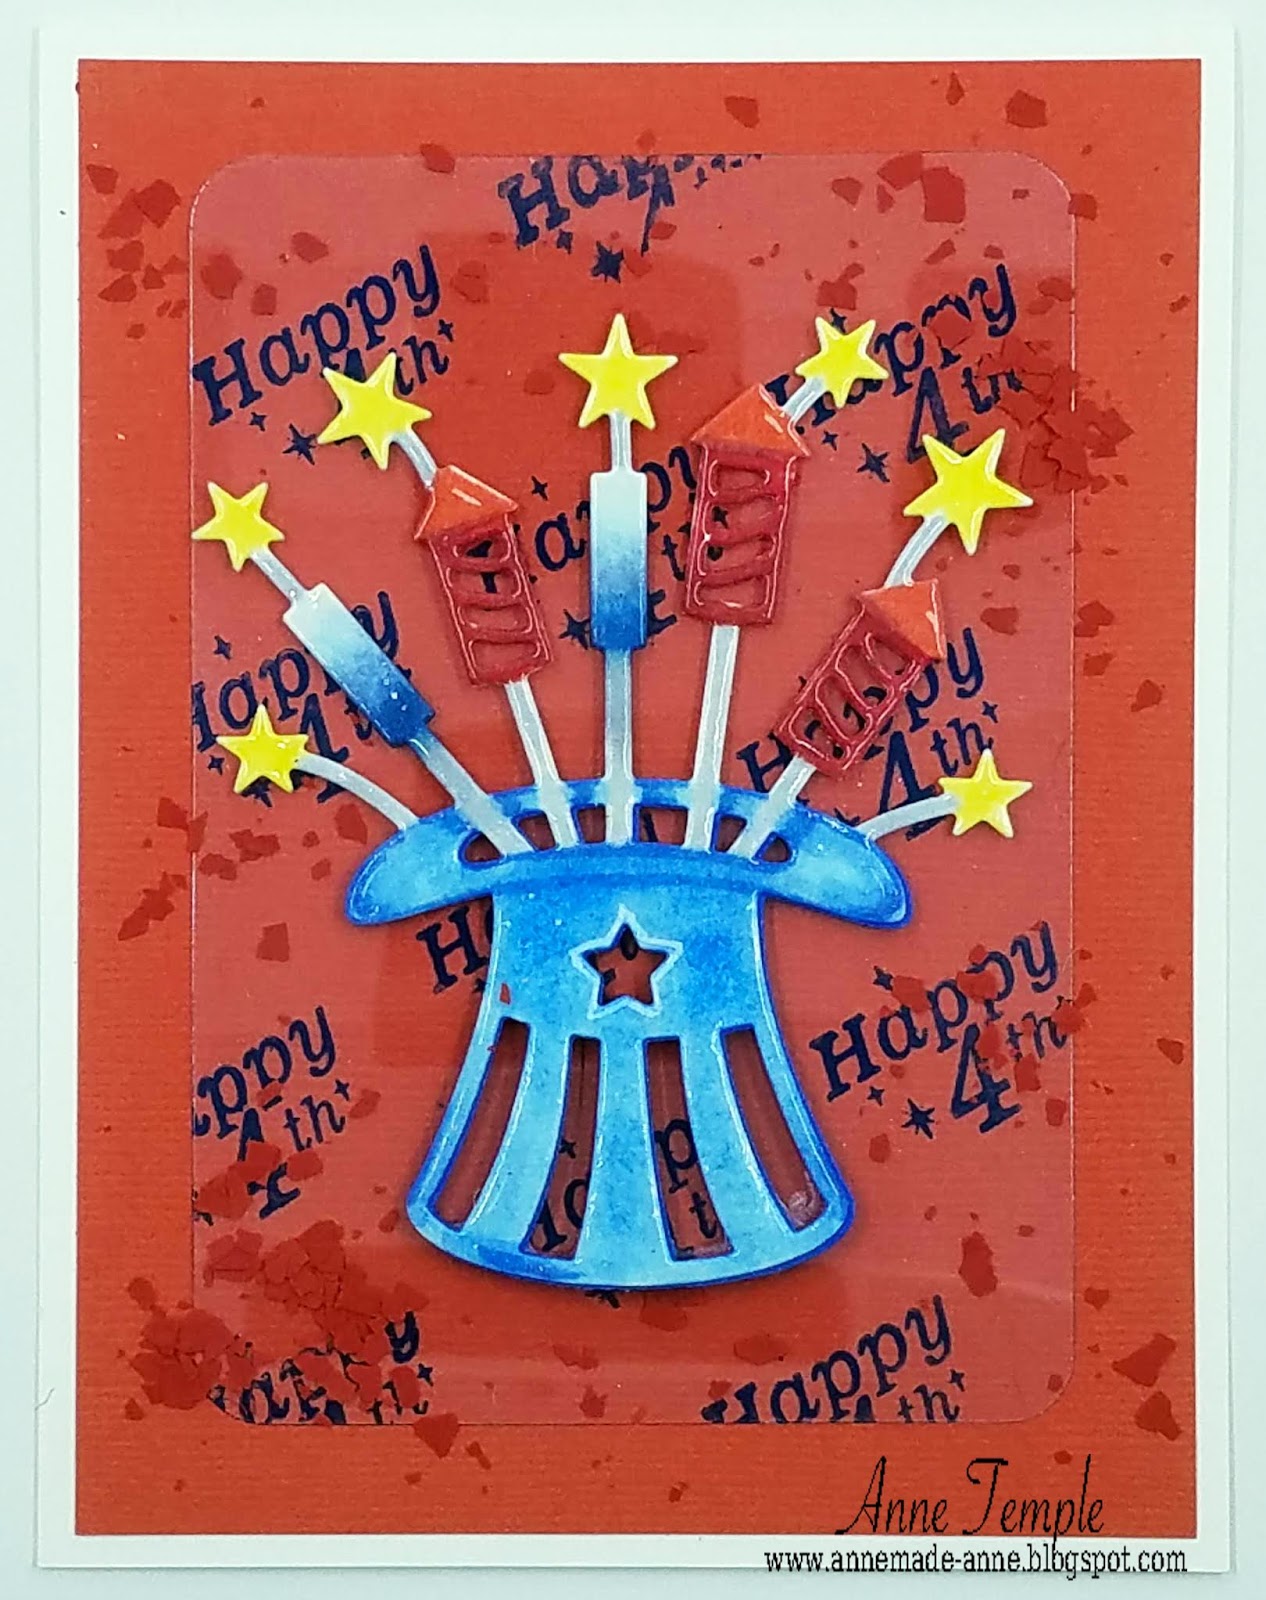
Happy 4th of July to all my American friends!

It's also the first Wednesday of the month and time for a new Scrapy Land Challenge.  The theme is always anything goes using any brand of die that Scrapy Land sells.

As you can tell, I went with a Patriotic theme and used the following dies:
Die-Versions: Fireworks (other patriotic choices are here)
Memory Box: Rectangle Basics set

Start off by die cutting a solid piece of cardstock with the larger rectangle die.  Then go down a couple sizes and die cut a piece of acetate (or recycled packaging material like I did) and use a corner rounder to round the corners.

Next I added the sentiment to the acetate by stamping in Archival ink (Manganese Blue).


I die cut the Fireworks die cut twice, once from fun foam and once from white cardstock.  I colored the cardstock using Copic markers and then added Clear embossing powder over the whole thing for a shiny look.  After this was completed, I adhered this to the fun foam for added dimension.

As a final step, I added more texture by adhering Scarlet Fragments (by Stampendous) randomly around the background.

Now it's your turn to join in on the fun.  There are two winners and both will receive a $10 gift certificate to go shopping at Scrapy Land.  You have until July 15 to upload your projects.  


Monday, August 21, 2017

Elf Sitter


I have another fun Christmas card to share with you today.  It's an acetate card (which are so hard to photograph, but are so fun to make!).  I used the Elf Sitter stamp set from Sparkle N Sprinkle.  After coloring him with Copic markers, I fussy cut him out and added Imagination glitter to his belt, hat, and boots.  Nuvo Crystal Drops (Bright Gold) was added to the bells on his hat and boots.  His eyes were given dimension by applying Gloss White Nuvo Crystal Drops and immediately adding a small drop of Ebony Black to the still wet white drop.

I decided that since elves live in the North Pole, he should be sitting on top of an igloo.  I didn't have an igloo die that would work, so I made my own igloo by using an oval die (from Spellbinders).  My blocks of ice are outlined with Olaf White glitter (part of the Frozen glitter set).  The snow banks, die cut using a Paper Smooches die (Stitches) were also outlined with Olaf White.

The sentiment base was die cut from vellum using a Sue Wilson die (Spanish Collection - Cordoba).  After stamping the sentiment with VersaMark, it was heat set using Red Apple embossing powder.  A couple drops of Bright Gold Nuvo Crystal Drops were added as well.


The focal panel was then adhered to the center of a piece of Embossable Acetate.  I created the frame using two of the Double Pierced Rectangles (Sue Wilson Designs) and used the Glueless Glitter technique to add Sparkling Snow glitter to the edges.

Here is one more photo with a different color background so you can see the acetate better.


Monday, March 6, 2017

Bonnet Bouquet


Today I'd like to share an acetate card with you featuring the newly released Bonnet Bouquet stamp set from Sparkle N Sprinkle.

The front of this mixed media card was created with Embossable Clear Acetate sheets, Tonic Studios die (Mixed Edge Rectangles Layering Basics die set), and Super Thick Silver embossing powder.

To start off, I sprinkled some Super Thick Silver embossing powder onto the embossable acetate and heat set it from the bottom.  Don't try this with regular acetate as the heat will curl and melt the acetate.


The image was stamped with Memento Ink (Tuxedo Black) and colored with Copics and colored pencils.  Various glitters were used to accent the flower centers: Sunny Daze, Guava Nectar, Orchid, and Raspberry Soda.  Princess Anna Royal glitter was used to accent the ribbon and bow.

I then die cut a couple frames using the Tonic Studios die set.  I love that they have little notches on each side of the dies so you can line them up properly and cut out an even frame.

I also die cut another piece of navy cardstock to fit inside the smaller of the two frames.  I stamped the sentiment and the single flower (multiple times) with VersaMark and then heat set it with White Detail embossing powder.

I fiddled around with the placement so that the flowers would show through the frame on the front and not be obscured with some of the Super Thick Silver embossing powder.  Once I was happy with how it looked from the front, I adhered this piece to the inside of the card.

On the front of the card (the acetate), I adhered the frames and made sure the smaller of the two frames was positioned over the inside piece.  I then adhered the fussy cut image on top.  You still see the white flowers peeking around the edges of the focal image, but you don't see the sentiment until you open the card.

Wednesday, February 15, 2017

Peacock Feathers


It's the third Wednesday of the month and that means it's time for a new Scrapy Land Challenge!  The theme for this challenge is Add Texture, plus use any brand of die that Scrapy Land sells.

Now that's a pretty broad field and can mean anything from added glitter, dry embossing, cheese cloth, embossing paste, and the list can go on an on.  For my card, I added dry embossing, heat embossing with glitter, and Nuvo glimmer paste for my various textures.

The following dies were used to create my shadowbox style card:


Die-Versions: Love Frame
Impression Obsession: Tied Line
Sue Wilson Designs: Italian Collection Background

The arch behind the Peacock Feathers is also a die cut, but I had borrowed it from a friend and for the life of me I can't remember who made it.  If you know who the manufacture is, please let me know so I can give them credit.

To create this shadowbox card, I started out by spritzing a piece of watercolor paper with water and then randomly adding yellows, reds, and oranges of Color Bursts.  This was spritzed again with water and I kept adding and drying until I was happy with the results.

Next I die cut the Sue Wilson background die and then ran it through my die cutting machine a second time with the embossing mat to dry emboss it.  This step really brings out the veins on the leaves.  I lightly spritzed this layer with a homemade glimmer mist (water and Perfect Pearls).  Unfortunately, the added bling is so subtle that I can't get the camera to pick it up (but it looks great in person 😃).  I then added a double layer of dimensional foam tape to the back of the die cut so that it would look like a shadowbox with the watercolors in the background.

Another option would have been to add a piece of acetate sheeting to the back before adding the dimensional tape and then adding some sequins to make a shaker card.  That would have really given it lots of texture.


To create the Peacock feathers, I began by taping down the Peacock Feather stencil from Stampendous/Dreamweaver down onto a piece of acetate.  Then I randomly added three different colors of Nuvo Glimmer Paste (Tanzanite Lavender, Peridot Green, Blue Topaz).   After the Glimmer Paste was dry, I cut around the outside edges of the feathers. I had so much fun making these that I made several and will use them in some future projects coming up.

The backdrop for these feathers is a die cut piece of patterned paper that I enhanced with a little Distress Ink (Mustard Seed, Vintage Photo).  This helped the feathers to be more of a focal point.

The "Love" sentiment is part of the Die-Versions Love Frame die that I cut out of fun foam and then heat set it to make it shrink.  Once it was shrunk down to a smaller size, I applied VersaMark and Royal Violet embossing powder and heat set it again.

For the bow and string, I die cut the Tied Line from Impression Obsession twice and fanned out the strings on either end and glued the two pieces together.  I then added VersaMark and heat set this with more Royal Violet embossing powder.

Now it's your turn to join us for some fun.  Maybe try a new technique that gives texture, or use one of your tried and true formulas.  Either way, I hope you join us for this Scrapy Land Challenge.  You have until February 26 and the winner (chosen by the design team) will win a $15 gift certificate to go shopping at Scrapy Land.  New Arrivals are added all the time!


Monday, December 7, 2015

Feathered Bird


Today's card uses various products sold at Sparkle N Sprinkle, including Embossable Clear Acetate, Super Adhesive Sheets, Dreamweaver stencil, Want 2 Scrap chipboard, and of course glitter and flock.

The background was created by first applying a piece of a Super Adhesive Sheet onto the clear Embossable Acetate.  I then rubbed Hawaiian soap on the Cherry Blossom stencil so that it wouldn't permanently stick to the adhesive.  Pink Spirit Sparkle N Soft flock was used to cover the design.  After removing the stencil, I used a marker directly on the flock to change the color of the branches.  

Once this was completed, I added Waterfall semi transparent glitter to the rest of the adhesive.  Since this glitter is semi-transparent, it's color changed in intensity depending on what color of cardstock I had behind it.  This is why I used this technique on acetate - to see how the overall look changed based on what color cardstock I used for the mat.  The centers of the flowers are self adhesive bling from Want 2 Scrap.  In order to flatten them, I ran it through my die cutting machine.  This gives you more ways to use the dimensional gems.  You can really see the difference when you compare his eye to the centers of the flowers.  The same self adhesive gems were used for both.

The chipboard flourish bird is also by Want 2 Scrap and he was covered with Fleur de Lis embossing powder and heat set.  I added a pull ribbon bow by Mon Ami Gabby.  Sue Wilson Designs (Noble dies - Ornate Pierced Rectangles) complete the card and card base.


Monday, November 30, 2015

Cherry Blossoms


 Welcome to Sparkle N Sprinkle's
 Dec 1 Blog Hop!

This month the Designers were given a Surprise Package full of products found at the SNS Shoppe and were asked to create projects with these products.  So sit back, enjoy the Hop and get ready to have those creative juices flowing!


On Dec 3rd, ONE GRAND PRIZE WINNER will be selected from the comments left on the Designers' blogs listed below. Please leave a comment with each Designer in order to be eligible for the Grand Prize.  You never know who the Mystery Designer will be that has the winning comment.

The Grand Prize Winner, which will be announced on the SNS Facebook page and on the SNS Blog, will receive a $20 gift certificate to go shopping at the SNS Shoppe.

The Blog Hop order this month is:

Anne (you are here)
Shona
Jess
Belinda
Marie
Eret
Irit

(*Tip: if you have difficulty with a particular link, try clicking on the Designer's blog title to send you to their Home page.)

We would also like to thank all the Guest Designers who joined us this year: DianeAshleyAniChrisIrit, and Jess.  It was a pleasure having each of you on the team as Guest Designers!

We hope you enjoy the Surprise Blog Hop as much as we do.  Thanks for joining us and remember to comment on each of the Designers' blogs to be eligible for the Grand Prize.  
 Wonder who the Mystery Host will be this month????


The Sparkle N Sprinkle Creative Challenge also begins today.  There are lots of prizes and recognition badges.  Come check out how you can become a SNS Featured Artist as well.  The theme is always Anything Goes using Loose Glitter, Embossing Powder, and/or Flock.


Have you checked out the SNS YouTube Channel featuring Demo Donna?  If not, then you are in for a real treat.  Subscribe today to get all the latest Demo Donna tips and techniques!


Now a little about my project.


Some of the items I received in my Surprise package were the Dreamweaver Cherry Blossom stencil, Clear Embossable Acetate, Mon Ami Gabby flat backed Pearl Mesh, Want 2 Scrap chipboard and self adhesive bling, plus a few other things as well.

I knew I wanted to incorporate acetate and the stencil, so I set out to experiment on a couple of things.  First off, the embossing paste I had was white and I wanted pink.  So I added a little Nuance powder (Scarlet and a small bit of Turquoise) to the white and mixed it together on my craft mat.  The Nuance colored the paste beautifully.  I also wasn't sure how the paste would look on the clear acetate since you can see both sides.  As you see in the photo below, it looks good.  The darker spots on the flowers are where the powders were still concentrated in certain areas.  If you don't like these concentrated areas, spend a little more time combining the Nuance powders into the embossing paste.  Once the embossing paste was dry, I added some Mon Ami Gabby flat backed pearls to the centers with a dab of Brushable glue.

inside
The acetate was framed using a Simon Says Stamp die (Stitched Rectangles) and then some Mon Ami Gabby pull ribbon was adhered along the edges.  I also added a thin line of glue around the frame's outside edge using a Sakura glue pen and covering it with Sparkling Snow glitter.  The sentiment is another die from Taylored Expressions that I die cut from fun foam and added more Sparkling Snow glitter to the letters.

The card base was created from watercolor paper so that I could watercolor the inside panel of the card.  I used Nuance powders (Turquoise) to create my sky background.  The birch trees are a die from Taylored Expressions and I highlighted certain areas of the trunks with a Sakura glue pen and Sparkling Snow glitter.

I'm first on the blog hop today, so your next stop is Shona.  Be sure to visit each of the Designers for your chance to win the $20 gift certificate to the SNS Shoppe.


Thursday, October 29, 2015

Witch's Hat


Halloween is only a few days away and I wanted to make one more card for a friend.  I created a shaker card using the Witch Hat by Die-Versions  The shaker part has spiders from the DV Spider Web die and orange glitter.

The hat was colored with various embossing powders from Sparkle N Sprinkle: Black Magic for the spiders, Firefly for the yellow lightning bolts, Pumpkin on the hat band, Amethyst on the outline of the hat, and Glow in the Dark on the spider webs.

My (not so secret) message, a rubber stamp from Stampers Anonymous, was stamped onto Embossable Clear Acetate with VersaMark and then heat set with more Glow in the Dark embossing powder.


 It's really hard for me to get a good picture of it glowing, but it really does. The photo on the left is blurry, but you can see how much it glows in the dark.  The photo on the right also shows the glow aspect, but it was taken in a dark room, but some light was shining in.

Be sure to check the Die-Versions blog often to see what the rest of the team has created for you.

Happy Halloween everyone!


Monday, October 26, 2015

Witching Hour


I have another Halloween card for your today featuring the Witching Hour stamp set from Sparkle N Sprinkle.  

To start out, I dry embossed a piece of YUPO synthetic paper and then added color with my Color Bursts.  After that dried, I heat embossed the witch from the stamp set onto the background using Black Magic embossing powder.  (Be careful heating this paper, as it can curl if you get it too hot.)
The spider web and spiders are from the Spider Web die by Die-Versions.  Glow in the Dark embossing powder was added to the spider web for a fun aspect.  It gives off a yellowish color when see in normal light and really glows in the dark.  The cat was die cut from black patterned paper and is by Poppy Stamps.

The sentiment, which is part of the set was heat embossed onto a piece of Embossable Acetate as I wanted it to be on top of the web.  Amethyst embossing powder was used for this. 

Happy Halloween!

Wednesday, September 30, 2015

Sparkle N Sprinkle Oct Reveal


Welcome to Sparkle N Sprinkle's
 October 1 New Reveal Blog Hop!

We have SIX new stamp sets to share with you today.  These new sets are 20% off until Oct 3.  So once you finish the blog hop, head on over to the store and start shopping.  All of the new sets are available on cling mounted rubber or as a digital image.  


The sets are:
Witching Hour 742  (digi version DIGI742B)
  Cackle On 743  (digi version  DIGI743B)
  Sleigh Ride 744  (digi version DIGI744J)
 Jefferson 745  (digi version DIGI745B)
Wilson 746   (digi version DIGI746B)
Hats DIGI3120 (digi only)

On Oct 3, one GRAND PRIZE WINNER will be selected from the comments left on the Designers' blogs.  Please leave a comment with each Designer in order to be eligible for the Grand Prize.  You never know who the Mystery Designer will be that has the winning comment.  

The Grand Prize Winner, which will be announced on Oct 3 on the SNS Facebook page and on the SNS Blog, will receive ALL of the new stamp sets released this month (or the digi versions, if preferred).


In addition to our regular Designers, we are happy to introduce you to two new Guest Designers this month.  Irit and Jess will be our Guest Designers for the months of October, November, and December.  We'd also like to say Thank You to our second set of Guest Designers, Ani and Chris, for a job well done!


The Blog Hop order this month is:
Jess
Belinda
Eret
Marie
Shona
Anne
Irit

(*Tip: if you have difficulty with a particular link, try clicking on the Designer's blog title to send you to their Home page.)

We hope you enjoy the New Reveal Blog Hop as much as we have enjoyed creating new projects for it.  We also hope that we have inspired you as well.  Thanks for joining us and remember to comment on each of the Designers' blogs to be eligible for the Grand Prize.  (We love reading these as your comments also inspire us.)  Our Latest Mystery Designer was Shona. Wonder who will be the Mystery Designer this month?? 


The Sparkle N Sprinkle Creative Challenge also begins today.  There are lots of prizes and recognition badges.  Come check out how you can become a SNS Featured Artist as well.  The theme is always Anything Goes using Loose Glitter, Embossing Powder, and/or Flock.

We hope you enjoy the New Reveal Blog Hop as much as we do.  Thanks for joining us and remember to comment on each of the Designers' blogs to be eligible for the Grand Prize. 


front

inside

Now for a bit about my fun fold project.  The front of the card was created out of a synthetic watercolor paper called YUPO paper and Color Bursts.  It's basically a type of plastic that you can water color on.  You definitely need to let it air dry for a quite a while as the liquid sits on top of the paper and slowly dries.  If you try to dry it with a heat gun, be careful as the heat can make the paper curl (ask me how I know :-).) 

I started out by creating a mask.  I die cut a large circle out a pice of cardstock that was larger than my YUPO paper.  I used the negative portion to create the moon and once that was dry (I let it dry overnight), I used the circle to mask the moon and colored in the sky.  Again, I let that dry overnight as well.  Be aware that any liquid you use on this paper will reactivate the watercolor (think liquid glue.)   The clouds are die cuts from MFT (Clouds) and Memory Box (Puffy Clouds) that were die cut from white cardstock and covered with Dimensional Glue and Twinkling Clouds Sparkle N Soft flock.

The witch was heat embossed on Embossable Acetate with Ebony Spark embossing powder.  The broom bristles are a combination of Ebony Spark and Antique Gold embossing powder.  I decide to use the embossable acetate as I knew the YUPO paper would melt/curl with the amount of heat needed to emboss the witch.  The back side of the tags (the part that is seen when the card is closed) were covered with Sparkle embossing powder.


For the inside of the card, I created an accordion style piece using the top edge of a Taylored Expressions die (Tag Stacklets One).  Each panel then uses a different die.

The Skeleton is from Die-Versions and he is covered with Super Thick White embossing powder.  As I was melting the embossing powder, I was careful not to completely melt it so that it was smooth.  I wanted rough parts to it so that it would look more like bones.  The bat is an old Spellbinders die (Nested Bats) cut out of cryogen text weight paper.

The second panel is the Black Widow die, also from Die-Versions.  He's covered with more Ebony Spark embossing powder and is inlayed into the background patterned paper.

The third panel is covered with some gauze that I glued down with a spray adhesive.  The Ghosts are a really, really old die from Sizzix.  Do you remember the Sizzix Original dies?  That's how old this die is :-).  Both of these guys are covered with White Spark embossing powder.

Finally, the sentiment on the last panel, which is part of the stamp set,  was heat embossed with White Detail embossing powder.  The RIP Tombstone is from Die-Versions and the letters and the crow are covered with Black Ice glitter.

This last photo shows what the card looks like from the top.  This was a really fun card to put together and I'd like to thank my friend Ann Williams for the fun fold inspiration.  She doesn't have a blog, but she creates amazing cards and projects.


Your next stop along the hop is Irit and I know she has something amazing for you too.  Don't forget to leave a comment with each of the Designer's for your chance to win all of the stamps released this month!