Showing posts with label paper floss. Show all posts

Thursday, May 22, 2014

Floral Flourish


This new rubber stamp set, Floral Flourish, from Sparkle N Sprinkle just screamed to be heat embossed.  So that's what I did :-).

I stamped the image with Adirondack ink (Meadow), quickly heat embossed it with Clear embossing powder (since it is a dye ink and dries faster than pigment inks), and colored it with Copic markers.  I actually stamped the image twice and fussy cut both out, so it would have a bit more dimension on the tag without adding any pop dots.

The background for the tag was created using another soon-to-be-released set from Sparkle N Sprinkle called Journal Mixed Media.  I stamped the journaling stamp multiple times (and in random directions) all over the tag and then heat set it with Clear embossing powder.  Next I dug out my rarely used Chiffon White pigment ink (by Color Box) and randomly stamped the second image (it sort of reminds me of fencing or chicken wire).

Before the pigment ink was dry, I sprinkled Starfire glitter over and it stuck (even when I brushed it with my fingertip).  Just to make sure the glitter stayed in place, I also sprayed the tag with a matte sealer.  This did darken the background kraft cardstock slightly.  But the good news is that the darker background does make the image pop off the tag even more.

The sentiment, also part of the Floral Flourishes set, was stamped onto a sentiment banner from Simon Says Stamp.  I added a bit more Starfire glitter around the edges of the banner using a Sakura glue pen.

Scroll down (or click here) to see the winners of the SNS May Release.  Nana Connie was the commenter who won from my blog.  :-) Congrats to all the winners.


Monday, December 9, 2013

Northern Lights


I recently saw the Northern Lights technique on Splitcoast Stampers and knew it would be perfect for the Geraniums rubber stamp set from Sparkle N Sprinkle. 

To start out, die cut a Sizzix Labels, Fancy #3 die (next to largest) out of white cardstock.  Using Distress Inks (Squeezed Lemonade, Pine Needles, Peacock Feathers, Dusty Concord, Chipped Sapphire, and Black Soot), I used the tutorial as my guide but didn't want to use as much black.  I then spritzed some Dylusions Ink Spray (White Linen) to replicate stars.

I then stamped the solid silhouette image with Archival ink in the center.  Next, I stamped VersaMark on top of (and slightly off-center) the black silhouette and heat embossed it with Lilac Spark embossing powder.

Next, die cut the largest Sizzix Labels, Fancy #3 and stamp the flourishes from the Flourishes One rubber stamp set with VersaMark.  Heat emboss with Black Magic embossing powder.  Using VersaMark and a dauber, distress the edges (like you would if you were using ink) and then heat emboss with Black Magic again.  Finally, bling your brads with Black Magic embossing powder.

Now I didn't stop with inks and decided to do the same technique using glitters for my background.  I started off with a piece of SNS Sticker Paper cut to the size I wanted, and went to town with lots of velvet glitters: Daisy, Lator Gator, Jasper Blue, Cobalt Glaze, Purple Potion, and Black Suede.  I randomly applied the glitter the same way as the inks, using my finger to swish my small piles around.  Then I distress embossed the edges with Black embossing powder.

I thought it still need a little something.  So.... I inked up a Spellbinders Impressabilities plate (Diamonds and Stars) with VersaMark and laid this on top of my glittered background.  I covered the VersaMark with Silver Lightning embossing powder and heat set.  (I randomly brushed off some of the powder so it wouldn't look too uniform.)  Now I was happy with the background.

I found a rub-on in my stash and thought the sentiment fit nicely with night skies and stars.  I applied this to a button, which I then stitched two of the buttons together with paper floss, as well as threading the remaining button holes.  Finally, I hand stitched the paper floss around the purple mat.

Although this project used quite a number of products, it was quite fun to make and will definitely do it again sometime.


Saturday, November 30, 2013

Beautiful Geraniums


Welcome to the December Reveal from Sparkle N Sprinkle.  This month we're debuting a new stamp set, Geraniums, by artist Beccy Muir with five chances to win it.  The first way is in our "Beautiful Geraniums" Release Contest.  To win, come to our Mystery Designer Party!   You have three more chances to win when you play in the SNS Creative Challenge.  The theme is always Anything Goes with Glitter, Embossing Powder, and/or Flock.  The rules/guidelines have been made even easier, there are more chances to win, and I've taken over the duties of handling the challenges.  {If that's not incentive enough to come play, I don't know what is :-).}

This set is included in Jazzy Jill's Technique Video of the Month Kit Club and is also available online.  You can purchase it for 20% off as part of the December specials, but this is only good until Dec 3 and you'll need use a credit card.  Just use the code DEC20 in the comments section when checking out.


How the Mystery Party works:

On one of the participating blogs below, a Commenter will be selected to receive the prize, which consists of the stamp set, an embossing powder, and one glitter.  No one knows who the Mystery Designer is, so you'll want to visit each of us and leave a comment.  The winner will be announced on Dec 3 on the SNS Blog, Facebook, and on our blogs.  (If any of the links don't work for some reason, go to the SNS Blog. 

Anne Temple (that's me)


Now a bit about how I created my card.  To start off, I decided to use the Ombre technique with alcohol inks.  The ombre technique is basically the same, no matter which medium you use.  You choose a light, medium, and dark shade of the same color and blend them together.  In my case, I used Copic refills and a felt blending pad on glossy cardstock.  You want to make sure that the lines between the colors are blended together so you don't have any hard lines.


Next, I stamped the image and sentiment with Archival ink (Coffee) and used a Sakura glue pen to outline the petals and flowers.  Luau Green velvet glitter was then added to the leaves and Cyclamen glitter was added to the petals.

The lattice behind the focal point is die cut from a SNS Super Adhesive Sheet and also covered with Cyclamen glitter.  To create the outer border, I adhered 1/4" Tear-ific tape to the edge, covered it with Cyclamen glitter and then added 1/8" Tear-ific tape down the center of the 1/4" tape and covered it with Luau Green.  Finishing touches include seam binding ribbon died with Distress Stain, a paper rosette, and paper floss.  You can also check out my SNS Art Gallery for more detailed instructions for this card.

Head on over to see the beautiful layout Belinda has created for you; you won't be disappointed.  Don't forget to leave each of us a comment for your chance to win this set and/or participate in the SNS Creative Challenge.  A new challenge begins on the first of each month.


Sunday, September 15, 2013

Botanical Molten Pearls


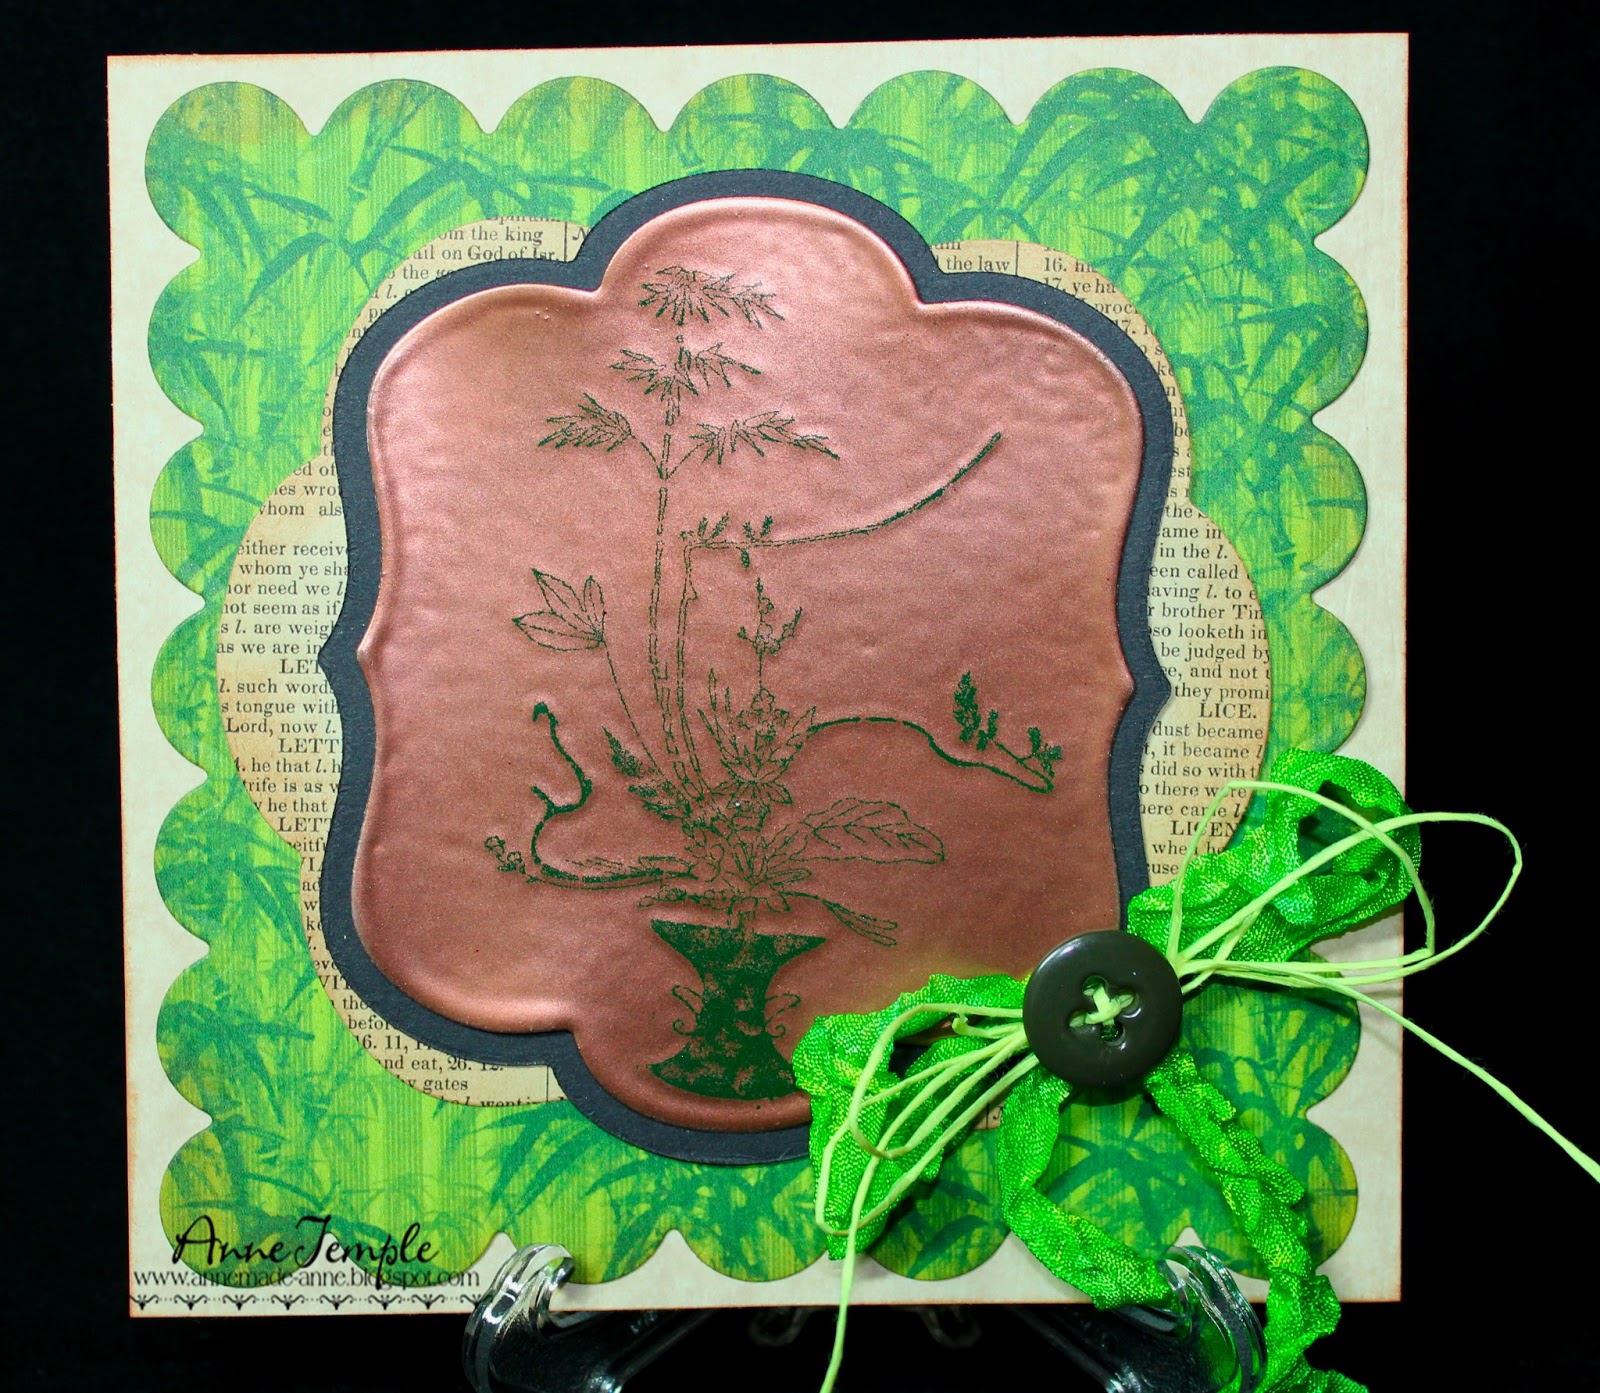
I've discovered another technique I haven't tried - Molten Pearls.  (You can see a video of the technique here, in the SNS Tips and Techniques section.)    And what makes it even better is that it's published in the Creative Color for Card Making 2013 edition of CardMaker magazine!  (Squealing with delight! You can see it for youself on page 100.)   I've done a step by step photo tutorial as well.


To create this card, I used the Bamboo Floral Vase stamp from Sparkle N Sprinkle.  You can also get it in the Asain Leaf Robe stamp set.


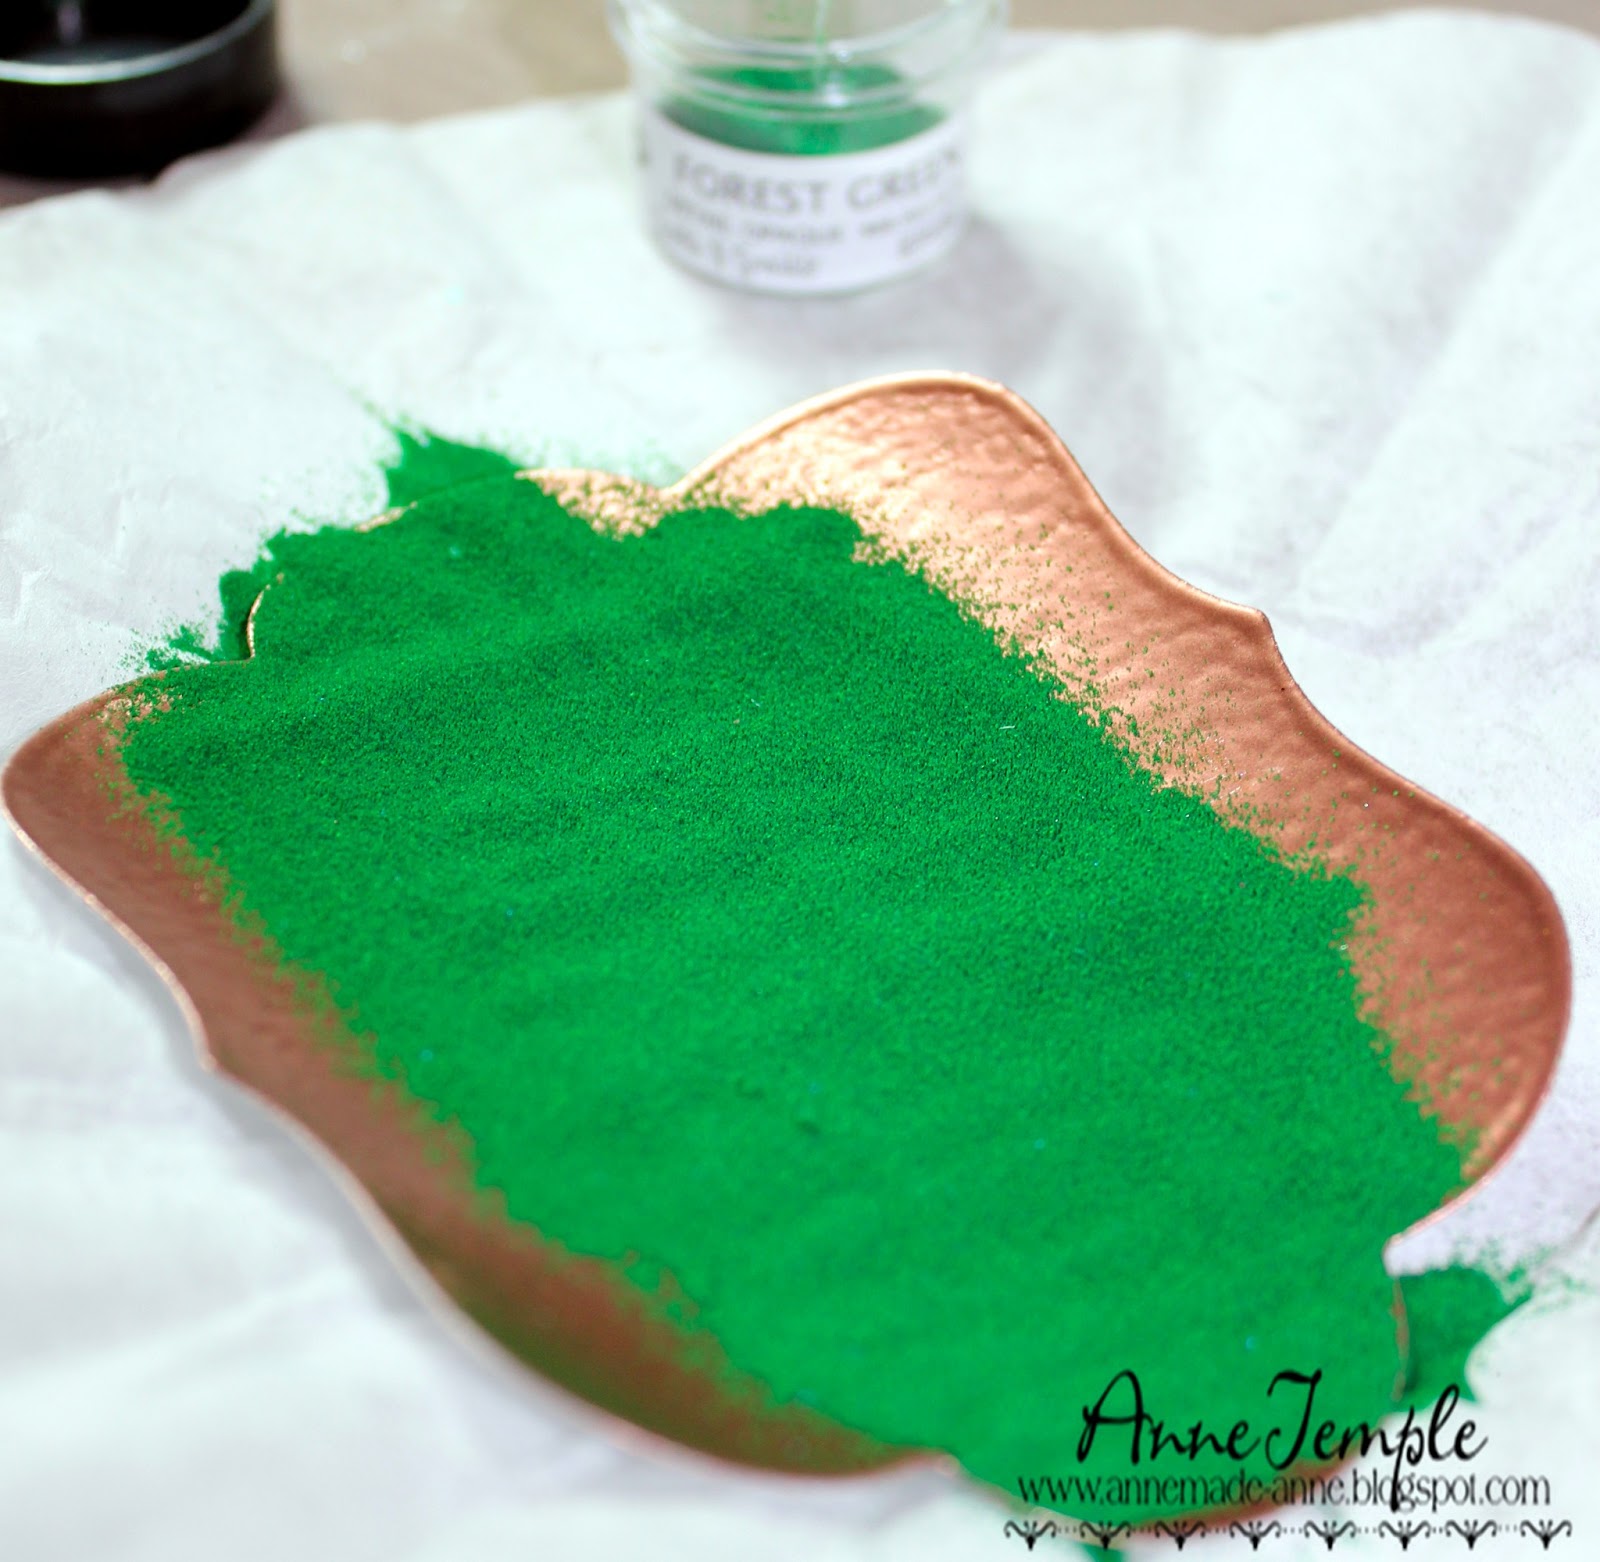
First you need to decide what shape you want the base to be.  I used a Lifestyles Crafts nesting die set that came as part of a package for my shape, inked it up with VersaMark, and covered it with Copper embossing powder.  It may take two or three times to get the desired effect your looking for.  It should be shiny and smooth.


Once you're happy with it, ink up your image with Versamark and stamp it directly onto the embossed shape.  Cover it with a different color embossing powder (I used Forest Green), and heat emboss.  The new layer melts into the base layer and looks so cool.


The photo on the right is what it looks like when you're finished.

To complete the card, I matted it onto black cardstock using the next size up nesting die and used the third size up to cut a piece of vintage book page for my larger mat (I just turned it on it's side).  The seam binding ribbon was colored with Dylusions Ink Sprays and I added a vintage button threaded with paper floss on top.
If you haven't tried this technique yet, you really should.  I couldn't stop with just one card.