Showing posts with label double glitter technique. Show all posts

Wednesday, March 17, 2021

Wooly Lucky to Have You As A Friend {DRU Inspiration}


Hey everyone, I'm up today on the DRU Inspiration Blog.  Since it's St. Patrick's Day today, I wanted to share a cute card with you. 


Before we get started though, I'd like to remind everyone that the DRU Inpsiration team is having a DT Call. You can find out all the details HERE. The call closes today, so don't wait to apply.


Now for more info about my card.  I used the following products from Dies R Us: 


To start off, I die cut the next to largest banner twice, once from a dark shade of green cardstock and once from a lighter shade of green.

Next, using the shamrock die from the Pot o Gold die set, I cut out several shamrocks from the lighter color cardstock. I wanted to use the negative space for today's project, so save those shamrocks for a future project. I then adhered the two banners together. 


I had a cute little St Patrick's Day stamp set that I used for the front of the card. After stamping the image, I fussy cut it out and colored it with Copic markers.  I added Fairy Hugs  Shamrock glitter to the shamrocks on his blanket.


I wanted a bit more bling, so I die cut the largest banner from white cardstock and added more of the Shamrock glitter to the edges.


While die cutting this last piece the negative portion from the die cut gave me the idea of using it for my sentiment. So I flipped it over to create a space below my focal point.


Here's one final look of today's project.


Don't forget to come join in the fun at the Dies R Us Challenge Blog.  There's a new challenge theme offered on the 1st and 15th of each month and one lucky randomly drawn winner will receive a $10 gift certificate to the Dies R Us Store.  For your convenience, all the important Dies R Us links are provided below.

click below for:


Remember, today is the last day to apply for the DRU Inspiration DT Call! 


So glad you stopped by,

Monday, April 24, 2017

Proudly Patriotic


Today's card features the newly released Proudly Patriotic stamp set from Sparkle N Sprinkle.  I used the digi version to create this night time scene.


I colored the image with Copic markers and used colored pencils for highlights and shadowing.  A bit of Peach Bellini glitter was added to each of the flower centers.  This not only gives it a bit more sparkle, it is also a tad darker than the flowers, so it gives the centers a little more shading.  Dimensional Glue and Daisy velvet glitter was added to the fireworks bursting in mid air and Sparkling Snow was applied to the "tails" of the fireworks.  The All-in-One Frames Rectangles 2 by Impression Obsession was used to die cut the frame around the flag.

The background was created using the Double Glitter Technique and a mask created from die cutting the Tonic Studios Ribbon and Bows Layering Set from a piece of Super Adhesive Sheet.  (Always save the backing paper instead of throwing it away 😉.) I adhered the mask to another piece of Super Adhesive Sheet and covered the exposed area with Liberty glitter.  After removing the mask,  I covered the remaining exposed adhesive with Cloud Nine velvet glitter.  I also let some of the Liberty glitter mix in with the Cloud Nine so that it had specks of color throughout.

The sentiment was created by using the Glueless Glitter technique and one of the smaller dies from the Tonic Studios Ribbon and Bows set.  Clear embossing powder was the first layer and then I stamped the sentiment with a stamp positioner and VersaMark.  (The Tim Holtz Stamp Platform is a perfect tool to use with the technique.)  I then added Liberty glitter to the VersaMark and heat set it again.  I actually did this step twice to make the sentiment have a bit more dimension.   Fun foam die cut using the same Tonic Studios die was adhered to the back of the sentiment for more dimension.

I can see this stamp set used in so many different situations - of course Fourth of July, but also Veterans Day, Memorial Day, or just as a Thank You to a Vet.


Monday, December 21, 2015

Friendship


Today's card incorporates the kiss cut method (found on electric die cutting machines like a Silhouette) with lots of Sparkle N Sprinkle glitter and a Sue Wilson Designs background die (Italian Collection - Background).

To start off, adhere one side of a piece of Super Adhesive Sheet to cardstock, then die cut using your favorite die.  Slowly peal off sections of the release paper to reveal the area you want to cover in glitter.  The roses were uncovered first and Sugar Plum glitter was added to each of these areas.  Next I revealed more sections of the background and covered them with Luau Green velvet glitter.  Finally the rest of the release paper was peeled off and Tyrian glitter was burnished over the entire area.

The sentiment is from the SNS Beautiful Friendship rubber stamp set and was stamped with Versamark and heat set with White Detail embossing powder.  Next I die cut the sentiment with a Sizzix die  (Labels).  While the cardstock was still inserted into the die, I traced around the inner edge with a Sakura glue pen and then added more Tyrian glitter to the glue.  The Leafy Swirl die cut (by Die-Versions) was added to the back of the sentiment and then pop dotted onto a strip created by die cutting two Little Open Scallop Strips (by MFT).  These two strips were adhered together using 1/8" Tear-ific Tape.  The top portion of the adhesive tape was covered with Black Suede velvet glitter.

You can do this technique with so many different dies and different colors of glitter or flock and each time the results will be completely different.  Hope this inspires you to try this technique too.

Monday, May 18, 2015

Gilded Peacock


Today I'm sharing another Dreamweaver stencil and yet another way to use these stencils.  As you probably know, all month long the designers from Sparkle N Sprinkle are showcasing various techniques using Dreamweaver stencils.

I've basically used the Double Glitter technique, but I tweaked it on the Peacock stencil.  Instead of just using glitter, I also added flock and gilded flakes to the focal point.

I started off by rubbing the Hawaiian Soap across the back of the stencil before placing it down onto the Sticker Paper.  By doing this step, it allows the sticker paper to be easily removed from the stencil.

Then I added Palm Leaf flock to the branches and swirls behind the peacock and around most of the edges.  Priceless Peacock glitter was added to the head and part of the wing and Red Tiger Leaf gilded leaf was added to the tail and part of the edges.  I incorporated a little of each of the products into the tail section to give it more depth.

After removing the stencil, I sprinkled a little more Priceless Peacock glitter onto the background with my fingertips and then covered the rest of the background with Lavender Iris glitter.

The die cut panel peeking out from behind the focal point is from Taylored Expressions (Proud Peacock Cutting Plate) and I added touches of SNS Brushable glue to the centers of each of the feathers and covered them with Priceless Peacock glitter.  The sentiment, a die cut from Penny Black (Doodles) was cut from sticker paper and covered with more Priceless Peacock  glitter.

I have to say that this project feels so good to the touch.  It's amazing how soft the flocking is.  You just want to keep rubbing your fingers over the background.

Wednesday, June 18, 2014

Ooh La La


Introducing the "Life as a Diva" new release from Die-Versions.  Today I'm showcasing two of the new dies - the Ooh La La Express Edge die and Nice Heels Whispers die.

When I think of girly girl projects, I think of lots of glitter.  So what better way to showcase the nice heels than to use the double glitter technique?  I started off by die cutting the image from some adhesive paper.

(I need to digress here for a minute and tell you about this paper.  I was out of what I normally use, which is Sparkle N Sprinkle's Super Adhesive Sheets or SNS Sticker Paper , and I used another brand that I had purchased some time ago.  Like most, I thought all double sided adhesive papers are basically the same.  Wrong!  I ended up having to die cut it several times as the adhesive paper curled up when I was trying to cut off various parts of the release paper to add the various glitters.   Needless to say, I wasn't a happy camper, but wanted to do this technique - so I persevered :-) And I'm not just saying the SNS product is better because I happen to be on that design team as well.  I wouldn't recommend anything I didn't like!)

The way this is suppose to work when you have the right tools is that you die cut the image from adhesive paper and die cut the background (the circle in this case) from another piece of adhesive paper.  Take off the release paper from the background and from the shoe.  Attach the shoe's release paper to the exposed adhesive in center of the circle - since it's release paper, it won't stick when you pull it off.  Add Goldenrod Velvet Glitter to the entire surface, burnishing it in with your fingertip.  Now, if you wanted the image to be all one color, you'd just remove the release paper and cover with your next color of glitter.  I wanted the flowers to be white instead of red, so I carefully cut the release paper between the flowers and the rest of the die with an exacto knife.  Make sure you don't cut all the way through.  The flowers are covered with Cloud Nine Velvet Glitter and the rest is covered with Gypsy Red Velvet Glitter.


The Ooh La La Express Edge was done pretty much the same way.  I added double sided adhesive paper to cardstock and die cut the sentiment.  Using an exacto knife, I cut the release paper across the center of the letters and added Goldenrod Velvet Glitter to the top portion of the letters and Gypsy Red to the bottom half.

Be sure to check out what the rest of the team has created for you using the new Life as a Diva dies.

Wednesday, March 27, 2013

Just Saying


This seahorse and sentiment are just two of the cute images on the new Serena Mermaid stamp set from Sparkle N Sprinkle.

To create the background, I used the Masking on Glitter technique from SNS Tips and Techniques section.  (You can find the tutorial here.)  This is also a variation of the Double Glitter technique.  To create my mask, I die cut my MFT border from a scrap left over from the super adhesive sheet and laid it on top of a piece of cardstock that I covered with the super adhesive sheet.  Cover the entire thing with Frosted Carmine velvet glitter.  Be sure to burnish it in with your finger tip.  After you've brushed off the excess, remove the mask and cover this area with Hanauma Bay glitter.  I love how these two glitters look together.  I also covered my brads with the Hanauma Bay glitter as well.

For the focal point, I die cut a pice of black cardstock with a Spellbinders die and covered it with a soon-to-be-released product called Velvet Shimmer (Trans-Blue) by SNS.  It's a shimmery paint that has bits of velvet glitter in it and it gives you a very shimmery, yet subtle look.  I really like the way it looks on the black cardstock.  You can see the bits of glitter in this close-up view.  Next I stamped my image and sentiment with Perfect Medium and covered them with Perfect Pearls (biscotti).  I added a few gems and this card is all ready to be given to someone special.  Lots of bling and shimmer on this one, so the recipient may need to wear sunglasses. :-)


Monday, February 4, 2013

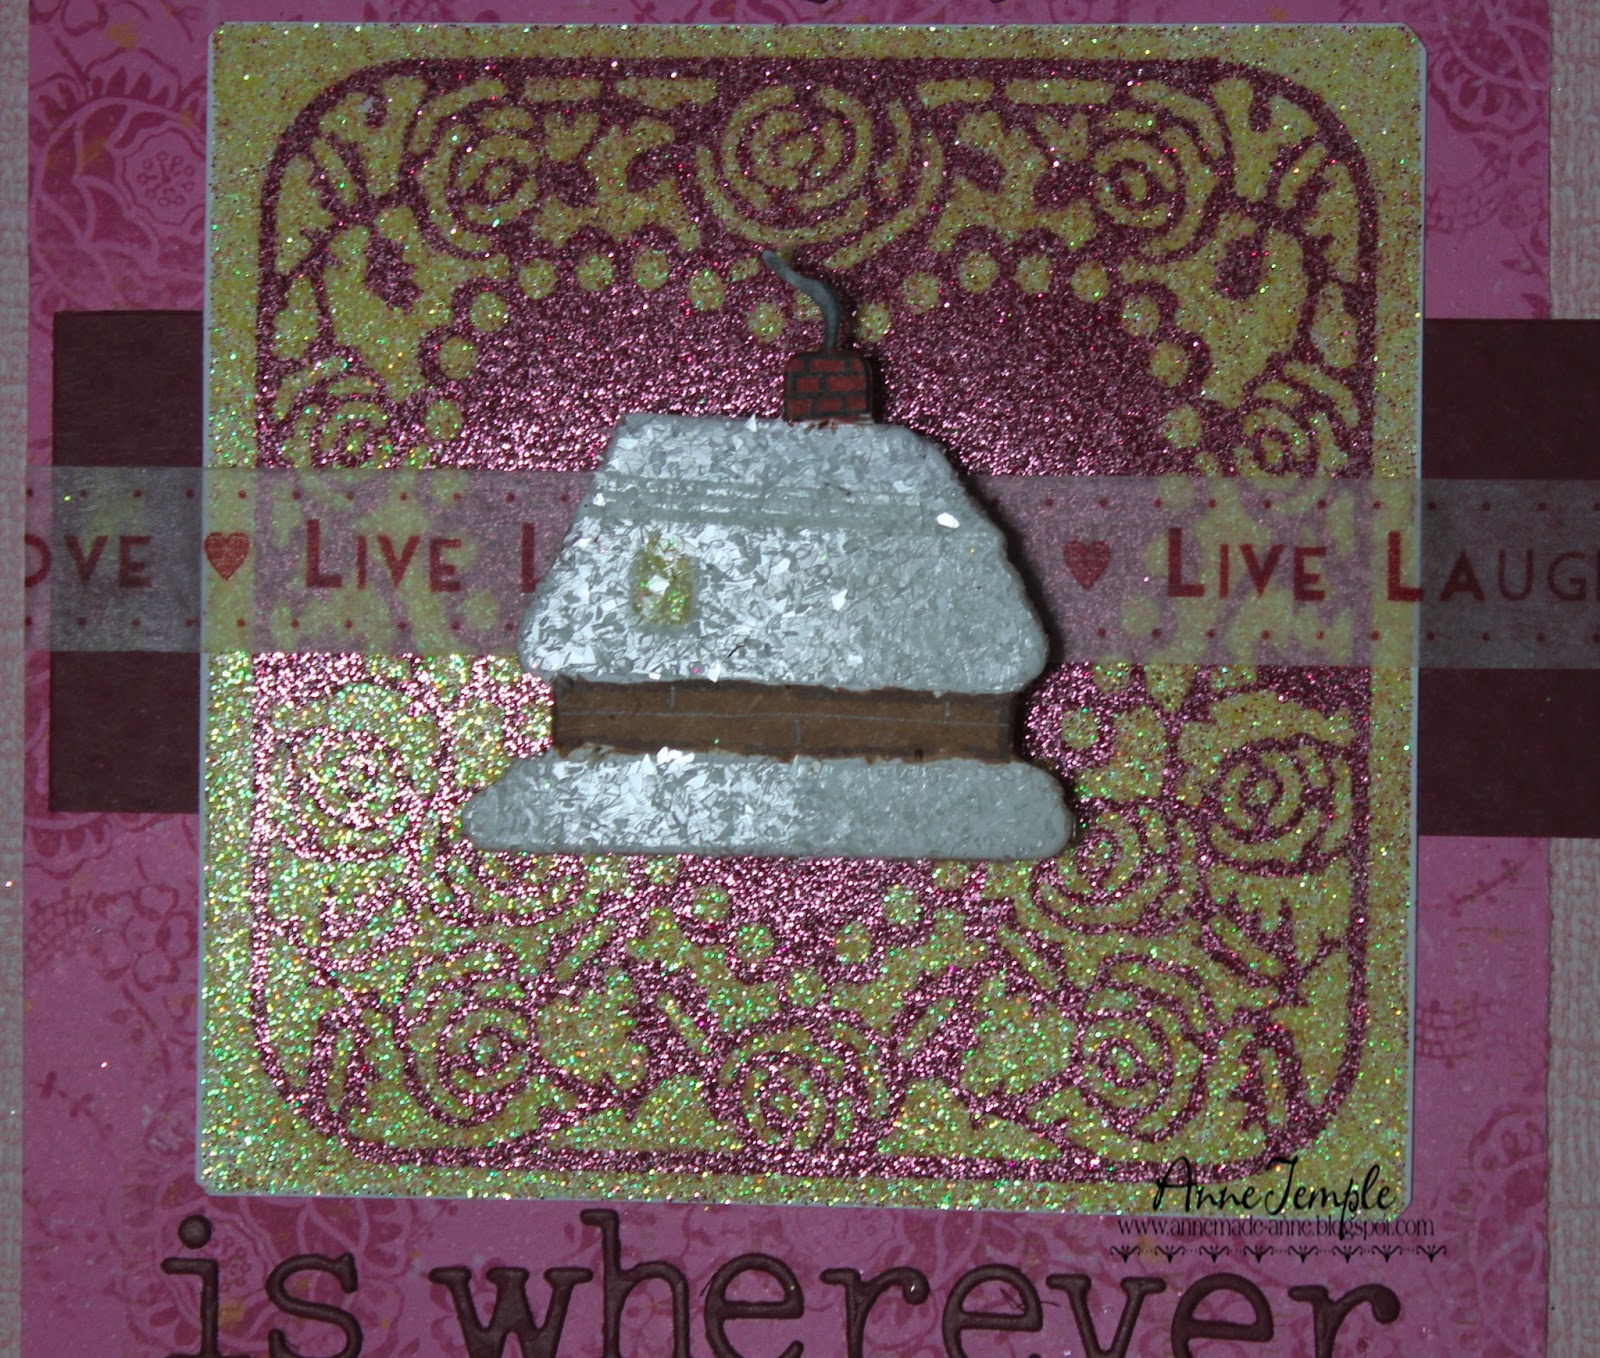
Home is wherever You are


Instead of a card, I decide to make a plaque using several different dies from Die-Versions.  Using the double glitter technique on the A Dozen Roses die, I created my backdrop for the House with Chimney Sweet Petite.  The house has glitter for the window and is colored with Copic markers.  The snow is Diamond Dust.  A bit of washi tape runs through the background.

I created this while thinking about a question we are always asked - where is home?  Well, for my family, it's wherever we are living at the moment.  We used to move frequently, so this question came up a lot.  Home is where the heart is - to me that's wherever my family is.

It's so hard to capture the sparkly goodness of glitter, so this final photo shows a bit of how this really sparkles - but it doesn't make a great picture.  To be honest, this was my third attempt at doing the double glitter technique with this die cut.  The first one was so bright (used different colors of glitter) that it hurt my eyes to look at.  On the second attempt, I changed to these colors, but didn't get my mask down well enough.  So as they say...third time's a charm.

The message was created using a couple different fonts from Die-Versions.  The words "Home" and "You" were die cut using the HollyWOOD font and the rest was cut out using the Editor-In-Chief font.  If you love fonts, you definitely need to check out all the font dies that Die-Versions has.  They are all fabulous and don't take up that much space (like all the old Sizzix alphabet sets I still own).


Friday, August 17, 2012

Thinking of You


This is an example of the double glitter technique.  The stencil is from Dreamweavers and the background is Sparkle N Sprinkle glitter and the trees are covered with glitter from PK Glitz.

For the edges, I wanted a faded look, so I placed some double tape along the edges, pressed down, and then lifted it away.  It took most of the glitter away, but not all, leaving a beautiful edge that fades to white.

This is so glittery and sparkly in person, I just couldn't quite capture all that in the photo.  Have a good weekend everyone.