Showing posts with label embedded embossing technique. Show all posts

Wednesday, August 17, 2016

Groovy Birthday {Scrapy Land Challenge #48}


Welcome to Scrapy Land Challenge #48.  The theme for today's challenge is Use an Image (digi or rubber), plus any brand of die that Scrapy Land sells.

The dies used in my project are:


Sue Wilson Designs: New York Collection-Madison Square
Taylored Expressions: Banner Stacklets 1


I used a couple different rubber stamps in this project.  The focal point is an older rubber stamp from Unity Stamp Co. and the flowers and sentiment are by Taylored Expressions.

The scooter was stamped a couple times, colored with Copic markers and fussy cut out.  I wanted to add dimension by layering the both the front and back wheel fenders with pop dots.  The body of the scooter was covered with Glossy Accents and a touch of glitter was sprinkled onto the wet glue for added sparkle.

Once this was dry, I die cut the square from white cardstock, added a backdrop created with Bister wood stains, and adhered the scooter on top with dimensional dots.

The embedded embossing technique was used to create the sentiment.  I started out with a piece of yellow cardstock and heat embossed it with Clear embossing powder.  I then stamped the sentiment and flowers on top of this, covered the entire thing with more clear embossing powder and heat set it again.

You have until Sunday, Sept 4 to upload your project to the Scrapy Land Challenge Blog.  The winner will receive a $15 gift certificate to go shopping at Scrapy Land.


Monday, April 4, 2016

Do What Makes You Happy


Today's card is the result of playing around with lots of embossing powders from Sparkle N Sprinkle and Want 2 Scrap chipboard to see what I could create with them.

I started out with the Doily (Doily Set 2 chipboard embellishment) from Want 2 Scrap thinking I wanted to create a deep impression in the heated powder with a stamp. The first layer was Fleur de Lis embossing powder, then I added a couple layers of Super Thick Clear to make it even thicker.  It takes a bit of time to heat the chipboard through the bottom (you don't want the embossing powders to fly all over the place).  Next I used the Versamark pad to create a rectangle as I wanted to create a backdrop.  I added Super Thick White and heat set that.

Well, I didn't like that result, so I doubled up on craft mats, had a heat resistant pad under those (so that I could be hands free and the piece was flat on the table) and I really began to heat up the embossing powder to mix the white in with the background.  This is where the fun really started!  I got super close to the surface with my heat tool and the powder became like molten lava.  I was able to push the liquid embossing powders around with the heat to create depth and ripples.  The contrast between the black and white are actually little ripples that you can feel with your finger.


Here is a closer view so hopefully you can see what I'm talking about.


 It still needed a little something, so I sprinkled some Super Thick Gold on top and quickly melted that in for more contrast.

The chipboard words (Create, Inspire) came from the Want 2 Scrap Printer's Tray Embellishment set and they were heat embossed with Gold embossing powder.  The final touch was to add Nuvo Crystal Drops (gloss white) to the outside edge of the finished doily.

The Poppy in the center of the doily is from the Poppies stamp set #771 and was colored with Copic markers and then fussy cut out.  Black Ice glitter was added to the center and Bubble Gum glitter was added to the outside petals.

For the background, I added Red Apple embossing powder to a piece of white cardstock and heat embossed it.  I then sprinkled  Super Thick Gold embossing powder on top and heat set that as well.  The card base is Coordinations Kraft cardstock.  I tore the bottom edge and then inverted the two pieces to create the strip of kraft paper between the black.

The sentiment is from the Bicycles stamp set #494 and I used the embedded embossing technique to create this (also known as Molten Pearls technique).  I added some Red Apple embossing powder to a scrap of white cardstock and heat embossed it.  Then I die cut an oval using a Stampendous die (Build A Pop Up die set) from the embossed area.  The sentiment was then stamped in Versamark on top of the Red Apple, covered with White embossing powder and heat embossed again.

I hope this has inspired you to go and create more of what makes you happy :-).


Monday, June 15, 2015

Life Is Better


Instead of creating a card today, I decided to create a "mini portrait" that could be displayed on a small easel stand.  The Life Is Better stamp set from Sparkle N Sprinkle was used to create this mini portrait.

The image was stamped onto watercolor paper and heat embossed with Black Detail embossing powder.  Distress Markers were used to add color to this little Pomeranian.  A Spellbinders Circle die cut the image and the edges were distressed with Distress Ink (Tea Dye).

The matting was dry embossed with a Sue Wilson Designs embossing folder (Eternity) and then more Distress Inks were added (Festive Berries, Tea Dye, Gathered Twigs).

The "frame" was an experiment where I cut strips of semi-glossy white cardstock and mitered the edges.  These strips were then colored with Gathered Twigs ink.  Next I ran a dot tape runner down the sides and covered the adhesive with Coffee embossing powder and heat set.  This gave me the texture I was looking for.  This adhesive wasn't really heat proof (unlike the SNS Tear-ific tapes, which can take the heat), but I kept the heat far enough away not to scorch the paper, but close enough to melt the embossing powder.

What's a formal portrait without a gold plaque?  To achieve this final part of the equation, I die cut a piece of white cardstock using a Stampendous die (Build a Pop-Up die set) and covered it with VersaMark ink.  Gold Detail embossing powder was added and heat set.  I did this step twice as I wanted it to be nice and smooth.  The "engraving" on the plaque was achieved by stamping the sentiment with VersaMark on top of the Gold Detail.  The embossing ink was covered with Coffee embossing powder and heat set.  Now my mini portrait is complete and ready for any Pomeranian loving dog owner.


Wednesday, October 8, 2014

Bubble Gum


Today's card showcases the new Bubble Gum rubber stamp set from Sparkle N Sprinkle.

To start off, I stamped the image in Barn Door Distress Ink and heat embossed it with Clear embossing powder.  The rest of the image is colored with Copic markers.  I added a very healthy dose of Glossy Accents to the "glass bowl" holding all the bubble gum pieces.  It took this quite a while to dry, but I like that it really looks like a piece of glass.


The embedded embossing technique was used to create the sentiment tag.  I started off by stamping one of the sentiments from the set with VersaMark, covering it with White Detail embossing powder, and heat setting the powder.  Next apply VersaMark over the entire tag, which is a die cut from Taylored Expressions (Tag Stacklets 1), cover with Clear embossing powder and heat set again.

I created a frame from black cardstock and then adhered several different colors of twine around the edge to create a multicolored frame.  Distressed embossing technique was added to the edges of the larger patterned paper using Faded Jeans Distress Ink and Clear embossing powder.

For more details, you can also visit my Sparkle N Sprinkle Art Gallery.  (You can search under my name to see all the projects I have worked on since becoming a Designer too.)


Monday, December 23, 2013

Happiness


I wanted to do the Embedded Embossing (also known as Molten Pearls) technique again and I thought the Geraniums silhouette image from Sparkle N Sprinkle would be a good stamp to use for this technique.

I started off by die cutting my labels die and covering it with VersaMark and heat embossing it with Firecracker Red embossing powder.  I repeated this process again with the Firecracker Red.  On the third repeat, I used Clear embossing powder instead of the Firecracker Red.  This gives sit a really glossy look, similar to the way Glossy Accents does when dry.  Next I stamped the Geranium silhouette and heat embossed with Black embossing powder, heating it throughly until it melts into the background.

Die cut the tag (cut in half) and follow the same steps as before, using the sentiment from the Shabby Chic Birdhouse rubber stamp set.

The Dee's Distinctively (Lattice 1) die was cut out of SNS Sticker Paper and covered with Swan Wing tinsel glitter.  The Poppystamps die was also cut out of Sticker paper and covered with Citron Green glitter.  (This is more of a gold than a green and matched the design in the paper perfectly.)  I folded the top of the die cut like an accordion for added dimension.  The base and mat were cut with Spellbinders Grand Labels Four dies and the papers are from Graphic 45's Bird Song collection.

Saturday, June 1, 2013

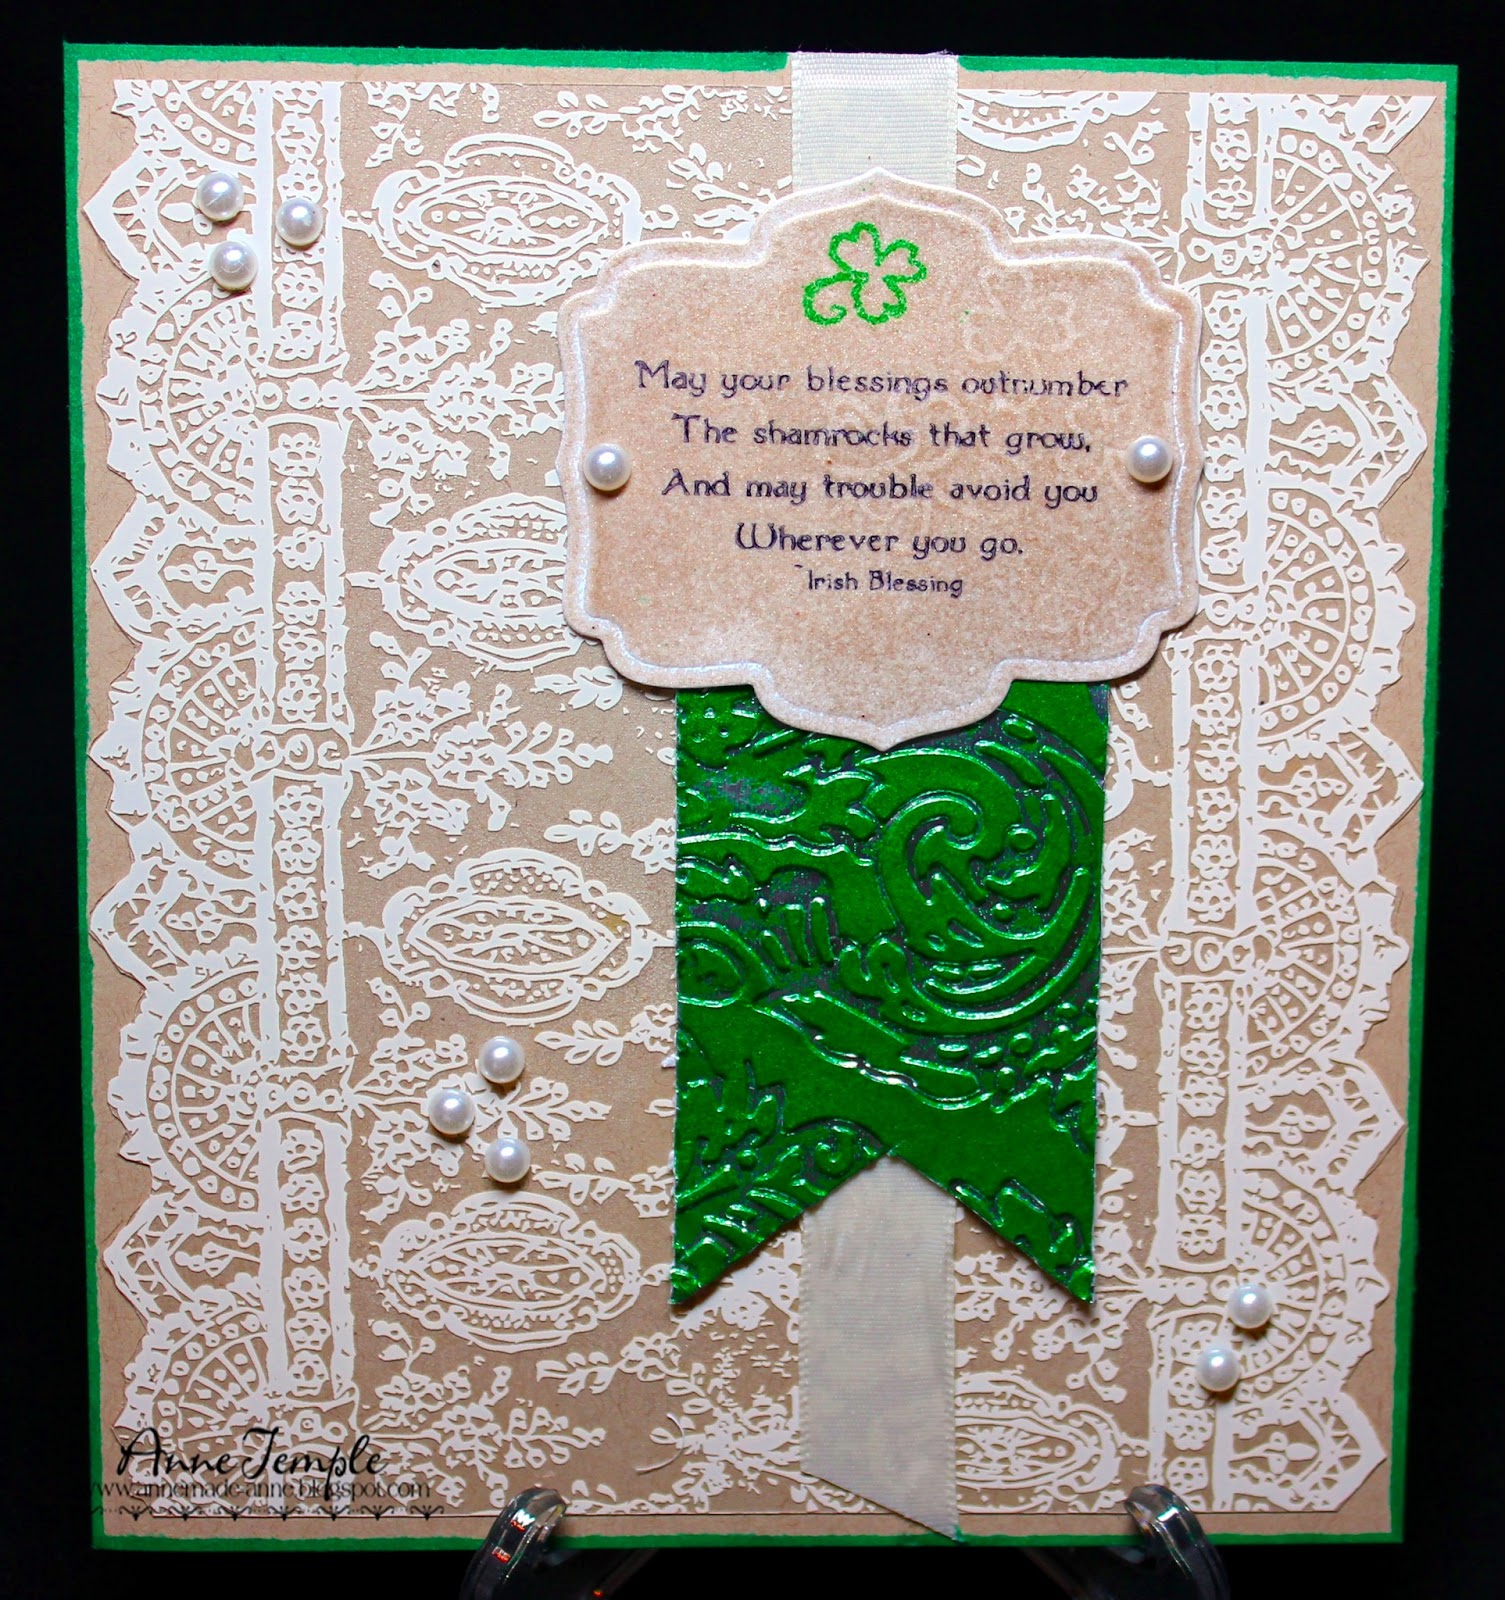
Irish Blessing


Can you believe June is already here?  Well, you know what that means....summer and a new Sparkle N Sprinkle Creative Challenge.  This month we're following a sketch.


As you can see, I followed it pretty closely.  The focal point is one of the sentiments from the Irish Shamrocks rubber stamp set from Sparkle N Sprinkle.  After die cutting my cardstock using Spellbinders Labels Five die, I covered it with VersaMark and Vintage embossing powder.  Once it was heat set, I stamped a shamrock (the stamp actually has three of them) with Versamark and Forest Green embossing powder and used the Molten Pearls technique of embedding the embossing powder into more embossing powder.  Then I stamped the entire shamrock stamp with VersaMark and heat set it again.  This gives it a fun watermark.  The sentiment was then stamped with Staz-On ink.

The green embossed banner is actually metal tape that I adhered to cardstock.  I ran it through my Sizzix embossing folder (Regal Flourishes) and then tapped VersaMark on the raised portions.  I covered it with Forest Green embossing powder and heat set it.  The metal stayed silver in the recessed portions.  The backdrop is a Hambly Screen print (acetate with a design) and the card base is kraft paper.  I thought it went nicely with the Vintage embossing powder.

Now it's your turn!  You have the entire month of June to come up with a project following the sketch. Can't wait to see what you make.

Wednesday, April 24, 2013

Silhouette


Using the new Silhouettes stamp set from Sparkle N Sprinkle, I combined two different techniques to achieve the end result: Molten Pearls (also known as embedded embossing) and Cracked Ice technique (also known as the Cracked Glass technique).

I used two different embossing powders, Pineapple and Moss Star.  Start out by trimming a piece of cardstock slightly larger than the stamped image.  Cover the entire piece with VersaMark and then Pineapple embossing powder.  Heat set.  Ink up the rubber stamp with VersaMark and stamp directly onto the cardstock embossed with Pineapple embossing powder.  Cover with Moss Star embossing powder and heat set.  Those bits of glitter in this embossing powder really sparkle and shine backed by the lighter colored Pineapple.  (This is the Molten Pearls technique.)

Next, cover the entire piece with VersaMark again and cover with Super Thick Clear embossing powder.  Heat set.  Repeat this step several times, building up the layers of embossing powder each time.  You can leave it at this step - it's super shiny, like glass - or you can continue to the next step, which is putting it in your freezer for a few minutes.  When you take it out of the freezer, bend the cardstock back and forth, causing the clear embossing powder to crack.  If you want more cracks, place it back in the freezer again.  To emphasize the cracks, use a sponge dauber and rub in a bit of ink into the cracks. (This is the Cracked Glass or Cracked Ice part.)

Using a Spellbinders Fancy Tags Three die, cut out a piece of vellum and stamp your sentiment with VersaMark.  Cover with Moss Star embossing powder and heat set.  I loved combining these two techniques together, but I have to tell you, they are both hard to photograph.


Monday, February 25, 2013

Happy Spring


Have you tried the Embedded Embossing technique?  It's a really fun thing to do and it makes mailing your cards even easier as it creates a single layer.  All you have to do is die cut your favorite images, adhere them to your base cardstock, and run them through an embossing folder.  The tighter the pattern is on the embossing folder, the better it will turn out.

What this does is embed the top layers into the base layer.  Pretty cool, huh?  Here's a close up so you can see what I'm talking about.

The Butterfly Flourish from Die-Versions now becomes part of the pale pink background as does the sentiment that I cut out using the A Little Lime  Die-Versions font.  I added some gems to the flower centers and a bow, but this is still basically a flat card that can easily be mailed without any extra padding or postage.

Don't forget to check out the Die-Versions blog to see what the rest of the team comes up with using all the Die-Versions dies.  There are some pretty amazing projects on there!