Showing posts with label glitter ribbon. Show all posts

Thursday, February 13, 2020

Wine tag {Tutti Designs}


I wanted to create a tag for the bottle of wine that was being given as a birthday present. 

I used the Tutti Designs Cross Stitch Tags to create my wine bottle tag.

Cross Stitch Tags


I started out by searching for some free clip art featuring a cluster of grapes. (For some unknown reason, I didn't have a stamp with this image. 😮)  Once I found what I had in mind, I then used a photo editing software to colorize the black and white image.  I've used digital images for quite some time now, but I've always printed them out and then colored them by hand.  This is the first time that I tried to add color and texture and shading within a software program.  I was quite happy with the results.

Once the grape cluster was completed, I added some digital paper for the background and printed everything out.

Next, I used the largest die in the Cross Stitch Tag set to cut out the image.


I added some glitter to the grapes and also created a matching piece of glitter ribbon to tie the tag onto the bottle.  If you've not created one before, it's quite easy.  Take a piece of double sided tape (whatever width you would like) and cut it to the length you want.  Add glitter to the first side, making sure to burnish it into the adhesive with your finger.  Then remove the backing paper from the other side and repeat the process.  Now you can create your own glitter ribbon and coordinate it to your project.😊

On the back side of the tag, I added my sentiment and a few more smaller stickers having to do with wine.


Be sure to come back tomorrow for more more inspiration from the Design Team and visit the Tutti Designs store where there are lots more fabulous dies to choose from.

Here are some Tutti Designs quick links:


Until next time.....


Wednesday, February 12, 2020

Tutti Designs and Hochanda TV


I am so excited to let you know that Tutti Designs was asked to be on Hochanda TV again (a UK crafting channel) and the Design Team was asked to create projects for the shows.

These are the dies that will be showcased on today's shows:


I created the following projects:

A Happy Hello


This is a shaker card using the Tulip Egg and Cross Stitch Nesting Ovals. Dotted Nesting Rectangles was also used for the mat. Clear embossing powder helps make the Tulip Egg sparkle.


Squirrel Scene Tag


A tag using the Squirrel Scene die.  His tail has flocking on it and the tag was dry embossed and colored with Distress Oxides.


Flower Power
This card combines the Flower Love, Flower Smile, Flower Friends, and Cross Stitch Nesting Circles dies.  Gemstones were also added and lots of glitter markers.


Follow Your Dreams

This card was created using the Oriental Screen, Koi, and Cross Stitch Nesting Ovals.  Lots of glittery goodness on this one. The screen was heat embossed with a sparkly translucent embossing powder and the sentiment was embossed with clear embossing powder.


Friends

Garden Fountain and Cross Stitch Nesting Ovals were used to create this watercolor fountain.  Glitter helps to accent the dripping water. The sentiment was stamped onto vellum and heat embossed with white embossing powder.


Smile Z-Fold card

Flower Love, Flower Smile, Flower Friends, Garden Fountain and Cross Stitch Nesting Circles create this Z-fold card.  Each of the die cuts were embossed with sparkly embossing powder.  The small hearts are the negative pieces from the Flower Love die cut and the "Smile" was cut from the Flower Smile die cut.


Tulip Egg Tower Card

This fun fold double tower card was created using Distress Oxides, the Tulip Egg die and the Cross Stitch Nesting Circles.  The Tulip Egg die cut, which is layered on top of a Cross Stitch Nesting Circle, has added glitter and the tulips have been given added dimension using pop dots.  


Thinking of You

This simple card was created using the Squirrel Scene and the Cross Stitch Nesting Ovals.  The oval die cut was colored with Distress Oxides.

Show times are 3am and 5am Eastern time.


Until next time.....


Monday, December 2, 2019

Roaring 2020 {Jan's Digi Shop}


Hey everyone, welcome to Jan's Digi Stamp Challenges #3.  I have a new project featuring two new digi stamp sets from Jan's Digi Shop.  I combined images from both the Happy New Year (3230J) and New Year's Eve (3231J)


I combined a number of the pre-colored images from both sets to create this fun New Year's card.  The background numbers paper, is digital paper as well.


Lots of glitter was strategically added to the streamers, the champagne glasses, the burst of champagne, and the year.

I adhered my focal point to some silver and then gold cardstock and added glitter ribbon for even more sparkle.  To create you own glitter ribbon, take a long piece of double sided tape (whatever width size you want) and add your choice of glitter to one side and then the other side.  Easy, peasy to create sparkle in your choice of color.

Jan's Digi Shop is one of the few digi stores that also gives your pre-colored images.  SO if you need to create a card in a hurry, this is the way to do it.  Add a few of your own embellishments, if you want, and your good to go!

Now it's your turn to come play with us.  Jan's Digi Stamp Challenges will be held the first and third Monday of every month.  Winners will be chosen randomly and will have two weeks to collect their prize.  (All the details are under the Challenge Guidelines tab at the top of the Challenge Blog page.)

Come get social with us:
Facebook - Shopping - Pinterest - Challenges

Until next time.....


Friday, March 2, 2018

Love Machine


Today I'd like to share a tag/card combo that uses the Love Machine die from Cheapo Dies.  My first thought about this die was that it would be great for Valentines and anniversaries, but I decided to go outside the box and created a birthday card.  It's so easy to personalize the little hearts that are part of this nine piece die set.

To start out, I die cut the entire set from white cardstock and then began to color the various pieces using different mediums.  The base and top were covered with Morning Glory embossing powder from Sparkle N Sprinkle, the globe was covered with a Nuvo glitter marker (Ember Glow pack), and the  black rectangle was colored with a Copic marker and then Glossy Accents added on top.  All the hearts were colored with various Copic markers.

The tag base was given color by applying three different colors of Nuvo Embellishment Mousse (Cosmic Brown, Spring Green, Lilac Lavender) to the surface using a Marshmallows 3 (a type of dauber that I love).

The sentiment is part of a rubber stamp set by Sparkle N Sprinkle (Balloon Bunch) and was stamped with Nuvo Hybrid Ink (Black Shadow) and heat embossed with Clear embossing powder.

The glitter ribbon was created by taking a piece of 1/4" Tear-ific tape and adding Butterscotch microglitter to both sides.

A piece of patterned cardstock was used for the base and the edges were distressed for a more casual look. 

Be sure to visit the Cheapo Dies Blog regularly to see what the rest of the team has created for you.


Monday, November 20, 2017

Cat's Meow


This was a fun birthday card to create.  I recycled some junk mail for the presents  (these were fussy cut out from a larger sheet) and used the Cat's Meow rubber stamp set from Sparkle N Sprinkle to embellish those presents.  What cat doesn't like boxes, whether it's getting into them or sitting on top of them?

I used the Stamp Platform to stamp the two cats onto white cardstock.  (Be sure to leave the stamps in place.)  Then I colored the images with Koh-I-Nor colored pencils.  Once this step was completed, I placed the cardstock with stamped and colored images back on the Stamp Platform and stamped on top of the colored images with VersaMark and heat set with Clear Detail embossing powder.  This gives you great details and is an extra step that I do most every time.


For the background, I started out by dry embossed a piece of orange cardstock with a Tonic Studios embossing folder (Modern Chevron). Then I covered the entire piece with VersaMark and Sparkle embossing powder and heat set.  Just as the name of the embossing powder implies, this gives it lots of bling.

I adhered the packages with 1/4" Tear-ific Tape and then pop dotted the cats on top of the packages. Bubble Gum glitter was added to both cats' noses and the inside of their ears. Sunny Daze glitter gives the little butterfly the grey tom cat is holding its sparkle.

The Happy Birthday die cuts are from a Sizzix set (Balloons Step Up) and were die cut from white cardstock.  The letters were given lots of bling using the Glue-less Glitter techniqueVersaMark and Clear Detail embossing powder are first applied, then another layer of VersaMark and Denim velvet glitter.  The shadows are covered with Sparkle embossing powder.

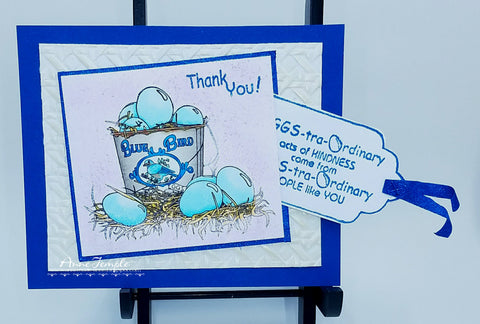
The sentiment, which is part of this rubber set was die cut using a die from another Sizzix set (Ticket-Fold A Long).  Using the Stamp Platform, I stamped the sentiment with a Nuvo Hybrid Ink pad (Empire Blue).  I decided I wanted the entire die cut to be shiny, so I covered it with VersaMark and heat set Clear Detail embossing powder over it.  This was then given a bit of dimension by adding a pop dot in the center of the die cut and gluing down the two ends.


Tonic Studios Mirror cardstock (Glossy Black) was used for the card base. To complete my birthday card package, Goldenrod glitter was applied to a strip of 1/2" Tear-ific Tape to create my glitter ribbon. 

Monday, January 16, 2017

Kindness


Eggs-traordinary Kindness is one of ten new stamp set released this month from Sparkle N Sprinkle.


After stamping the image onto white cardstock, I colored it with Copic markers.  To create the speckled background, I repeatedly dipped a stipple brush into Nuvo Embellishment Mousse (Lilac Lavender) and applied the mousse until I was happy with the coverage.  (Be sure to wash your stipple brush after doing this technique and let it air dry.  It will be as good as new and ready for the next time you want to use it.)  

The Glueless Glitter technique was used to add the sentiment.  Start out by heat embossing Clear embossing powder, cover stamped sentiment with VersaMark ink again, and then cover with your favorite color glitter (Denim velvet glitter used here), and heat set a final time.  The glitter will melt into the embossing powder and won't come off.  

This layer was then adhered to a piece of cardstock that was edged with 1/8" Tear-ific Tape and covered with Denim velvet glitter.  When adhering the stamped layer onto this layer, don't add adhesive to one side.  This creates a pocket so that you can insert your tag.  I added a strip of Glitter Ribbon (1/4" Tear-ific Tape covered with Denim velvet glitter) to the tag edge, so that it can easily be removed.


The background layer was dry embossed with a Spellbinders folder (Cane Weave) and the Mother of Pearl Nuvo Embellishment Mousse was added to the raised areas.


The sentiment on the tag is also part of this set and the Glueless Glitter technique was also used to add Denim velvet glitter to the stamped sentiment.  The edge around the tag was created by adding Nuvo Glue pen and covering with Denim glitter.

Monday, October 10, 2016

Turkey Dish


Turkey Dish is one of the fun new stamp sets revealed this month from Sparkle N Sprinkle.  All these new Bugaboo stamps, which are now available in rubber only from SNS, are so fun to color.

The image was colored with Copic markers and various glitters were then added for lots of sparkle.  Autumn Medley glitter was added to the autumn leaf in her hair as well as to the highlighted words on the sentiments.  The glitter ribbon, which combines 1/8", 1/4", and 1/2" Tear-ific Tape is also covered with Autumn Medley glitter.

 Margarita velvet glitter was added to the green leaves on her hair decoration.  Rose Gold glitter accentuates her necklace as well as the buckles on her shoes and Sonic Silver velvet glitter creates a nice silver platter for this golden turkey to rest on.

Spellbinders Labels Twenty Eight were used to create the mats and Stampendous dies (Build A Pop-Up die set) were used for the sentiments.  The edges of all the white cardstock was given a bit of color using Spiced Marmalade Distress Ink.  The Distress Embossing technique was applied to the outside edge of the focal die cut using Sparkle embossing powder and Spiced Marmalade.

Monday, August 22, 2016

Stella - Happy Meds


This new stamp stamp set called Stella - Happy Meds from Sparkle N Sprinkle should definitely make you smile.  It's one of the new Bugaboo images that is now available in rubber, only from Sparkle N Sprinkle!

After stamping the image and coloring it with Copic markers, I added Dimensional Glue and Sunny Daze glitter to various letters.  I also outlined other words with a red Multi-liner to make them pop a bit more.  The pink pills and Stella's glasses were covered with Glossy Accents for a real shine.


To create the mat, I used the lacy background technique with Sticker Paper, lace, and Sunny Daze and Blue Haze glitters.  This is such an easy and fun technique and with so many variations, depending on the style of lace and the colors of glitter you use.  For some reason, this one reminds me of a leopard print, even though the colors are different.

For embellishments, I created my own glitter ribbon using 1/2" Tear-ific tape and Blue Haze glitter and added a few Nuvo Crystal Drops (Navy Blue) as accents.  Crystal Drops also accent the corners of my lacy background.  The background matting behind the focal point was dry embossed with a Crafters Companion embossing folder (Hessian) for a bit of texture.

Monday, July 18, 2016

Milton Catching Snowflakes


Milton Catching Snowflakes is one of the five new stamp sets released this month by Sparkle N Sprinkle.  I used the digi version and combined the image and sentiment when I printed it out.


The image is colored with Copic markers and the colors of one of his many scarves is highlighted with Purple Dust glitter.  The snowflake that Milton is catching with his tongue was given extra sparkle using Sparkling Snow glitter.

For the background, I started out by using one of the dies from the Tonic Studios die set (Merry Christmas - Christmas Strip die set) from green cardstock.  As I wanted the strip on both sides, I had to die cut it twice, leaving a small solid piece of cardstock in the center.

Next I adhered a piece of Super Adhesive Sheet behind this green panel.  I exposed the side that went up against the green cardstock and left the protective sheet on the other/back side (for the time being). Sparkling Snow glitter was then poured on top of the exposed adhesive and burnished into the adhesive with my finger tool :-).  You want to make sure and firmly press the glitter into the adhesive for good coverage and to get into all of the little crevices.

Sparkling Snow is a semi-transparent glitter, so with the protective backing still on the backside, the glitter loos white.  But when I removed this protective backing and adhered this panel to purple patterned cardstock, the Sparkling Snow takes on that color.

A strip of glitter/flock ribbon was added below the image.  To create this, I started out with a strip of 1/2" Tear-ific Tape and added a strip of 1/4" Tear-ific Tape down the center of the 1/2" strip, after removing the protective backing.   I left the protective backing on the 1/4" strip of Tear-ific Tape and covered the exposed adhesive with Cloud Nine velvet glitter.

After brushing away the excess with my Glitter brush,  I then removed the protective backing from the 1/4" strip and covered it with Glistening Emeralds Sparkle N Soft flock.  Be sure to burnish the flock in well with your fingertip.  The combination of the velvety softness of the glitter and the softness of the flock is wonderful.  You just want to run your finger over this glitter/flock ribbon over and over :-).

As a finishing touch, I added a piece of snowflake ribbon over glitter/flock ribbon.