Showing posts with label Molten Pearls technique. Show all posts

Monday, April 4, 2016

Do What Makes You Happy


Today's card is the result of playing around with lots of embossing powders from Sparkle N Sprinkle and Want 2 Scrap chipboard to see what I could create with them.

I started out with the Doily (Doily Set 2 chipboard embellishment) from Want 2 Scrap thinking I wanted to create a deep impression in the heated powder with a stamp. The first layer was Fleur de Lis embossing powder, then I added a couple layers of Super Thick Clear to make it even thicker.  It takes a bit of time to heat the chipboard through the bottom (you don't want the embossing powders to fly all over the place).  Next I used the Versamark pad to create a rectangle as I wanted to create a backdrop.  I added Super Thick White and heat set that.

Well, I didn't like that result, so I doubled up on craft mats, had a heat resistant pad under those (so that I could be hands free and the piece was flat on the table) and I really began to heat up the embossing powder to mix the white in with the background.  This is where the fun really started!  I got super close to the surface with my heat tool and the powder became like molten lava.  I was able to push the liquid embossing powders around with the heat to create depth and ripples.  The contrast between the black and white are actually little ripples that you can feel with your finger.


Here is a closer view so hopefully you can see what I'm talking about.


 It still needed a little something, so I sprinkled some Super Thick Gold on top and quickly melted that in for more contrast.

The chipboard words (Create, Inspire) came from the Want 2 Scrap Printer's Tray Embellishment set and they were heat embossed with Gold embossing powder.  The final touch was to add Nuvo Crystal Drops (gloss white) to the outside edge of the finished doily.

The Poppy in the center of the doily is from the Poppies stamp set #771 and was colored with Copic markers and then fussy cut out.  Black Ice glitter was added to the center and Bubble Gum glitter was added to the outside petals.

For the background, I added Red Apple embossing powder to a piece of white cardstock and heat embossed it.  I then sprinkled  Super Thick Gold embossing powder on top and heat set that as well.  The card base is Coordinations Kraft cardstock.  I tore the bottom edge and then inverted the two pieces to create the strip of kraft paper between the black.

The sentiment is from the Bicycles stamp set #494 and I used the embedded embossing technique to create this (also known as Molten Pearls technique).  I added some Red Apple embossing powder to a scrap of white cardstock and heat embossed it.  Then I die cut an oval using a Stampendous die (Build A Pop Up die set) from the embossed area.  The sentiment was then stamped in Versamark on top of the Red Apple, covered with White embossing powder and heat embossed again.

I hope this has inspired you to go and create more of what makes you happy :-).


Monday, December 23, 2013

Happiness


I wanted to do the Embedded Embossing (also known as Molten Pearls) technique again and I thought the Geraniums silhouette image from Sparkle N Sprinkle would be a good stamp to use for this technique.

I started off by die cutting my labels die and covering it with VersaMark and heat embossing it with Firecracker Red embossing powder.  I repeated this process again with the Firecracker Red.  On the third repeat, I used Clear embossing powder instead of the Firecracker Red.  This gives sit a really glossy look, similar to the way Glossy Accents does when dry.  Next I stamped the Geranium silhouette and heat embossed with Black embossing powder, heating it throughly until it melts into the background.

Die cut the tag (cut in half) and follow the same steps as before, using the sentiment from the Shabby Chic Birdhouse rubber stamp set.

The Dee's Distinctively (Lattice 1) die was cut out of SNS Sticker Paper and covered with Swan Wing tinsel glitter.  The Poppystamps die was also cut out of Sticker paper and covered with Citron Green glitter.  (This is more of a gold than a green and matched the design in the paper perfectly.)  I folded the top of the die cut like an accordion for added dimension.  The base and mat were cut with Spellbinders Grand Labels Four dies and the papers are from Graphic 45's Bird Song collection.

Sunday, September 15, 2013

Botanical Molten Pearls


I've discovered another technique I haven't tried - Molten Pearls.  (You can see a video of the technique here, in the SNS Tips and Techniques section.)    And what makes it even better is that it's published in the Creative Color for Card Making 2013 edition of CardMaker magazine!  (Squealing with delight! You can see it for youself on page 100.)   I've done a step by step photo tutorial as well.


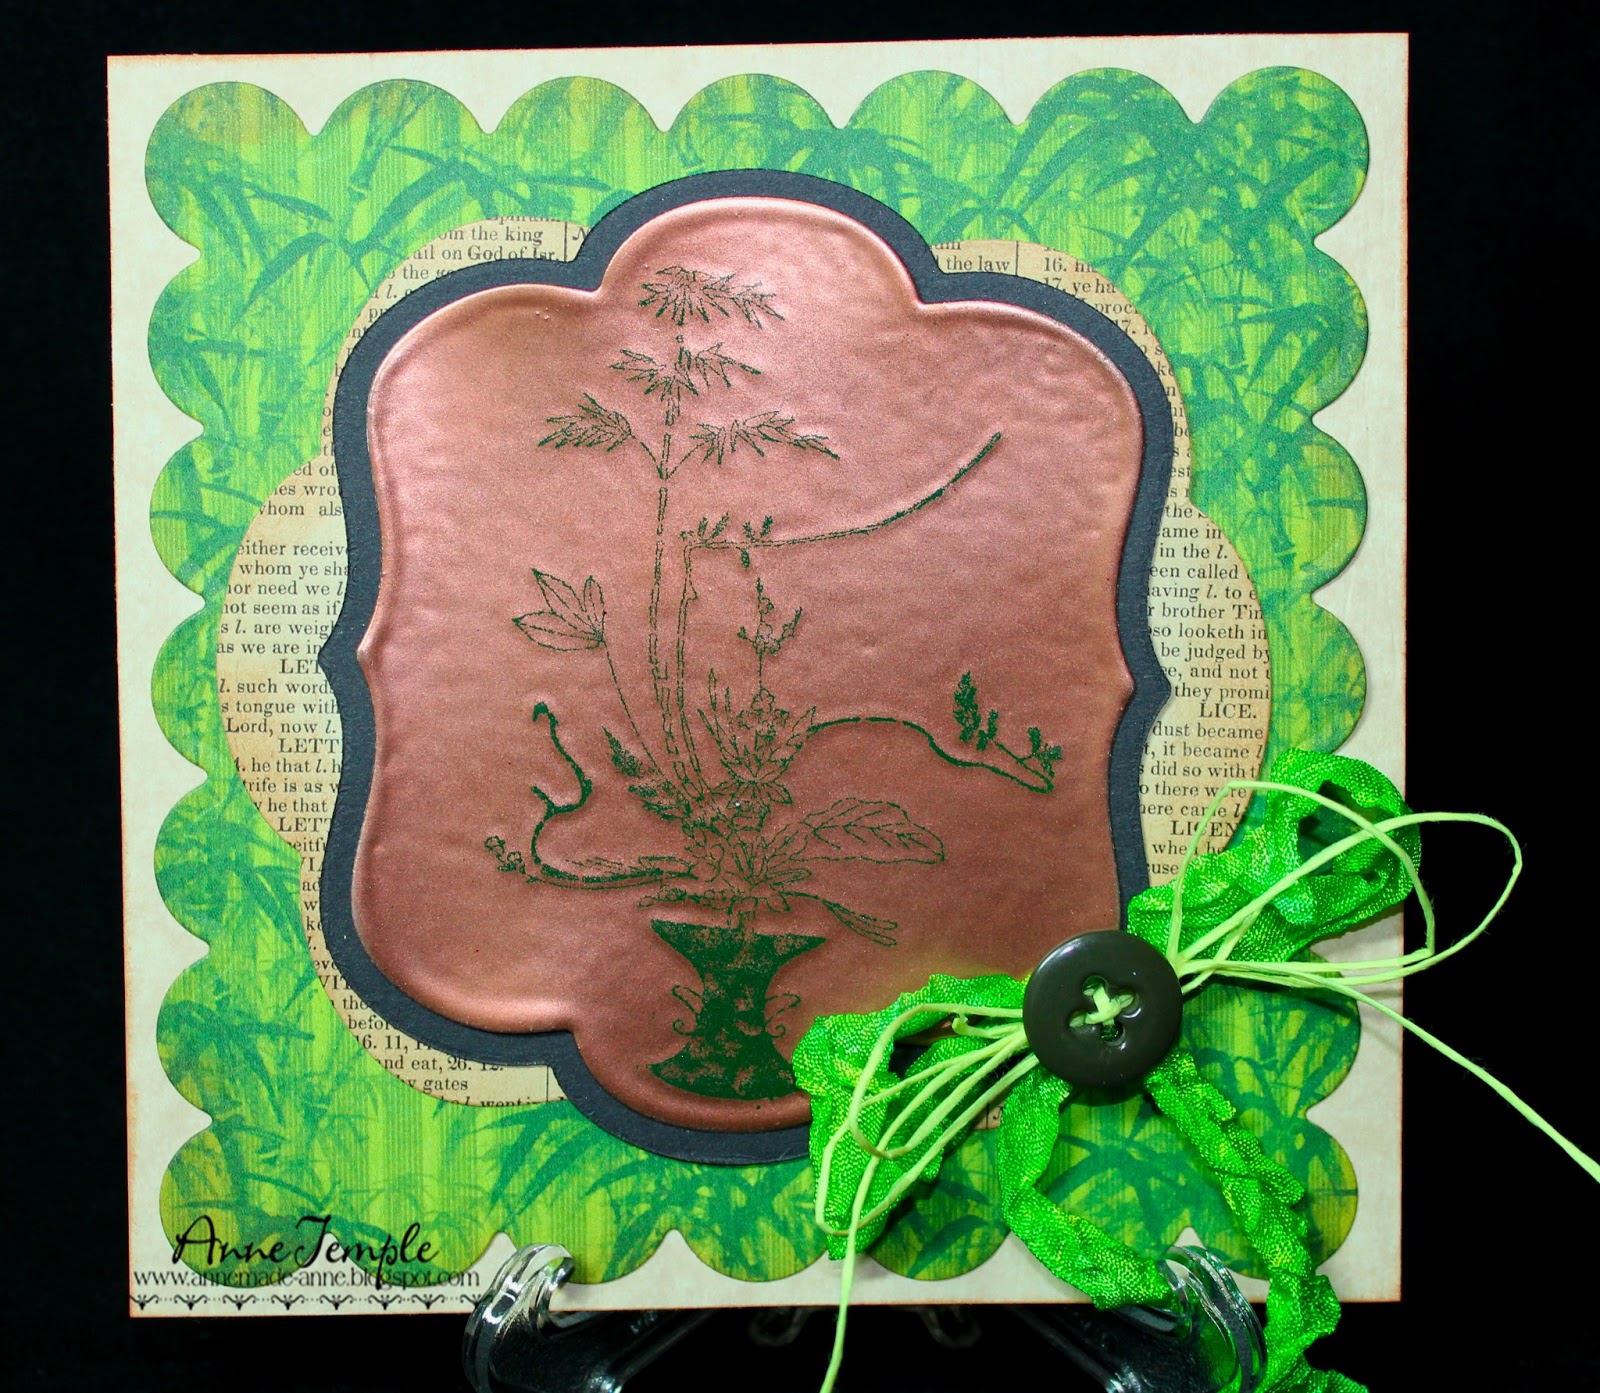
To create this card, I used the Bamboo Floral Vase stamp from Sparkle N Sprinkle.  You can also get it in the Asain Leaf Robe stamp set.


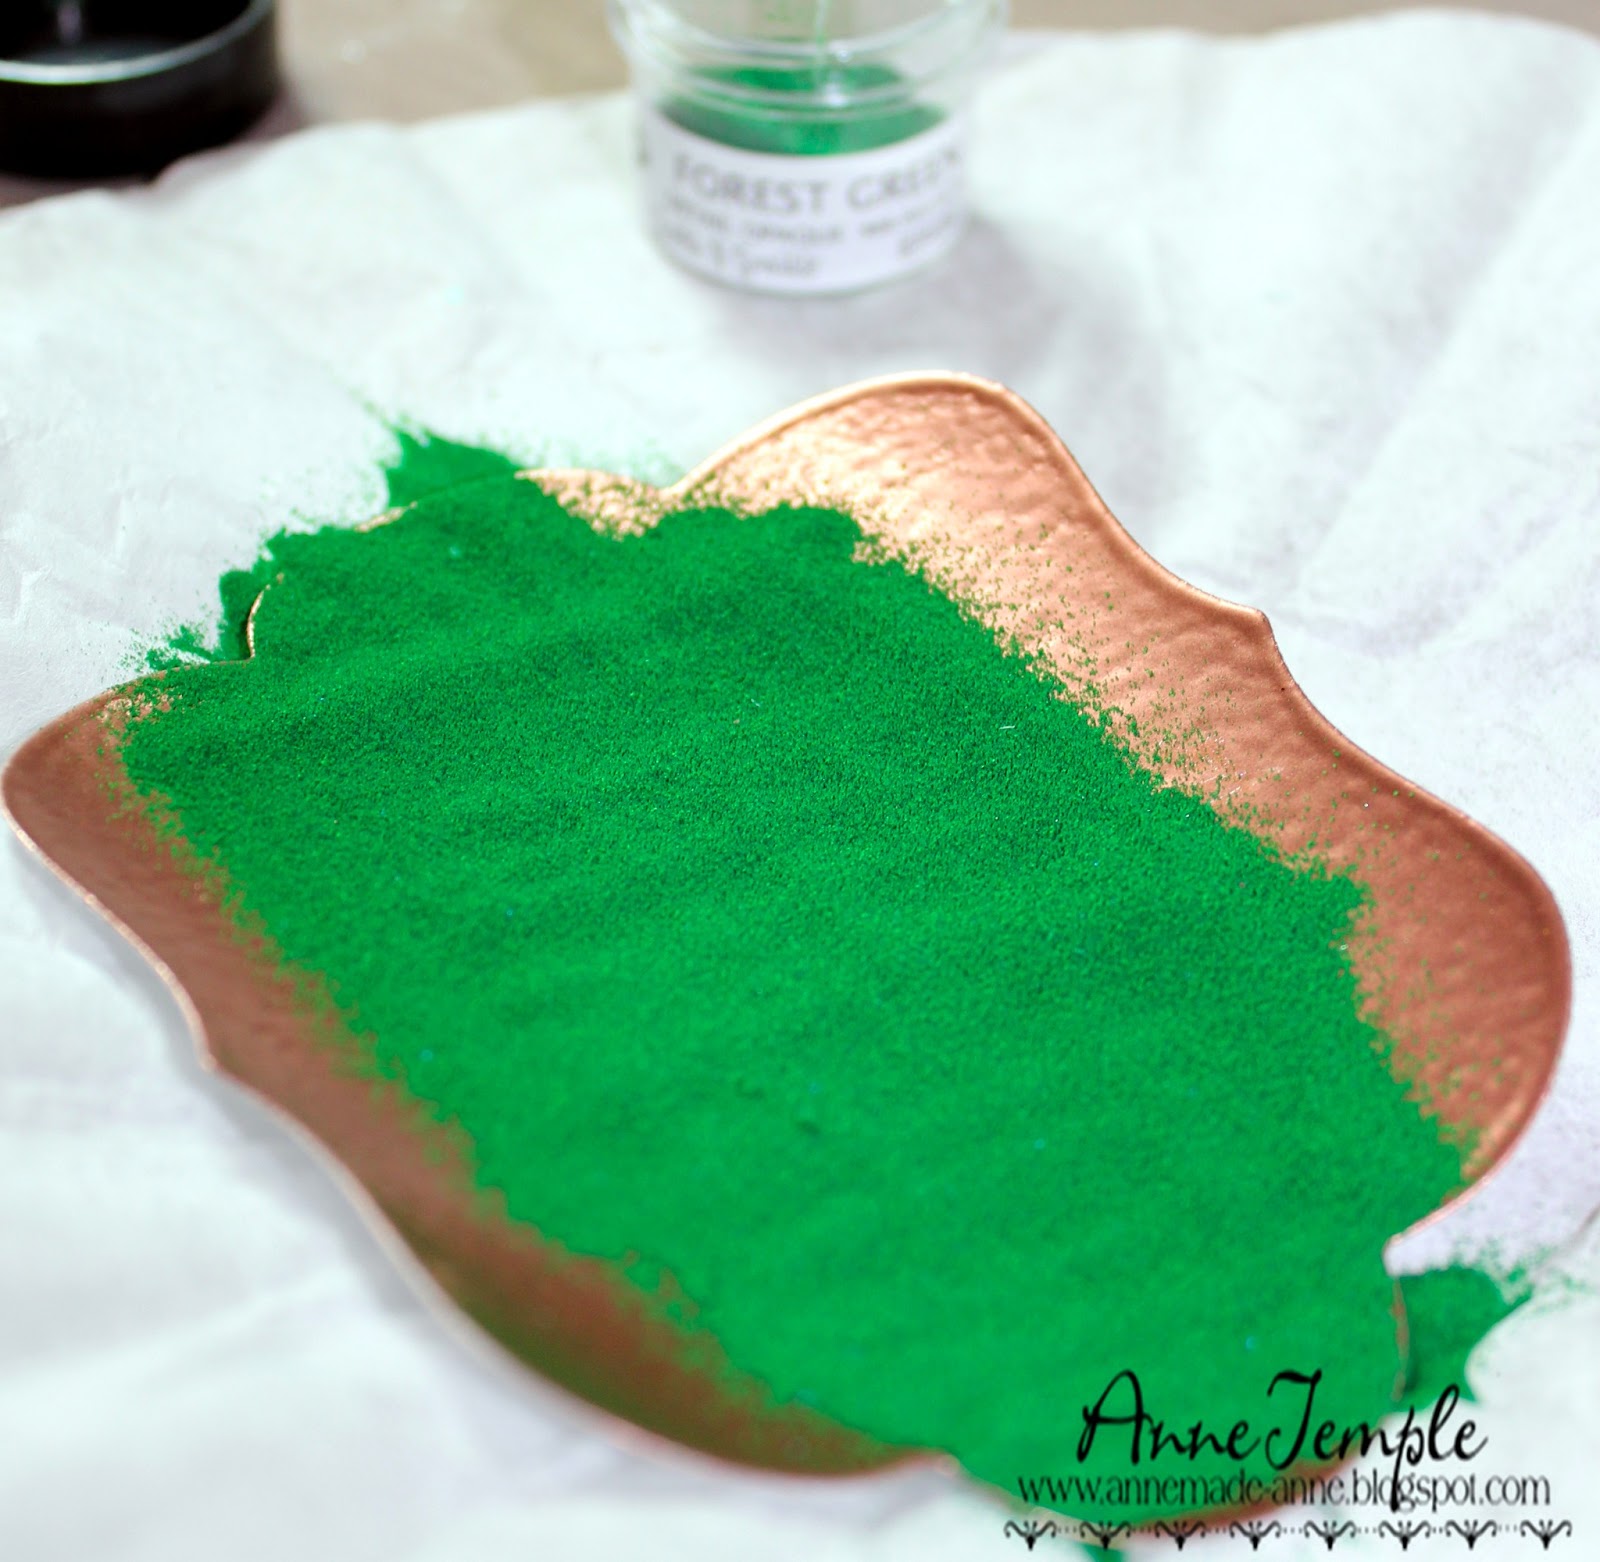
First you need to decide what shape you want the base to be.  I used a Lifestyles Crafts nesting die set that came as part of a package for my shape, inked it up with VersaMark, and covered it with Copper embossing powder.  It may take two or three times to get the desired effect your looking for.  It should be shiny and smooth.


Once you're happy with it, ink up your image with Versamark and stamp it directly onto the embossed shape.  Cover it with a different color embossing powder (I used Forest Green), and heat emboss.  The new layer melts into the base layer and looks so cool.


The photo on the right is what it looks like when you're finished.

To complete the card, I matted it onto black cardstock using the next size up nesting die and used the third size up to cut a piece of vintage book page for my larger mat (I just turned it on it's side).  The seam binding ribbon was colored with Dylusions Ink Sprays and I added a vintage button threaded with paper floss on top.
If you haven't tried this technique yet, you really should.  I couldn't stop with just one card.

Saturday, June 1, 2013

Irish Blessing


Can you believe June is already here?  Well, you know what that means....summer and a new Sparkle N Sprinkle Creative Challenge.  This month we're following a sketch.


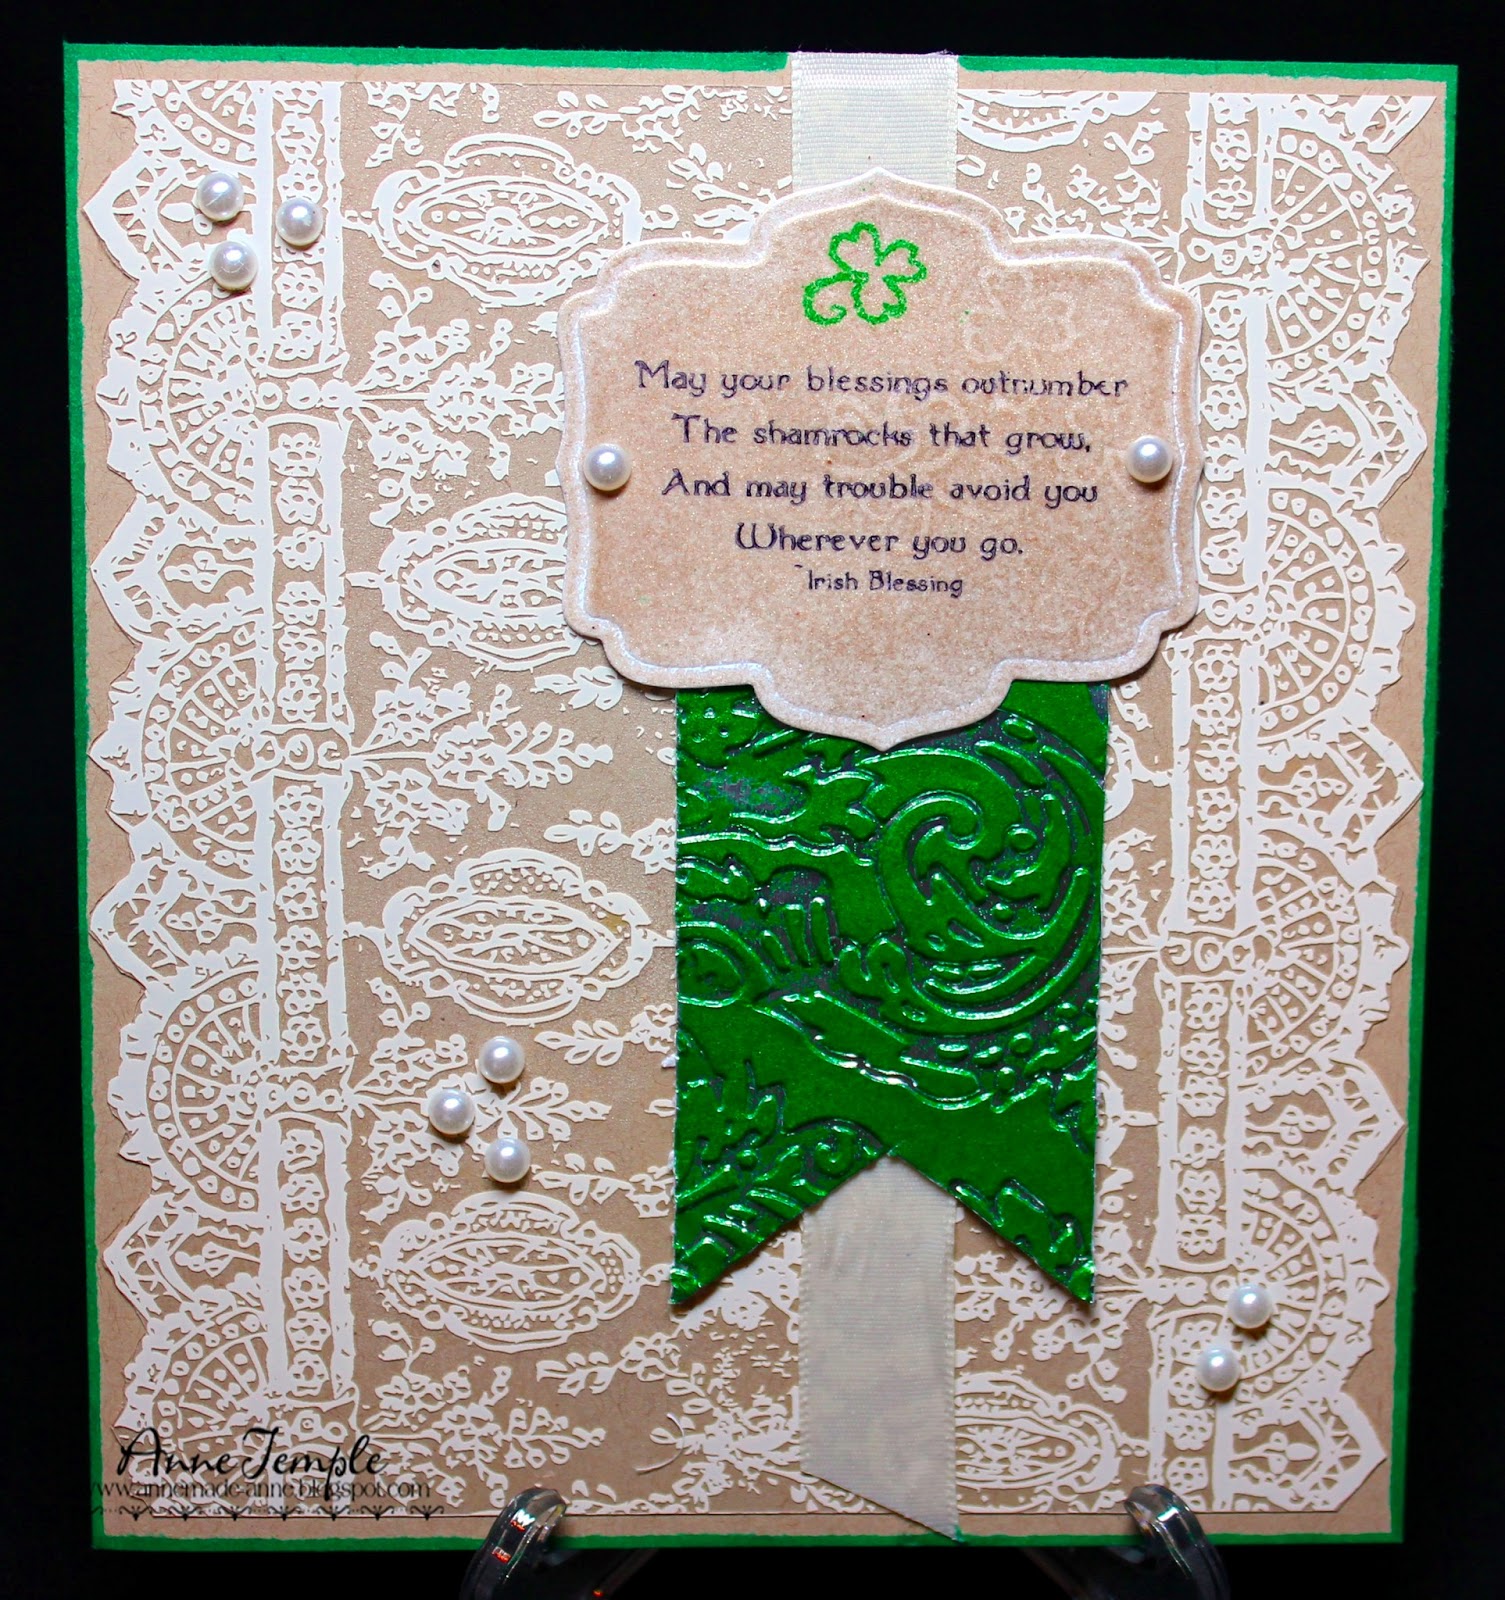
As you can see, I followed it pretty closely.  The focal point is one of the sentiments from the Irish Shamrocks rubber stamp set from Sparkle N Sprinkle.  After die cutting my cardstock using Spellbinders Labels Five die, I covered it with VersaMark and Vintage embossing powder.  Once it was heat set, I stamped a shamrock (the stamp actually has three of them) with Versamark and Forest Green embossing powder and used the Molten Pearls technique of embedding the embossing powder into more embossing powder.  Then I stamped the entire shamrock stamp with VersaMark and heat set it again.  This gives it a fun watermark.  The sentiment was then stamped with Staz-On ink.

The green embossed banner is actually metal tape that I adhered to cardstock.  I ran it through my Sizzix embossing folder (Regal Flourishes) and then tapped VersaMark on the raised portions.  I covered it with Forest Green embossing powder and heat set it.  The metal stayed silver in the recessed portions.  The backdrop is a Hambly Screen print (acetate with a design) and the card base is kraft paper.  I thought it went nicely with the Vintage embossing powder.

Now it's your turn!  You have the entire month of June to come up with a project following the sketch. Can't wait to see what you make.

Wednesday, April 24, 2013

Silhouette


Using the new Silhouettes stamp set from Sparkle N Sprinkle, I combined two different techniques to achieve the end result: Molten Pearls (also known as embedded embossing) and Cracked Ice technique (also known as the Cracked Glass technique).

I used two different embossing powders, Pineapple and Moss Star.  Start out by trimming a piece of cardstock slightly larger than the stamped image.  Cover the entire piece with VersaMark and then Pineapple embossing powder.  Heat set.  Ink up the rubber stamp with VersaMark and stamp directly onto the cardstock embossed with Pineapple embossing powder.  Cover with Moss Star embossing powder and heat set.  Those bits of glitter in this embossing powder really sparkle and shine backed by the lighter colored Pineapple.  (This is the Molten Pearls technique.)

Next, cover the entire piece with VersaMark again and cover with Super Thick Clear embossing powder.  Heat set.  Repeat this step several times, building up the layers of embossing powder each time.  You can leave it at this step - it's super shiny, like glass - or you can continue to the next step, which is putting it in your freezer for a few minutes.  When you take it out of the freezer, bend the cardstock back and forth, causing the clear embossing powder to crack.  If you want more cracks, place it back in the freezer again.  To emphasize the cracks, use a sponge dauber and rub in a bit of ink into the cracks. (This is the Cracked Glass or Cracked Ice part.)

Using a Spellbinders Fancy Tags Three die, cut out a piece of vellum and stamp your sentiment with VersaMark.  Cover with Moss Star embossing powder and heat set.  I loved combining these two techniques together, but I have to tell you, they are both hard to photograph.