Showing posts with label Poppy Stamps. Show all posts

Monday, April 5, 2021

Fairy Hugs/The Craft Store (formally Hochanda TV) - April

Today I'm sharing samples created for the Fairy Hugs April New Release. There are 22 new designs and they are making their debut on Hochanda Craft TV today. You can catch the shows any time during the next 60 days.

Tree Condo
Skunks - FSH-120
Raccoons - FSH-119
Rocks - FSH-116
Flower Vine - FSH-121
Ducks - FSH-118
Grass - FSH-114
Pond - FSH-117
Fairy Hugs Glitter - Pixie Dust

Angela - FSH-111

April
Pine Branch - FSH-115
Raindrops - FSH-101
Dotted Mushrooms - FSH-112
Whimsical Flowers - FSH-113
Grass - FSH-114

Zippy - FSH-104
Condo Dwellers2 - FSH-108
Fairy Wind - FSH-103
Fairy Hugs Stencil - Woody

Dandelia - FSH-102
Fairy Hugs Glitter - Arctic

Elaina 
Fairy Hugs Stencil - Woody
(clear acetate floating frame - shown on top of black cardstock)

Elaina 
Fairy Hugs Stencil - Woody
(clear acetate floating frame - shown on top of woodgrain cardstock)

Estrella - FSH-105
Fairy Gate
Whimsical Flowers - FSH-113
Grass - FSH-114
Wooden Walkway - FSH-066

Lila and Robin (Lila) - FSH-110
Moon Dust - FSH-106
Magically Made By
Fairy Hugs Glitter - Pearl
Fairy Hugs Glitter - Bumblebee

Lila and Robin (Robin) - FSH-110
Pond - FSH-117


Thanks so much for stopping by.  Until next time....


Wednesday, February 17, 2021

Scotch Man (DRU Inspiration)

Hey everyone, it's my turn on the Dies R Us Inspiration Blog. Today I'm sharing a masculine birthday card, but it would really be perfect for anyone who loves a good glass of bourbon/whiskey/scotch etc. 😀

I used the following dies from Dies R Us:

Poppystamps: Happy Birthday Background (any of these would work)
Spellbinders: Sunday Drive with Santa add-on (any small image would work for the bottle label)
MFT: Bitty Birthday Wishes (any of these would work)

As I usually do, I die cut all my pieces before starting the assembly process. I started with the Whiskey bottle and die cut everything in both white cardstock and in vellum.  At this point I wasn't exactly sure how I was going to combine the individual pieces, but I knew I wanted to color the bottle with my Copics. I ended up adding the vellum to the top of the bottle and around the outsides of the glasses to give each of these pieces a frosted look.


The label was die cut from a piece of silver mirrored cardstock.


Next came the small deer head for the label. This was also die cut from vellum.


The Tall Birthday Candles and the Slimline Scalloped Rectangles were die cut from white cardstock as well. These pieces will be for the inside of the card.


I used the negative pieces from Poppystamp's Happy Birthday Background die for the front sentiment.


Brown cardstock was used to die cut the  Slimline Gentlemen Background and then it was adhered to a page from an old dictionary. (If you look closely, it's one of the "S" pages and defines the word Scot and Scottish.)


This is the inside of birthday card.


And one final look at the front of the birthday card:


Head back to the Dies R Us Blog tomorrow for more fabulous inspiration from the DRU Inspiration design team.


Don't forget to come join in the fun at the Dies R Us Challenge Blog.  There's a new challenge theme offered on the 1st and 15th of each month and one lucky randomly drawn winner will receive a $10 gift certificate to the Dies R Us Store.  For your convenience, all the important Dies R Us links are provided below.

click below for:


Thanks so much for stopping by.


Wednesday, January 13, 2021

Friendship {DRU Inspiration}


Hi everyone. I'm back today with a new project for the DRU Inspiration team.  I created this cute card for a friend of mine who doesn't care for typical Valentine's cards.  That's why I made it about friendship. 😀

I used the following products for today's project.

Poppystamps: Pinpoint Hearts
My Favorite Things: Skinny Strips (many of these would work)
Crafters' Companion: For A Special Friend stamp and die set (many of these will work)
La-La Land Crafts: Love Notes stamp set (any stamped image or die cut will work)


I started out by stamping my image with Memento ink and then coloring it with Copic markers.  Since I used a stamp positioner to stamp the image, I left the stamp in place while I colored it. Once it was colored, I placed the stamped image back in the positioner and stamped it again with VersaMark embossing ink. Then I heat embossed it with Clear embossing powder.  This extra step gives the image much more definition and a bit of shine. I fussy cut out each animal and saved the other two for upcoming projects.

Next up I used my paper trimmer to cut some patterned papers to the correct sizes for matting on an A2 sized card. On the smaller of the two mats, I die cut the Pinpoint Hearts.  Once this was die cut, I thought the pinpoints didn't stand out as much as I wanted, so I added a darker ink to the die cut area.  I didn't like that either, so I added the same ink randomly to the rest of the mat. Then I die cut another piece of the same patterned paper and fussy cut around the edges. 

I die cut my word Friend from the same patterned paper as the backing mat and stamped the other part of the sentiment onto white cardstock. I die cut this out using a small label die. You could also hand cut it.

Now I was ready for the assembly of my card. I adhered the backing mat to my white card stock base. Next came the patterned paper that I added lots of ink to and then the fussy cut out heart directly on top.  I completed the card by adding the panda and my sentiments.

Here is one final look at today's project:


Head back to the Dies R Us Blog tomorrow for more fabulous inspiration from the DRU Inspiration design team.

Don't forget to come join in the fun at the Dies R Us Challenge Blog.  There's a new challenge theme offered on the 1st and 15th of each month and one lucky randomly drawn winner will receive a $10 gift certificate to the Dies R Us Store.  For your convenience, all the important Dies R Us links are provided below.

click below for:


Thanks so much for stopping by.


Monday, December 14, 2020

Cottage {Fairy Stamper}


Hey everyone! Happy Monday.  Today I'm sharing another project created for Fairy Stamper.  I created this scene using the Fairy Hugs Stone Wall stamp, and a number of different die cuts. 


I only used the one stamped image, but I wanted to show how well these Fairy Hugs stamps coordinate with many dies that you may already own.  One of the things I like about this particular stamp is that you can extend the wall in either direction quite easily  The stones are staggered perfectly so you can match up the ends and keep stamping.

For this project, I stamped the Stone Wall once with Distress Ink and then fussy cut it out.  The rest of this card is comprised of the following dies: Poppy Stamps (Proper Brick House), Memory Box (Puffy Clouds), Your Next Stamp (Chunky Grass), Sizzix/Tim Holtz (Funky Florals #3), and Elizabeth Craft Designs (Country Scapes-Woods 2).  

I die cut everything out of white cardstock and added color using my Copic markers. For me, this is easier than trying to coordinate different pieces of cardstock.  I also added a touch of Fairy Hugs Glitter Powder (Pixie Dust) to the flowers.  I love how the Pixie Dust takes on the color beneath it and just adds more sparkle.

Be sure to join our Fairy Stamper Facebook group to see all the latest inspiration from the design team and from the members.  This is YOUR group where you can ask questions, get inspired, and share your projects with us!


Until next time,


Thursday, August 13, 2020

Eden {Lavinia World #33}


It's Thursday and time for a new Lavinia World Challenges #33.  The theme is always anything goes and the winner will receive a generous gift card to go shopping at Lavinia World.

I used the following products for this card:


I also have a 🧚 🧚 🧚 SNEAK PEEK🧚 🧚 🧚  that I'm sharing with you today.  Fairy Hugs is coming out with a brand new Raven Black pigment ink pad and I was fortunate enough to try it out!  I absolutely LOVE 😍 this new ink pad.  You get clear, crisp silhouette images on the first stamping.  No need to stamp it two or three times to get your image completely covered! Both Pipin and Eden were stamped with this new ink pad and, as you can see, perfect coverage the first time I stamped it!  I plan to do a comparison video between this new Fairy Hugs Raven black ink and VersaFine Clair Nocturne as soon as the new ink pads are available.  So stay tuned for that as well.

This was actually a very quick card to put together since I used the SceneScapes pre-printed cardstock and the new Fairy Hugs Raven Black ink.   Once Eden and Pipin were stamped, I then die cut the focal point out using the Poppystamps die.

I added some color to Eden's hair and wings using the Gelly Roll pins. I also added a few accents to Pipin.  Next, I added the Fairy Hugs Glitter Powder to the berries and leaves on the die cut. Here's a close up of her hair and wings (and you can see what great coverage this new ink pad has!).


I decided not to create an easel card, so I cut off the portion of the base card that I wanted.  I wanted to duplicate the focal point with a solid color, so I picked up the pinks from the printed cardstock and die cut some pink cardstock.  I offset this solid layer with the stamped layer.

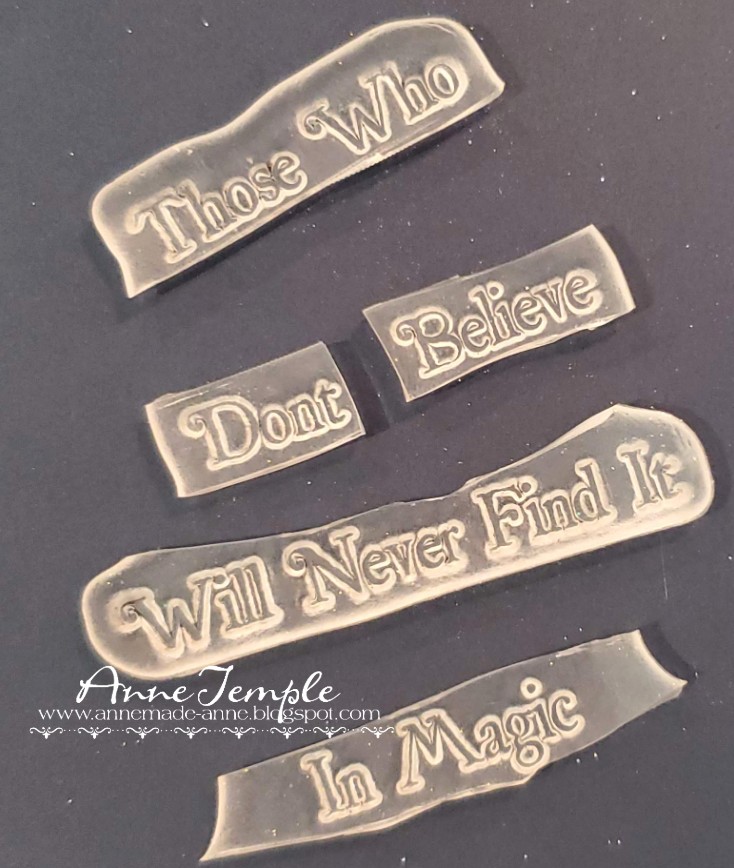
For the sentiment, I used two more dies from the set and the lower part of the Scenescape paper.   I cut my Believe in Magic stamp apart so I could stamp the words individually when I wanted to.

After die cutting the smaller part of my sentiment base, I stamped the word Believe with VersaFine Clair and then heat set it with Clear embossing powder. I added a pop dot to the back of the sentiment and added it to my card.  I also added a few dots of the Gelly Roll pen and some more Fairy Hugs Glitter to the label.


Now it's your turn and I hope you'll join us.  You can either upload your newly created project to the Challenge Blog or you can join our Anything Lavinia Facebook group and upload your project there.  

If you upload into the Anything Lavinia album, your project must include something Lavinia (stamps, paper); if you upload to the Challenge Blog, anything goes as long as you have used a physical stamp on your project.  

You can share your projects with us on the Challenge BlogFacebookInstagram, and our Anything Lavinia Facebook group:

Anything Lavinia


Play in our Anything Lavinia Facebook Group
and/or our Lavinia World Challenge Blog

 Don't forget to include #laviniaworldstore on your projects and tag us at @laviniaworldstore so we can be sure to see and comment on your Lavinia projects!
Sign up to receive our Lavinia World Challenges and all the amazing inspiration from our Designers sent directly to your emails.

Please note that although we carry the full Lavinia range, we are not part of any other entity or Facebook group that carries Lavinia stamps. ONLY the cards posted to Lavinia World Challenges will be entered into the drawing for the Lavinia World prize.  Also note that the gift certificates are ONLY valid at the Lavinia World website.


Check out Lavinia World's 
YouTube Channel and their amazing video team! This wonderfully talented group creates how-to videos every Monday, Wednesday, and Friday (and sometimes more often). Be sure to SUBSCRIBE so you don't miss a single one!

You have until Monday, August 24 to enter in either Lavinia World Challenges or Anything Lavinia.  The winner will receive a very generous $15 gift code to do some shopping at Lavinia World.


Until next time..... 

Monday, June 8, 2020

Foiled Again!


Hey everyone, today I'm sharing another project I created for the Dies R Us Inspiration team using foil.

Last week I showed you how to create a foiled die cut using a small, thin die cut.  I wanted to show alternative ways to apply foil to die cuts without needing a foil machine. Today's project uses a similar technique but with a large die cut word and the same fun DIY embossing plate.

I used the following dies for today's projects:

Sue Wilson Designs: Italian Collection-Background (many of these would work as well)
Poppystamps: Luscious Script Hello
The first step in this project was to create the DIY embossing plate.  I used the Sue Wilson Background die and die cut a thin piece of magnetic sheet.  You might have to run it through your machine a couple of times to get it to cut all the way through.  But once it does, it created great dimension to your dry embossed projects.  

I used the debossed side instead of the raised side for this card front. After using the direct to paper method and grey ink to color the main part of the white cardstock, I added vibrant color to the indented areas using Spectrum Noir sparkle markers.  The contract between the dark grey and the bright blues and pinks really made the flowers pop.

Next I began the foiling process for my die cut.   


I die cut a piece of a double side sheet using my hello die.


After carefully removing the protective layer from the front of the die cut, I applied the foil, decorative side up onto the exposed adhesive and burnished it in with my finger tip.


I also exposed the adhesive on the backside of the die cut and added a strip of vellum.


Once everything was burnished on both sides, I removed the foil and my sentiment was ready to be added to the front panel of my card.


For the background, I used a piece of glossy photo paper and added alcohol inks to the surface.  You don't see too much of it, but it adds color without overwhelming the focal point.

Here's one more look at the finished project:


I hope you've enjoyed today's project.  Head back to the Dies R Us Blog tomorrow for more fabulous inspiration from the DRU Inspiration design team.


Don't forget to come join in the fun at the Dies R Us Challenge Blog.  There's a new challenge theme offered on the 1st and 15th of each month and one lucky randomly drawn winner will receive a $10 gift certificate to the Dies R Us Store.  For your convenience, all the important Dies R Us links are provided below.


click below for:
FRIENDS OF DIES R US PINTEREST PAGE

Thanks for stopping by!