Showing posts with label Nuvo Embellishment Mousse. Show all posts

Monday, December 28, 2020

Dream {Fairy Stamper}


Today's Fairy Stamper project is another quick and easy one.

The focal panel showcases the Fairy Hugs Stardust stamp.


To create the galaxy effect on my oval focal panel, I used a variety of Nuvo Embellishment Mousse colors on black cardstock.  Once I was happy with the look, I stamped the Stardust image multiple times with VersaMark and then heat embossed it with a yellow sparkle embossing powder.

The blue panel behind the focal panel carries the Stardust theme as well.  I stamped the image several times around the edges with VersaMark and allowed it to dry naturally.  I love how it leaves a watermark image where you stamp.

The yellow panel was dry embossed using a Crafters Companion embossing folder (Distress) and my sentiment is a die cut that I added Fairy Hugs Glitter Powder (Pixie Dust) to for added sparkle.

Come join our Fairy Stamper Facebook group to see all the latest inspiration from the design team and from the members.  This is YOUR group where you can ask questions, get inspired, and share your projects with us!


Until next time,

Thursday, May 23, 2019

Freya's House {Lavinia World Challenges #1}


I am so excited to be sharing my first Lavinia World Challenges project with Lavinia World with you!  This is a brand new US company and we have a brand new Challenge Blog that runs bi-weekly on Thursdays.  Lavinia World offers all the Lavinia stamps and papers (which are manufactured in the UK). Lavinia World does ship world-wide.

The theme is Anything Goes using stamps (either rubber or clear, but no digis).  If you join our challenge and use Lavinia stamps, then you double your chance of winning the Designer's Choice Award.

The winner will receive a $15 gift certificate to Lavinia World!

So let me tell you a little bit about my project.  The Lavinia stamps I used are  Freya's House, Quirky Mushrooms, and Stars Miniature.  The background paper is also a Lavinia paper called Spellbound.  These papers are absolutely gorgeous!!

(I've darkened this photo a bit so you can see more of the details)

To start out, I die cut a standard circle using a Spellbinders die.  I also die cut the Impression Obsession Geometric Cutout 2 from a scrap of cardstock.  I used this cutout as a stencil and added Nuvo Embellishment Mousse (Lemon Sherbet) to the center of my paper.  Next I used more Lemon Sherbet and Worn Linen embellishment mousse on the circle and created a large moon.

I stamped Freya's House onto white cardstock with VersaMark ink and heat set it with Zing embossing powder (Brownie).  Then I carefully colored my stamped image with Copics (they aren't very friendly with embossing powder) and colored pencils.  After this was complete, I fussy cut it out.  Nuvo Crystal Drops (Ruby Slippers) was added to the heart.

I stamped the Star Miniature multiple times with VersaMark and heat set it with Midnight Madness embossing powder.  This is a black embossing powder with bits of glitter added for sparkle.

The Quirky Mushrooms were also stamped multiple times along the bottom of the paper and heat set with Military Green embossing powder.  Then I positioned Freya's House where I wanted it and adhered it to the paper.

I die cut several insects from a Die-Versions die set (Buggy) and heat embossed the dragon flies with Midnight Madness and the caterpillar with Military Green.

The frame around the focal point was die cut using a Tonic Studios die (Greek Temple layering set) and then I added more Midnight Madness embossing powder to the edges. These were then adhered to a dark blue cardstock (also die cut from the same set) and finally to a black card base.

I had so much fun creating with these stamps and I can't wait to build up my collection so I can play even more 😄.


We'd love it if you would Like Lavinia World on Facebook and Follow us on Instagram (LaviniaWorldStore).  Don't forget to tag us so we can see what you've created and comment on it.  You can also get bi-weekly inspiration delivered directly to you email, by subscribing to our Lavinia World Challenges blog.

Check out all the amazing stamps and papers at Lavinia World and come play along!  Remember, if you use Lavinia stamps in your projects, your chances of winning are doubled for each project you submit!

This first challenge lasts until Monday, June 3.  The winner will be announced on June 6 and Challenge #2 will also begin.

I'd like to join the following challenges
A Bit More Time to Craft (Anything Goes, #92)
World Wide Open DT Challenges (Anything Goes)
Creative Cottage Challenges (Add Ink)  edited: Winner of this challenge
Classic DT Open Challenge
The House that Stamps Built (Anything Goes, M2219)

Until next time.....


Wednesday, March 6, 2019

Hey Y'all Mixed Media Tag {Scrapy Land #109}


Hey Y'all, it's the first Wednesday of the month and that means it's time for a brand new Scrapy Land Challenge.  The theme is always Anything Goes using any brand of die that Scrapy Land sells.

Today I'd like to share a mixed media tag/card and the following dies were used to create this tag:


Elizabeth Craft Designs: Planner Patterns
Sue Wilson Designs: Floral Collection-Layered Loops
Frantic Stamper: Hey Y'all


In addition to the dies, lots of embossing powders, washi tape, vintage book pages, Nuvo Embellishment Mousse, Nuvo Mica Mists, and Distress Inks were added to the tag.  I just kept adding and adding until I was happy with the results.  I even added a few of the negative pieces from the Planner Patterns die cut.  That's the beauty of a mixed media project - you can just keep adding various mediums to create something uniquely yours!


Once everything was adhered to the tag, I added the completed tag to the card base.  Now I have plenty of room on the inside to add my message to the recipient.


Scrapy Land is also having a new Design Team Call.  You can find out all the details here.  Looking forward to seeing all your amazing projects.  Best of luck to everyone who is interested in joining our team!


Now it's your turn😀.  You have until March 17th to play along with the Scrapy Land Challenge #109 and have a chance to win one of two $10 gift certificates from Scrapy Land.  We can't wait to see what you create!

Monday, February 18, 2019

Enjoy


Hey everyone, today I'd like to share my first post using The Stamp Doctor dies and stamps.  I created this fun card using the Coffee Cup Cake Stamp set and the coordinating Coffee Cup Cake Die set.


To start off, I stamped my cupcake, the cupcake topper, the cherry, and coffee mug with London Fog Memento ink as I wanted a "no lines" image.  After die cutting each image out, I colored them with Copic markers.


After the cupcake topper was colored, I stamped the little "sprinkles" on top using Memento ink (Rich Cocoa) and VersaMark.  I added Rose embossing powder to the VersaMark and heat set to create the pink sprinkles.   Pop dots were added to the back and adhered to the cupcake base.  The cherry was also pop dotted for even more dimension. 

Another cherry was added to the center of the mug.  Glossy Accents was then applied to the mug to give it more of a ceramic look. 

I die cut the large spoon from the Coffee Cup Cake Die set and heat set it with Silver Detail embossing powder.  To insert the spoon into the liquid, I cut a small slit with my exacto knife.


The mat was created by stamping the word Enjoy and the cherry randomly over a piece of white cardstock.  Copics give the cherries color and were used to give more color to the background.

A deckle paper trimmer was used to cut the yellow mat.  Then it was dry embossed using a Tonic Studios embossing folder (Simple Stripes).  Then all the layers were adhered together.


In addition to creating the above card, I also die cut and embellished the Card Easel Die. After die cutting from heavy cardstock, I dry embossed it with a Sue Wilson Designs embossing folder (Rambling Blossoms) and then added Nuvo Embellishment Mousse (Burnished Bronze) to bring out the de-bossed areas.  There are so many different ways to make this simple die cut unique to what you want.  I see lots of possibilities 😀!

Here is what the Card Easel die looks like showcasing a card:


Wednesday, January 2, 2019

Just To Say {Scrapy Land #105}


🎉  Happy New Yea 🎉

Can you believe it's 2019?!? It's also time for the first new Scrapy Land Challenge of the year. The theme is always Anything Goes using any brand of die that Scrapy Land sells.  Here is a list of all your choices.

Today's card uses two dies - Elizabeth Craft Designs: Entwined Ovals and Tonic Studios: Just to Say (but you could use any sentiment die as a replacement for this one).

The mat was dry embossed using the 3D embossing folder from WR Memory Keepers (Geometric) and then I added the ovals (I die cut the larger one twice and layered them on top of each other) and the flowers.

The sentiment was die cut from white cardstock and adhered in the center of the ovals.


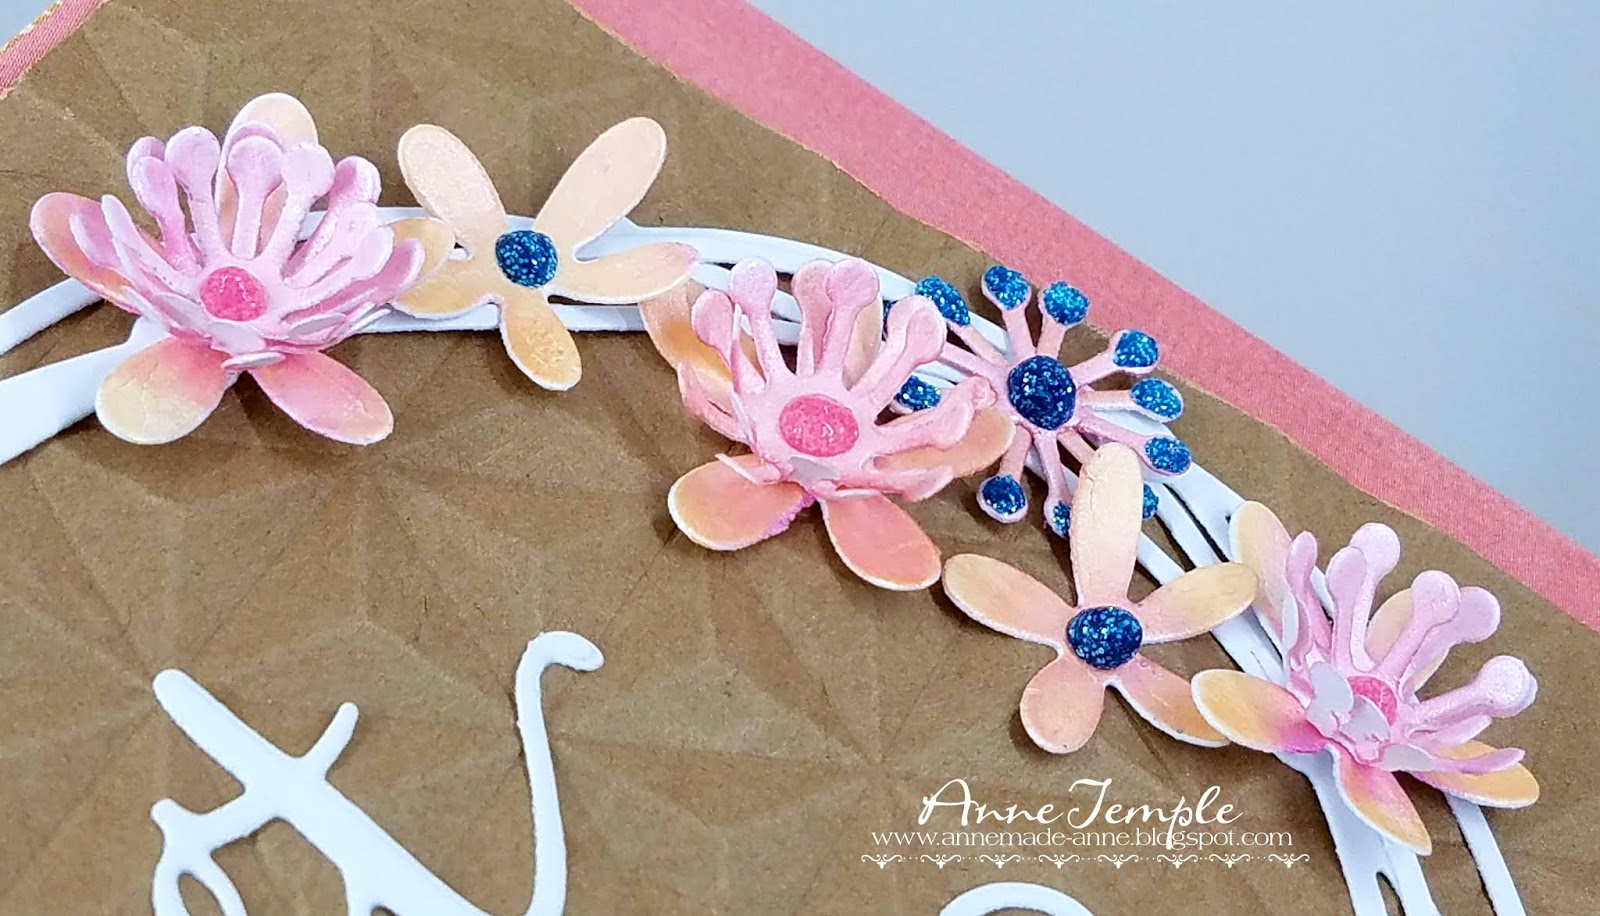
The Entwined Ovals die set also comes with the flower dies.  The flowers were all die cut from white cardstock and then a combination of two of the Nuvo Embellishment Mousse ( Peony Pink and Coral Calypso) was added to each one for color.  I die cut multiples and layered and shaped each one of them.


Nuvo Crystal Drops (Sherbet Summer) and Glitter Accents (Atlantic Drift) gives the flower centers extra color.


Now it's your turn to play along.  There are two winners for each Scrapy Land Challenge (all the details are on the Scrapy Land Challenge blog).  You have until Jan 13 to join in on the fun.


Wednesday, December 5, 2018

thanks


Hey everyone, it's that time again - the first Wednesday of the month. (Can you believe it's already December??)  That means it's time for a brand new Scrapy Land Challenge #103.  The theme is always anything goes using any brand of die that Scrapy Land sells.

I needed a quick thank you card for my husband to send out.  (That means it needed to be more masculine looking 😀).  This was quick and easy.  It would also be quite easy to mass produce and it's flat for easy mailing.

I started out by using a 3D embossing folder from WR Memory Keepers (Geometric).  I love both of the embossing folders that came in this package and have already used them several time!

Next up I took out several pots of Nuvo Embellishment mousse (Aquamarine, Cosmic Brown, Mustard Seed) to give a bit of color to the white background.  I started with the Cosmic Brown and used a dauber to lightly add color to the raised areas on the card front.  Next I spritzed some water into the Aquamarine to get it nice and juicy and used my fingertip to incorporate the water.  Using my fingertip covered with mousse, I added some of this color to the recessed areas of the card front.


I used the Die-Versions Curly Word Thanks die for the sentiment, but you could use any of these choices as well.  I die cut the word out twice, once from black cardstock and once from white.  I then added Mustard Seed Nuvo Expanding Mousse the white die cut for color.

Now it's your turn to join the Scrapy Land Challenge #103.  You have until Dec 16 to upload your project for you chance to win one of two gift certificates to Scrapy Land.  We look forward to seeing what you create!

Wednesday, October 3, 2018

Christmas Sweaters {Scrapy Land #99}


Hey everyone, it's time for a new Scrapy Land Challenge #99!  I have a quick and easy to mail Christmas card to share with you today.  The theme is always Anything Goes using any brand of die that Scrapy Land sells.


The following dies were used for today's card:


Cheery Lynn Designs: Fun with Sweaters (here are other options)
Frantic Stamper: Deckled and Torn Edgers
Die-Versions: Tis The Season Sweet Wordlet (here are other options)


I have to say, I love these Cheery Lynn Sweaters and can think of so many uses for them other than on a Christmas card.  I think they would make adorable gift tags, you could customize these for any holiday, or how about for your favorite football team.  The list could go on and on 😀.

To create these two sweaters, I die cut one from double sided adhesive and added mini pompoms all over the top.  For the second one, I ran the top portion of the sweater through a embossing folder (Cuttlebug-Spots & Dots) and die cut the Ho Ho Ho from glittered cardstock.  Mini pompoms accent the front.

The green mat was die cut using the deckled edgers and then dry embossed using one of my favorite Christmas embossing folders from Crafters Companion (Christmas Merriment).  Nuvo Embellishment Mousse (Aloe Vera) was used to highlight the raised portions.

Now it's your turn to come play with us at the Scrapy Land Challenge.  You have until Oct 14 to upload your projects for a chance to win one of two $10 gift certificates to go shopping at Scrapy Land.


It's almost here!!! We will be celebrating this major milestone in two more weeks.  There will be fabulous prizes and a blog hop.  Mark your calendars as you don't want to miss this one!


Wednesday, September 19, 2018

Moonlight {Scrapy Land #98}


Hey everyone!  It's the third Wednesday of the month (already!) and that means it's time for a new Scrapy Land Challenge.  As always, the theme is Anything Goes using any brand of die that Scrapy Land sells.  Here is a complete list of over 55 brands of dies sold and here is the list of the newest arrivals.

The dies used for this watercolor project were:


Hero Arts: Trellis (here are some other options)
Spellbinders: Grand Dome 3D Card (any type of die with an oval top will work)
Sue Wilson Designs: Noble dies-Double Pierced Rectangles, Set B
Sizzix: Tim Holtz-Funky Floral #3
My Favorite Things: Fresh Cut Grass (here are other options)


This project started out by my stamping and watercoloring various watercolor stamps from Art Impressions to create this kitty in the moonlight.  After this was completed and dry, I used the 3D Dome die to cut out the image.  I cut off the side pieces that make this die cut into a dimensional card.


Next I die cut the Hero Arts Trellis from black cardstock and heat embossed it using Clear embossing powder.  I wanted a wrought iron type of look.  I die cut it a second time from brown fun foam to add dimension to the gate.  I love how these gates can actually open and reveal what's behind them.

The blue background mat behind the focal point was dry embossed using a Crafters Companion embossing folder (Distress) and then I went over the raised areas with Nuvo Embellishment Mousse (Cornflower Blue).  To me, it resembled stars in the night sky😀.

Once these were adhered to my black card base (die cut using the Sue Wilson die), I began building my layers of flowers and greenery along the sides of the gates.  I die cut several of the dies from the Funky Floral set from white cardstock and colored them with Copic markers.  Although it's hard to tell in the photo, I added Spectrum Noir Sparkle marker to the grass.

Now it's your turn to play along.  You have until Sunday, Sept 30 to upload your crafty project to the Scrapy Land Challenge.  It can be anything from CAS to grungy to mixed media and everything in between.


The count down has begun.... only two more challenges before we celebrate our 100th Challenge!  Mark your calendars for Oct 17 because you're definitely going to want to get in on the fun and win some fabulous prizes!


Friday, August 31, 2018

Cat on a Fence

front

inside

Today I've created a card featuring the Cat On The Fence die from Cheapo Dies.  I'm sad to say this will be my final post as one of their design team members.


I started out by die cutting this die from the front panel of my card base so that there is an opening.  (The die cut is actually located on the inside of the card.)  Next I ran the front of the card base through an embossing folder from Spellbinders (Flower Fun) and then colored it with some Nuvo Embellishment Mousse (Coral Calypso, Peony Pink).


I masked front of the card and then added more colors of Nuvo Embellishment Mouse (Lilac Lavender, Lemon Sorbet) to the inside.  This gives me the backdrop for my silhouette.  Once this was finished, I closed the card front, added glue to the die cut, and dropped it down from the front.  That way, I've got perfect placement.

On the inside of the card, I randomly stamped my sentiment all over. This stamp is part of the Sentimental Stamps set by Avery Elle.


Friday, June 22, 2018

Geisha Girl


Today's project uses the Geisha die and is embellished with some negative pieces left over from one of my Fan die projects. Both of these dies are from Cheapo Dies.


I began by die cutting the Geisha from white cardstock and then applying VersaMark over the entire die cut and heat embossing it with Gilded Ivory embossing powder.


The crane was given a bit of color from Nuvo Embellishment Mousse (Indian Gold).  Nuvo Sequins (Vanilla Delight) were added here and there for added eye candy 😀.

The sentiment was given a bit of extra bling by coloring the letters with a Spica glitter pen (Lavender).