Showing posts with label WR Memory Keepers. Show all posts

Wednesday, June 5, 2019

Record Player {Scrapy Land #115}


closed
It's time for a new Scrapy Land Challenge and I have a very special birthday card to share with you today.  I created this dimensional card for my husband's birthday (he loved it!).

open


The following products were used to create this card:

Spellbinders: Standard Circles Large (any of these would work)
Sizzix: Balloon Step-Up (any of these would work)
John Next Door: Square Scene Box (this would also work)
John Next Door: Oakham Lattice
My Favorite Things: Turntable
My Favorite Things: For The Record stamp set
Create A Smile: Vinyl Greetings stamp set
Mama Elephant: Big Happy Birthday (any of these would work)


I started out by creating my shadow box using a John's Next Door die (Square Scene Box) and Graphic 45 papers.


The top of the box includes the balloons from the Sizzix die set and the Happy Birthday sentiment die cut three times for a shadow effect. (I used Tonic Studios craft papers for this.)


I die cut the turntable from dark blue cardstock and then stamped the vinyl record (by Create A Smile) with VersaMark and heat set with blue embossing powder.  The design underneath the turntable is part of the Oakham Lattice die set.  (There are a number of Sue Wilson dies that would work just as well for this step.) I thought it looked a little like the mechanics underneath a real turntable.

I stamped three more records with black VersaFine ink and embossed with Clear embossing powder.   The Spellbinders circle fits these records perfectly.  (You could also fussy cut it out.)  Once the records were die cut, I added my stamped sentiments in each of the centers.  The strip sentiment is part of the MFT stamp set.  This was also stamped with VersaFine and then heat set with Clear embossing powder.

I used the same Oakham Lattice die to die cut a piece of white cardstock for my sentiment.  I adhered this to the back of the record player.


Now it's your turn to join in on the fun.  The theme is always Anything Goes using any brand of die that Scrapy Land sells.  This Scrapy Land Challenge #115 goes until June 16.  Two winners will be chosen from the submissions.  (Full details are on the Scrapy Land Challenge blog.)

Until next time.....

Wednesday, December 5, 2018

thanks


Hey everyone, it's that time again - the first Wednesday of the month. (Can you believe it's already December??)  That means it's time for a brand new Scrapy Land Challenge #103.  The theme is always anything goes using any brand of die that Scrapy Land sells.

I needed a quick thank you card for my husband to send out.  (That means it needed to be more masculine looking 😀).  This was quick and easy.  It would also be quite easy to mass produce and it's flat for easy mailing.

I started out by using a 3D embossing folder from WR Memory Keepers (Geometric).  I love both of the embossing folders that came in this package and have already used them several time!

Next up I took out several pots of Nuvo Embellishment mousse (Aquamarine, Cosmic Brown, Mustard Seed) to give a bit of color to the white background.  I started with the Cosmic Brown and used a dauber to lightly add color to the raised areas on the card front.  Next I spritzed some water into the Aquamarine to get it nice and juicy and used my fingertip to incorporate the water.  Using my fingertip covered with mousse, I added some of this color to the recessed areas of the card front.


I used the Die-Versions Curly Word Thanks die for the sentiment, but you could use any of these choices as well.  I die cut the word out twice, once from black cardstock and once from white.  I then added Mustard Seed Nuvo Expanding Mousse the white die cut for color.

Now it's your turn to join the Scrapy Land Challenge #103.  You have until Dec 16 to upload your project for you chance to win one of two gift certificates to Scrapy Land.  We look forward to seeing what you create!

Friday, August 10, 2018

Hello Sunshine


The Jumping Dolphins exclusive die from Cheapo Dies was the focal point for my card today.


I started out by die cutting the dolphins from white cardstock and coloring them with Copic markers.


I hand drew the background and colored it with Copic markers and added highlights using a Spectrum Noir Sparkle marker.  The design was based a much smaller stamp that I have.

I recently received the WR Memory Keepers Happy Jig and thought that would be perfect to use on here. It was fun creating my sentiment out of wire and will definitely be creating more things with my new toy.

A couple strips of washi tape finish off this card.


Monday, March 10, 2014

Winter Cardinal


 A Winter's Cardinal from Sparkle N Sprinkle is one of the five new rubber stamp sets debuting this month.

I started out by coloring him with Copic markers and then using the Nesting Scallop Oval by Lifestyle Crafts.  The background is chalked in for a soft looking sky.  A VersaMarker ink pen was used to apply ink to the pine needles, which were then heat embossed with Pine embossing powder.


This cute file folder was created using the WR Memory Keepers Envelope Punch board.  You can view a You Tube video here, although a friend talked me through how to make one.  I used the Distress Embossing Technique on the edges of the file folder and the edges of the card base by applying VersaMark and Gold Tinsel embossing powder.


I wanted to place my sentiment on the inside of the file folder, but thought it was a bit plain.  So, I stamped the new Crystal Medallion into the center with Memento Danube Blue ink and then stamped the sentiment on top of this with VersaMark and heat set it with White Detail embossing powder.


A bit of twine and a pine cone shaped button are the finishing touches to this beautiful cardinal.  You can also visit my SNS Art Gallery page for more detailed instructions.


Friday, March 7, 2014

Confidential


Welcome to the joint Die-Versions/Operation Write Home Blog Hop.  The OWH folks and the DV Dynamos are teaming up to bring you lots of fantastic projects using the Die-Versions New Release dies, which feature a new set of dies that will be an OWH fundraiser product.  There will also be blog candy given away to random commenters (so don't forget to leave some lovin' as you hop along.)  Details can be found on the OWH Start-off Blog Hop post.

If you are not familiar with Operation Write Home, their mission is to support our armed forces by sending blank handmade greeting cards to write home on, as well as "AnyHero" cards of gratitude to encourage them. You can find more information for newcomers at: http://operationwritehome.org/welcome/.  For those of you who are familiar with OWH, but want a refresher on their guidelines (like don't use glitter for the safety of our troops), you can check out their guidelines page, here.


When I first saw the Confidential Express Edge, it immediately made me think of those Top Secret files I'd seen in spy movies.  So my thought process went from there.  I started off by creating this file folder using a WR Memory Keepers Envelope Punch Board.  (There are several You Tube videos showing how to make your own.  They are very easy and addictive to make :-). )  The cardstock base (front and back) was printed from some digi papers that I've had for a long time.  After die cutting the Express Edge, I distressed the edges with Distress Ink (Old Paper, Aged Mahogany).


inside
Since it was a file folder, you know there is always some loose papers on the inside.  This is where I created my sentiment, using the Torn Notebook Edge Straight die for the paper's edge, the Miss You Express Edge (cut in half), the Short Stop font (coordinates with the Express Edges) and the Gatsby font for my "beary".  The inside edges of the file folder are also distressed with Distress Inks.


This sweet little bear is a digi from Hambo Stamps and was colored with Copic markers.  Some Spica glitter pens were used to enhance his medals.  I printed it a couple of times so I could pop dot several areas for added dimension. 

Your next stop on the hop is Samantha, but in case there are some hick-ups, here's the official blog hop list with links:


Thanks for joining us on this hop and I hope it's given you lots of great ideas and inspiration.  Don't forget to leave each of us a comment for a chance to win some blog candy.  

Saturday, February 15, 2014

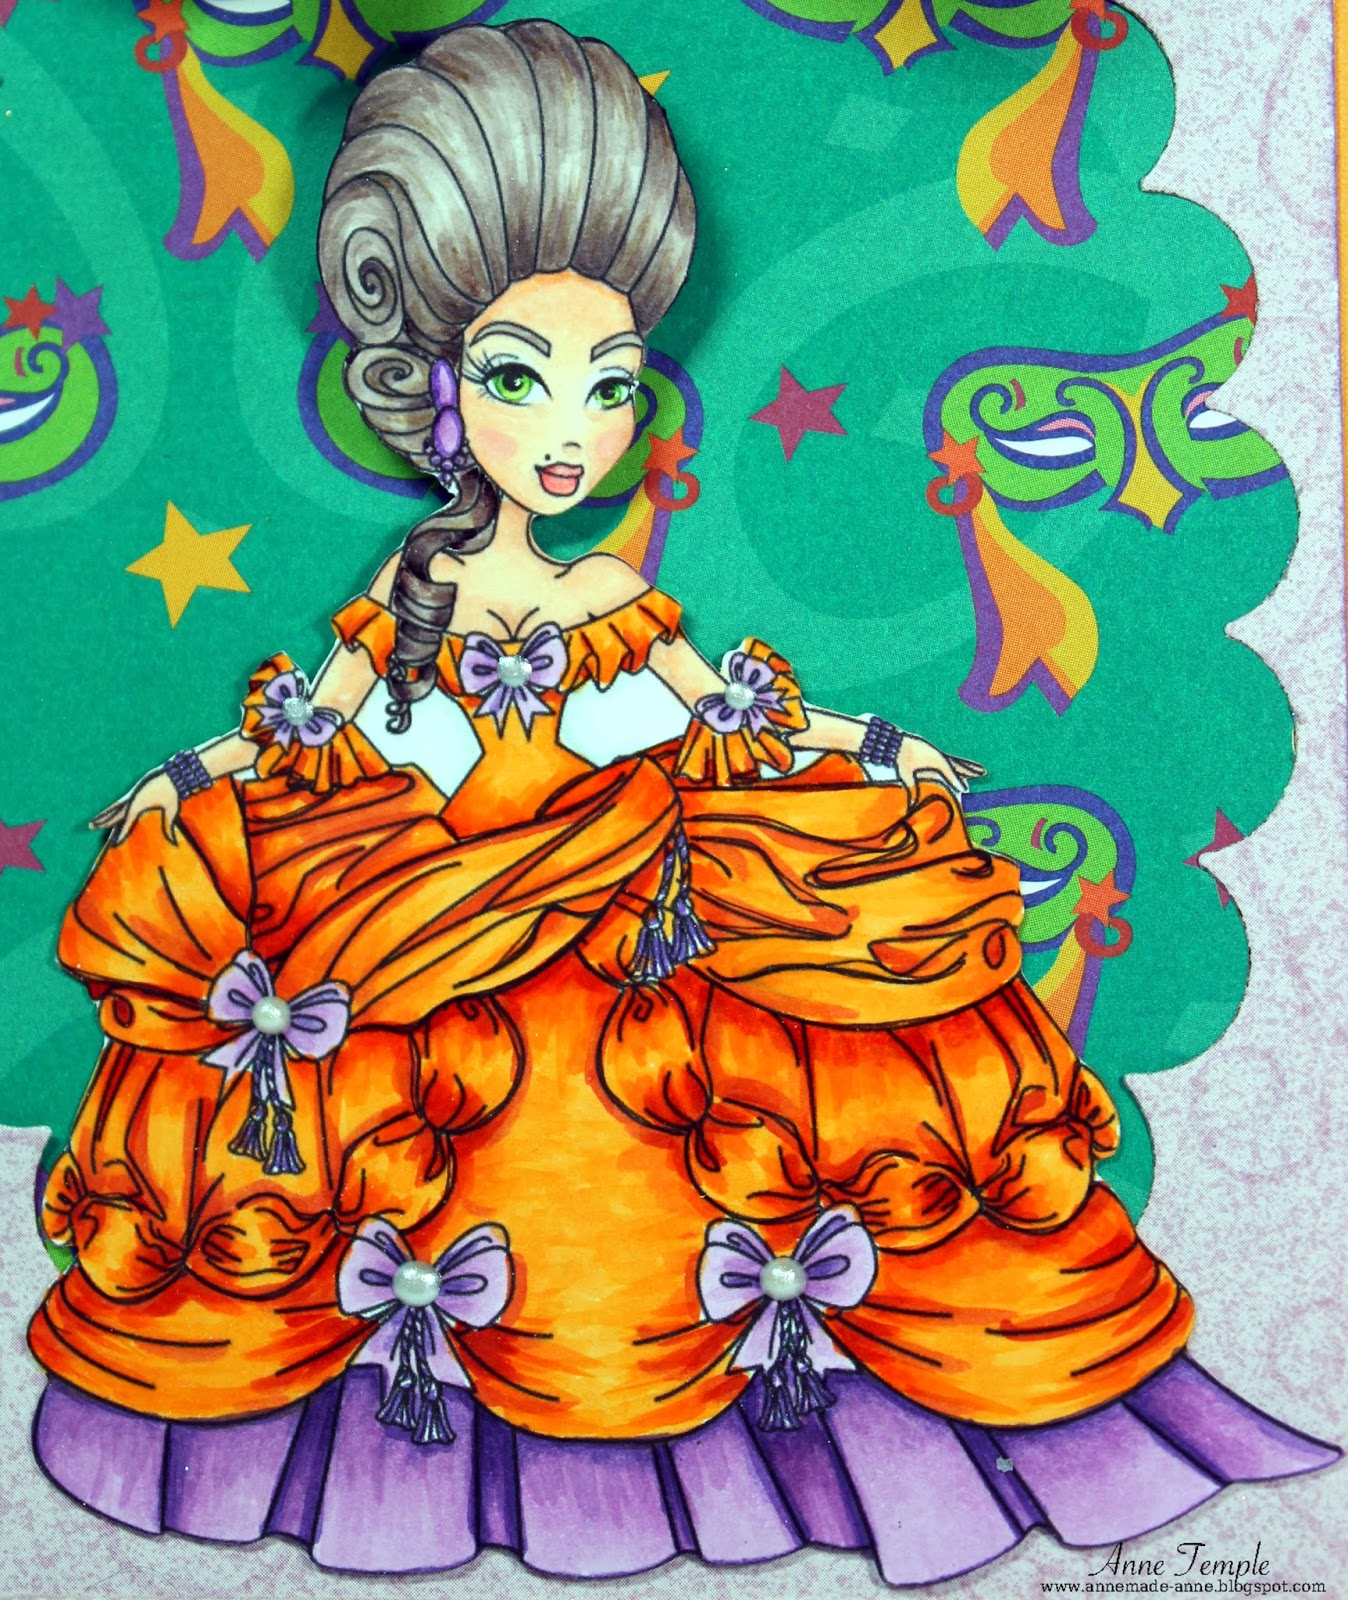
Carnival


Carnival is the theme for this bi-weekly challenge from Time4Scrap.  We have two sponsors, Sassy Studio Design and Aurora Wings.  My digi is by Sassy Studio and is Classic Marie Antoinette.  She just looked like she was going to a masquerade ball to me.  

Normally, I color my images with Copic markers and then find paper to coordinate.  I happened to be going through my scraps and discovered this masquerade masks paper and decided this would be perfect.  And her ball gown colors were instantly decided upon.  I didn't really add many embellishments because I though her dress spoke volumes :-).  


The bow at the top was created with a WR Memory Keepers envelope punch board (thanks Brenda for the idea).  You can find the You Tube tutorial here.

Now it's your turn.  You've got two weeks to upload your projects to Time4Scrap.  Don't forget to check out what the rest of the team has created (they've used some really cute images).

Thursday, November 14, 2013

Cozy Fireplace


Die-Versions newest release is all about Winter.  For those of you who live in snowy areas (or takes vacations in those areas), the fun doesn't have to stop when you come inside.  Setting by a roaring fire after being out in the cold weather sounds pretty fun to me and combining the new Winter Fun Express Edge and the Cozy Fireplace Whispers die is the perfect way to express this idea.

To create this scene, I started out with the Cozy Fireplace Whispers die and die cut it several times from various papers so I could layer them on top of each other.  This gives it dimension without a lot of added bulk.

The greenery above the mantel was colored with Copic markers and I added a touch of green tinsel glitter to the wreath.  Glittered cardstock was used for the swag and to fill in the leaves.  To give the fire a bit more spark, Cloud Nine velvet glitter from Sparkle N Sprinkle was added.  The bucket of wood was pop dotted for even more dimension and a Spica glitter pen was used to create the bricks in the fireplace itself.  A bit of paper piercing finishes off the front panel.

What better way to complete the package than to go ahead and create a handmade envelope with the WR Memory Keepers envelope board AND create your own labels using the sleigh from the new Cold Weather Wee Petites?

First, I used standard labels that you buy at the office supply store, used Word to fill them out, and printed them.  Then I adhered my sleigh which, as you can see has been blinged up with Gypsy Red and Sonic Silver velvet glitter, both from SNS.  These little Wee-Petites are the perfect size to design your own address labels with.

For more great inspiration, don't forget to visit the DV Blog and the DV Facebook page.