
Since everyday life encroached and overtook my crafting time last week, I decided I would do a tutorial on how I made this book for my mother-in-law. This is the first time I have put together one of these and I received my inspiration for this about a year ago from this site. I only had a picture that I had printed out, so I figured things out as I went.
All the pages are lightweight chipboard. The front and back covers are 7" x 5" and the six pages are 6" x 4". Cut your chipboard to size and choose your papers. I chose a background patterned paper and a coordinating paper for each page. I used my Spellbinders Label Four (the largest die) to make my pocket for each page using the coordinating paper. This pocket is what holds in the flower seed packets.


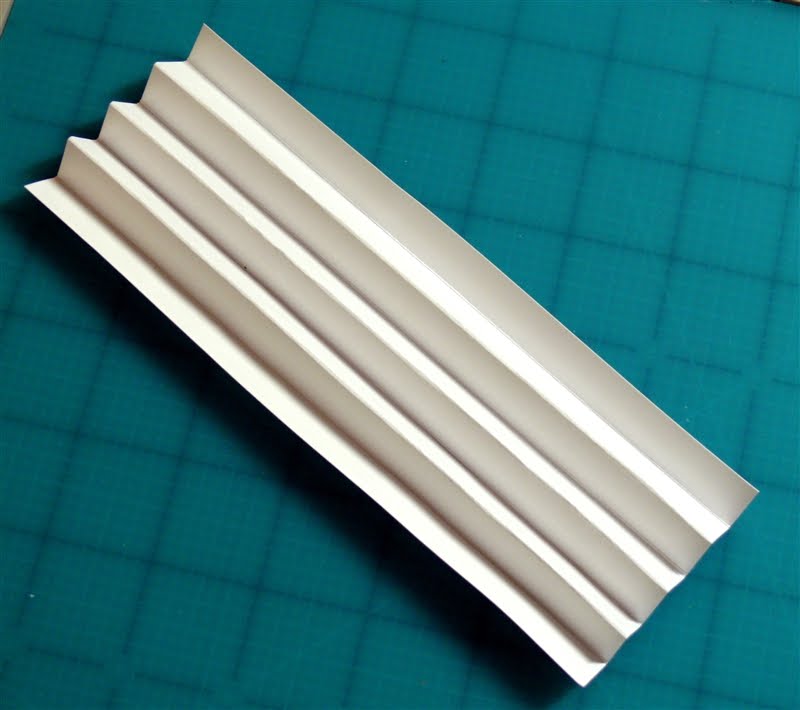
The next step is to take a piece of 7" x 4" white cardstock and score it at every 1/2" mark. I used my Scor-Pal for this.

Fold the scored cardstock accordian style. You should have eight divisions before you fold it, beginning with #1 on the left. You should also have four "valleys" once you have folded it. This is the backbone of the book. You will eventually attach the covers and each page to this piece of cardstock.
Before attaching the patterned paper to my lightweight chipboard, I took a black marker and colored all the edges of each piece of chipboard. You don't have to do this step; I'm just not fond of the natural color of chipboard.
 Cover each page (only the front side) with your paper and attach your Label Four pocket to each of the pages. I varied the way I used the labels by either folding them in half (left page) or by cutting off a portion of the bottom of the label and adhering it to the paper (right page). I used 1/4" Scor-Tape by Scor-Pal to adhere everything. To me, this tape is much better than the tape that has a red backing because you can tear it with your fingers if you want; the paper backing peels right off and doesn't cling to you; it's super strong.
 Attach your papers to the inside and outside of your two book covers.
Now you are ready to begin assembling everything once all the chipboad is covered and ready to go. Take the accordian folded cardstock, use your strong adhesive (Scor-Tape) and tape the back cover to the last section (#8) of the cardstock.

 To me, it was easier to begin working from the back of the book, so that's what I did. Apply 1/4" strong adhesive (Scor-Tape) along the left edge of your last page.
 Adhere this page in the "valley" closest to the back cover. This is section #7. Since the pages are smaller than the covers, I left 1/2" on both the top and bottom of each page.

 You want your pages to be "back to back" when you turn them, so you need to adhere the backs together. Again, I used 1/4" Scor-Tape and taped all around the back of the page.
This page will be adhered in the 3rd valley (from the front) and the #6 section. Make sure you line this page up with the previous page you just attached. Continue this process until all your pages are adhered and your book is completed.

For my "book binding", I used white duck tape so that everything was nice and secure. The final step is to embellish you new book and add you flower seed packets.
For the front and back cover, I cut two strips of paper using the Spellbinders' Grand 12" Classic Lace Border and cut it to size and I added Kaiser Craft Pearls along the edge of the front border. I had chipboard letters that I covered with Ranger's Glossy Accents that I purchased at my local craft store. I wanted a raised, shiny look for the letters. Finally, I used Distress inks to ink up the edges of my covers and pages.
This was my first attempt at making a book like this and I am happy with the results. That being said, the main thing I would do differently next time would be to adhere my background paper to my chipboard before I cut it to size. That way I don't have to worry about trying to get it perfectly aligned.
If any of my directions weren't clear, just leave me a comment/question and I'll do my best to answer it. The answer will be posted as a new comment. Go have fun making your own books. They aren't complicated and the longest part was picking out the papers. One of the pluses to this size book is that you can use your larger scraps up (and that's always a good thing!).
2 comments:
Cute project.
What a cute idea. By the way, I am not sure if I told you, but I was awarded the Kreativ Blogger award and I passed it on to you. Check out my blog for the image if you want to use it. You are now supposed to list 7 blogs and inspire you and 7 things about you. Hope you come up with a some really great lists!
Post a Comment