Thursday, February 28, 2013

Butterfly Garden


Here is a simple card I created using rubber stamps and the Butterfly Garden border die from Die-Versions.  The background was created using a couple different background stamps from Impression Obsession and the little girl is a retired clear stamp from My Favorite Things, colored with Copic markers.  After spritzing white cardstock with Smooch Spritz (Vanilla Shimmer) for more shimmer, I die cut the Butterfly Garden border twice so I could fussy cut out a couple of the butterflies.  I bent the wings and adhered them directly to the background.


What gives this card a bit more interest is that I bowed the border to make it look like the little girl and her dog are sitting on a bolder surrounded by butterflies and flowers. Easy to do and it looks pretty good in person.

For more inspiration, be sure to visit the Die-Versions blog.

Wednesday, February 27, 2013

Jumping for Joy: Life is Good


The Free Spirited Hat Ladies stamp set from Sparkle N Sprinkle has so many fun images on it.  I've used the small version of the lady jumping for joy (at least that's my impression of her) and stamped her three times.  Each one is colored a bit differently with Copic markers and I added Frosted Carmine velvet glitter to one of them.  Then I fussy cut each one out to have them perched on various letters from my Life Is Good solo sentiment die from Die-Versions.
I created the background using the Polished Stone technique.   Glossy cardstock, a blending tool, and alcohol inks are the main ingredients for this technique.  Then I used the negative portion of the die cut (saving all the little inside pieces) and adhered to my yellow cardstock.  The positive portion of the die cut will be saved for another day.  Next, I adhered my jumping for joy ladies and as a finishing touch, added Sapphire and Silk Sparkle N Soft flock all around the border of the card.


Monday, February 25, 2013

Happy Spring


Have you tried the Embedded Embossing technique?  It's a really fun thing to do and it makes mailing your cards even easier as it creates a single layer.  All you have to do is die cut your favorite images, adhere them to your base cardstock, and run them through an embossing folder.  The tighter the pattern is on the embossing folder, the better it will turn out.

What this does is embed the top layers into the base layer.  Pretty cool, huh?  Here's a close up so you can see what I'm talking about.

The Butterfly Flourish from Die-Versions now becomes part of the pale pink background as does the sentiment that I cut out using the A Little Lime  Die-Versions font.  I added some gems to the flower centers and a bow, but this is still basically a flat card that can easily be mailed without any extra padding or postage.

Don't forget to check out the Die-Versions blog to see what the rest of the team comes up with using all the Die-Versions dies.  There are some pretty amazing projects on there!

Friday, February 22, 2013

Mallards

Surprise Pop Up card - closed
Today is the beginning of a new challenge from Pattie's Creations and we want to see your Fancy Folds!  I used on of the new images - Mallards from Pattie's Etsy shop.  When I saw this fun Surprise Pop Up card fold on Karalee's blog a few months ago, I knew I wanted to try it.  You can find the tutorial here at Splitcoast Stampers.  I did have to adjust the measurements to accomodate the size of my image.


I colored the image with Copic markers and used Pan Pastels for the background.  When you pull on the tap at the top, it reveals a hidden message below.  I stamped and heat embossed the Happy Birthday with Forest Green embossing powder from Sparkle N Sprinkle.

Surprised Pop Up card - opened (front view)
Here's a view from the side, so you can see the way the mechanism works a bit better.  The image was cut out using a Spellbinders die.  In order to get the matting behind the image, I traced the die onto brown cardstock and hand cut it out since the image itself was cut using the largest die in the set.
Surprise Pop Up card - opened (side view)
I added Dark Chocolate flock to the cat tails for more dimension.  A vintage button and some twine finished out the card nicely.


You have two weeks to create a Fancy Fold card and upload it to the Pattie's Creations Design Challenge.  The rules are on the blog, but the main thing to remember is that you must use a digital or rubber stamped image on your project.  Be sure to see what other inspiring fancy folds the rest of the design team has for you too.

I'm also entering this in the follow challenges: Oozak (favorite colors); Divas by Design (fancy folds), 7 Kids College Fund (birthdays).

Wednesday, February 20, 2013

Pink Hat Lady


If you like the Art Deco style, this set called the Art Deco Ladies from Sparkle N Sprinkle is such a versatile set.  I've colored the image with Copic markers and fussy cut her out.  The backdrop is spritzed with various inks and I added a gem swirl.


Here's a close up of her.  There are lots of wonderful stamps and stamp sets in this genre, plus lots others too.   This was a pretty quick card to put together, so it would be easy to mass produce, and I think it's perfect for any occasion.  Enjoy.

Monday, February 18, 2013

Belle


Being the Belle of the Ball is easy with Die-Versions Stagelights font die.  As you can see, they are pretty large and would also be perfect with a scrapbook layout.  The smaller words are part of the Compliments - Everyday die.  The Copic colored image is from Saturated Canary and the handmade flowers are from the Rose Creations dies from Spellbinders.

Happy Monday!  Don't forget to check out the Die-Versions blog for more great ideas from the team.

Saturday, February 16, 2013

Butterflies Galore


Have you ever thought of your die cut as if it were a stamp?  That's exactly what I did with the Butterfly Flourish, one of the new February releases from Die-Versions.  I  die cut the image twice so I could pop up a few of the butterflies and colored everything with Copic markers.  I was able to add dimension without pop dots by fussy cutting out the butterflies, folding the wings and adhering directly on top of the other butterflies.   The background was created by stamping three different Unity rubber stamps with Creative Inspiration paints for a shimmery effect.

You'll want to check out the Die-Versions Blog as well as the Die-Versions Facebook page for more great ideas and inspiration.

I'm entering this in the following challenges: Allsorts (things with wings); Pink Gem Challenges (dies and punches).

Wednesday, February 13, 2013

Parasol


 Welcome to the Sparkle N Sprinkle Blog Hop.  Our theme this month is monochromatic.  Now don't thing that just because it's monochromatic that means dull and boring.  I've gone with pinks - light to darker and used the Parasol image on my flip (swing) card.  She's embossed with Japanese Lacquer embossing paste and lightly colored with Copic markers.  I've outlined the entire card with 1/8" Tear-ific tape and covered it with Cyclamen glitter.


The flip side is for my sentiment, which is from the Shabby Chic Birdhouse rubber stamp set.  I've also outlined the sentiment with Tear-ific tape and Cyclamen glitter.  For more detailed instructions, check out my SNS Art Gallery.

Making monochromatic cards and projects is alway fun and can be challenging to some as well.  For another example, check out my tag using Jasmine that I created for this month's Sparkle N Sprinkle Creative Challenge.  (You can view it here and you still have time to enter as well.)

As always, there are some fabulous prizes to be won, but in order to be eligible for any of the prizes, you must leave a comment on each of the SNS design team member's blogs.  You'll have two days to check out the wonderful creations that each of us is showcasing and leave your comments.

Hopefully, you came from visiting with Cammy; if not, you may want to start at the beginning (SNS blog), so you don't miss a thing or if you want to see the entire blog hop line-up.  The next stop on your monochromatic journey is Shona.  Have fun hopping and I hope you gets lots of inspiration to try your hand creating a monochromatic project too.

Monday, February 11, 2013

Chocolate Covered Strawberries


This was a fun card to make, using the Debossed embossing technique (also known as Double Embossing) and the new rubber stamp set, Sweet Strawberries designed by Beccy Muir for Sparkle N Sprinkle.  You can read about this technique here, in the SNS Tips and Technique section.  (I just lightly tapped the VersaMark onto the embossing folder instead of using a brayer.)  I first heard about it from a Sizzix video, so I'm sure there are several places you can check out this fun technique.

I used Distress Inks (Shabby Shutter, Forest Moss, and Brushed Corduroy) and the Bubble embossing folder from Sizzix to create the background.  I added the Memory Box border die (Tessatina border) that I heat embossed with Brown Fizz embossing powder.  When you cut this die out, be sure to save some of the negative pieces to add back to the die cut.  The Chocolate Covered Strawberries are colored with Copic markers and fussy cut out.  When adhering to the background, don't glue down the leaves; instead curl them slightly upwards, giving the piece added dimension.   The sentiment is from the Fall Harvest rubber stamp set and I heat embossed it with Brown Fizz as well.  Attaching a couple of the negative pieces of the border to the sentiment adds a nice embellishment to the oval frame.

I'm entering this in the following challenges: Sweet Stamps (embossed embossing); Simon Says (something messy).

Friday, February 8, 2013

Be Mine


It's time for a new challenge from Pattie's Creations: create a Valentine's Day card.  Perfect timing since Valentine's is only a few days away.  I've used the Valentine Bear Be Mine from Pattie's Etsy shop.

I printed him out multiple times so I could add lots of dimension and I used two different colors of ultra fine Flower Soft for his body.  Copics were used to color the small areas and Glossy Accents covers the "Be Mine" heart.  He's so soft and furry in person - just like a real teddy bear!


His backdrop is old patterned paper from Creative Memories and is cut using a Spellbinders die.  The outside rick-rack die is from Lifesyle Crafts.  I added a touch of lace colored with Distress Stains, and this little cutie is all ready to go in the mail.

You'll have two weeks to upload your Valentine's Day project to the Pattie's Creations Design Challenge blog.  Don't forget to visit the rest of the team and see what they've created for you as well.

Happy Valentine's Day!


Wednesday, February 6, 2013

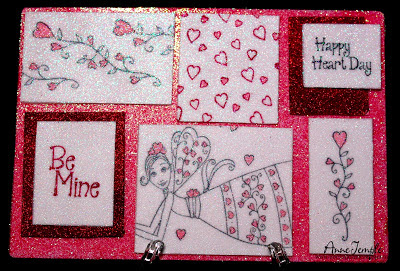
Happy Heart Day


Talk about sparkly - this one is all glitter!  I decided to let the glitter be both the embellishment and the focal point.  All of the images are from the Love Fairy rubber stamp set from Sparkle N Sprinkle.  The three panels with images were stamped with Memento Tuxedo Black ink and then covered with Cloud Nine velvet glitter.  By stamping the images first and then applying the glitter, it gives the image a softer look.  The two sentiments and the hearts panels were created by covering the cardstock with Cloud Nine velvet glitter and then stamping directly onto the glitter with Staz-On (Jet Black and Blazing Red).  I mounted the two sentiments onto cardstock covered in Gypsy Red velvet glitter.  All of the hearts were colored using a Spun Sugar Distress Marker after applying the glitter.  Each panel was then adhered to the base, which is covered with Cyclamen glitter.  You can check out the SNS Tips and Techniques section for lots of great tips on how to do these techniques plus lots of other ideas and tips.  There you have it... a very CAS, but extremely sparkly Valentine card.  

Monday, February 4, 2013

Home is wherever You are


Instead of a card, I decide to make a plaque using several different dies from Die-Versions.  Using the double glitter technique on the A Dozen Roses die, I created my backdrop for the House with Chimney Sweet Petite.  The house has glitter for the window and is colored with Copic markers.  The snow is Diamond Dust.  A bit of washi tape runs through the background.

I created this while thinking about a question we are always asked - where is home?  Well, for my family, it's wherever we are living at the moment.  We used to move frequently, so this question came up a lot.  Home is where the heart is - to me that's wherever my family is.

It's so hard to capture the sparkly goodness of glitter, so this final photo shows a bit of how this really sparkles - but it doesn't make a great picture.  To be honest, this was my third attempt at doing the double glitter technique with this die cut.  The first one was so bright (used different colors of glitter) that it hurt my eyes to look at.  On the second attempt, I changed to these colors, but didn't get my mask down well enough.  So as they say...third time's a charm.

The message was created using a couple different fonts from Die-Versions.  The words "Home" and "You" were die cut using the HollyWOOD font and the rest was cut out using the Editor-In-Chief font.  If you love fonts, you definitely need to check out all the font dies that Die-Versions has.  They are all fabulous and don't take up that much space (like all the old Sizzix alphabet sets I still own).


Friday, February 1, 2013

SNS Monthly Challenge


It's time for a new monthly challenge from Sparkle N Sprinkle Creative Challenge and they've changed the rules for 2013 to make it even easier to participate.  Now you can use any image or stamps (not just SNS stamps - although we love seeing SNS images), as long as you follow the theme.  Anyone who uses a SNS rubber or digital image though, will receive a FREE digital image.  The winner of the challenge will still receive a rubber stamp set of their choice.   How cool it that?  This month's theme is a color challenge:

Color swatch courtesy of Design Seeds® 


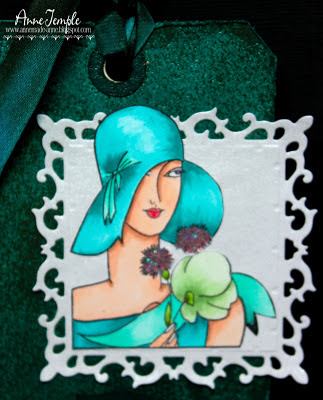
My hands got really inky making this tag, but it was so fun to make.  To create the background for the tag and the bookplate, I used Tim Holtz' Rusted Enamel technique along with various Distress Inks (Peacock Feathers, Gathered Twigs, and Brushed Corduroy).

Meet Jasmine, part of the Art Deco - Ladies rubber stamp set from Sparkle N Sprinkle.  Love this set!  She's colored with Copic markers and fussy cut out.  I've added a touch of Cloud Nine velvet glitter to the flowers for a bit of sparkle and the Fleur-de-Lis square is spritz with Smooch Spritz (Vanilla Shimmer) for some additional bling.  The sentiment is also part of the set and I heat embossed it with Clear-Transparent embossing powder (for a very subtle message).  The bottom ruffle is made out of silk ribbon, as is the tie on the top.

Now it's your turn to show us your creativity by using the colors above.  Remember, you have a whole month to upload your projects.  Be sure to visit the rest of the designers to see what they came up with using this color combo too.

I'm also entering this in the Oozak challenge (favorite colors), as these are some of my favorite color combos.


Copics used: G40, G82    E00, E01, E13   E22, E27   BG32, BG23, BG45, BG49    YG03, YG97