Monday, January 6, 2014

Spunky's Valentine


Spunky, along with his friend Rocco, is making his debut this month from Sparkle N Sprinkle.  They will become regulars and will have lots of adventures.  This set is called Spunky Skunk Valentine (#521).

After stamping and fussy cutting out the image, or parts of the image, three times, I colored Spunky with Copics and added Black Ice glitter and Twinkling Clouds Sparkling Flock to his tail.  I then pop dotted his body onto the image base and finally pop dotted the heart to the second layer.  The sentiment on the heart is also covered with Black Ice glitter. This paper tole technique gives your image lots of dimension.


The mat was created using a Spellbinders die (A2 Polka Dots) and then I used the Emboss Resist technique, using one of the other stamps from this set.  After stamping with VersaMark and heat setting with Clear Detail embossing powder, I used Distress Inks to color the background.  I also blinged up my brads (they were originally silver) using the SNS Bling Your Brads technique and White embossing powder.


The lace flower was quick and easy to do and I have a few photos for a quick step by step tutorial.  The first thing you need to do is to make your own large glue dot with the Mega Tack Glue.  Save some of the backing papers from the Super Adhesive Sheets or even the sheet that you get with all those address labels you receive for free.  Just apply the glue to the backing sheet and make a circle as large as you want.  The hard part is that you have to let it dry over night.  As you can see by the photo, it starts out white, but when it dries, it's clear.  (You can also make homemade regular sized glue dots this way too.)  Once it's dry, your ready for the next step.


Cut a long piece of lace (or ribbon or fabric) and start pushing it down onto the glue dot, going from the outside edge and continuing in a circle until the entire glue dot is covered.  I also scrunched mine up just a bit as I was adhering it so I would have a small ruffle.


I added a couple vintage buttons to the center of my lace flower and tied them together with some embroidery floss.  I also glued them down to the lace with the Mega Tack Glue.  That's it!  Easy, easy.


You can also view more detailed instructions in my SNS Art Gallery, here.

Saturday, January 4, 2014

I Heart U


For my very first project for Time 4 Scrap, we have a color challenge: incorporate Silver or Gold into your project.  Our sponsors for this challenge are Robyn's Fetish and Delicious Doodles.  I've chosen the I Heart U digi by Robyn's Fetish for my tag.


After printing the image a couple of times and printing just the sentiment in the center, I fussy cut out the heart from the scalloped edge.  Silver Lightning embossing powder from Sparkle N Sprinkle was used for the scallop border and Firecracker Red embossing powder was applied to the center heart.   Both of these have glitter mixed in with the embossing powder for a sparkly look.  Using a Memory Box die, I cut out the sentiment separately and applied Velvet Sparkle embossing powder for even more glittery goodness.  

After pop dotting the center heart, I added some red fibers behind the entire piece for more definition.
The tag was then covered with silver foil (aka Reynolds Wrap) and dry embossed with the Hearts M-Bossabilities embossing folder.  I highlighted the swirls and the edges with a Copic marker.

I also added the Hanging Hearts, from Die-Versions, to the top and bottom of the tag and heat embossed it with Silver Lightning and Firecracker Red.


So head on over to Time 4 Scrap and submit your card, tag, ATC, or a Fat page (a 4"x4" card, layout or mini album).  The winner will receive her/his choice of 3 digis.


Friday, January 3, 2014

SNS January Reveal Winners

Hi!  Thanks to everyone who played in Sparkle N Sprinkle's January Mystery Designer Party. 
We enjoyed making the new projects, and hope you enjoyed browsing. 


We released four new stamp sets and Jazzy Jill's latest Technique Video Kit:

Our mystery designers and winners are:

Emmy with “Dress Up”
25 commenters
Anet #7

Marie with “Spunky Valentine”
28 commenters
#12 Winterseve

Eret with  “Rocco with Roses”
33 commenters

apologies - Donna forgot to take a snap shot of the True Random Number Generator

#7 Desire Fourie

Anita with “Cinderella Slipper”
22 commenters
#16 Linda Gibb

Congratulations, Winners!

Thank you for checking out the products and sample cards. 
Will you please e-mail SNS_Artist@tampabay.rr.com with your mailing address, choice of one glitter and one embossing powder which can be used with your new stamp sets, and we will get your prize in the mail!

A big thank you to all for joining us in this kick off.

(and for visiting all our blogs)

hugs always from The Sparkle Team,

Tuesday, December 31, 2013

Sparkle N Sprinkle's January 1 Reveal


Happy New Year and welcome to Sparkle N Sprinkle's January Reveal.  We hope you enjoy all the new SNS products in 2014, including new, less expensive stamp sets, our own line of digital stamps, and an exclusive line of designer papers to match our glitters and embossing powders.

This month there are 4 new stamp sets being debuted by artists Michelle Perkett and Beccy Muir: Spunky Valentine, Rocco with Roses, Cinderella Slipper, and Dress Up.  

There are EIGHT chances to win: four chances in the "January 1 Reveal" contest and four more chances with the SNS Creative Challenge where the monthly theme is always Anything Goes, using Glitter, Embossing Powder, and/or Flock.

The Spunky Valentine rubber stamp set is the set included in Jazzy Jill's Technique Video of the month kit.

Four Winners (one for each new stamp set) will be selected by Random.org during the Designers Mystery Party. Winners will also get to choose one Glitter and one Embossing Powder to go with their new stamp set.

#521 Spunky Valentine
#525 Dress Up

#527 Rocco with Roses
#528 Cinderella Slipper


How the Mystery Party works:

On four of the participating blogs below, a Commenter will be selected to receive the prize. 
No one knows who the FOUR Mystery Designers are, so you may wish to visit each blog to leave a comment.

The winners will be announced on January 3 on Facebook, the SNS blog, and on our blogs:


Each of the four stamp sets are available at 20% off as part of our 2014 NEW YEAR specials.   The price should automatically be adjusted when checking out in the SNS on-line store.  Promotion valid through January 3.   You may also phone the SNS Shoppe to place your orders.


Now, on to my card using Rocco Raccoon.

Rocco was stamped and fussy cut out.  I colored his tail and face with Copic markers and the rest of his body is covered with Swanky Gray Sparkle N Soft flocking.  I used SNS dimensional glue and laid it on heavy so his body would have dimension and look like it was another layer.  A Sakura glue pen was used to outline the roses and Daisy velvet glitter was added to the petals for additional sparkle.

The frame around Rocco was created by first embossing white cardstock with the Fancy Frame embossing folder by Sizzix and then applying VersaMark to the raised edges and heat setting Shimmer embossing powder for a shimmery, but subtle look.  The corners were punched with an old EK Success punch (heart corner adorner punch) that I haven't used in ages.  Behind the open hearts, squares of Super Adhesive Sheets were applied and then I covered them with more Daisy velvet glitter.

I die cut the tag (part of a Sizzix die set) for the sentiment from Super Adhesive Sheets and then covered it with Daisy velvet glitter again.  The sentiment, which is part of the set, was stamped onto a tag with StazOn.  To create the rolled rose (Sizzix - Flowers 3D), I randomly applied Daisy velvet glitter and Bubblegum glitter to a scrap of Super Adhesive Sheets and then die cut it out.  Not to waste my newly created glitter paper, I colored an area with my Distress Marker (Mowed Lawn) to die cut the leaves (Spellbinders - Foliage).

The next layer peeking out, also cut from some Super Adhesive Sheets, was die cut from the Taylored Expressions Circles cutting plate and covered with Shimmer embossing powder.  The pale pink card base pulls it all together for a nice Springtime/anytime card.

Your next stop is Belinda.  Don't forget to leave everyone a comment in order to have a chance to win.  We'd all love it if you wanted to become a follower of our blogs too. :-)

New Teams to play with!

I'm excited to announce that I will be on two more teams in 2014, Pattie's Creations and Time 4 Scrap!


Some of you may recall that I've been on Pattie's design team before.  I was so honored when Pattie emailed and asked me to join her group again, that I said yes right away.  This time around there will be two teams: Team Allie and Team Pattieboop (I'm on this one) with a challenge every two weeks.  My first challenge will be January 24th.


Lady Ann asked me to join her team in 2013, but things were a bit too hectic at the time.  I asked her to think of me for the next go round.  Well, when that came around, I was in the process of moving from Alabama to Tennessee and Lady Ann was so gracious in accommodating my schedule.  I'm so happy to say that I'm officially beginning in January with a bunch of new ladies.  There are challenges every two weeks with some inspiration projects in between.  My first project will be on January 4th.

Please check the Page Tab above, "Design Teams", for links to all the design team members for each of the design teams I'm on.


Monday, December 30, 2013

Cupid's Jar


Did you know that Cupid, one of the new Valentine's release from Die-Versions, keeps all of the hearts that goes on the tip of his arrow in a DV Bug Jar?  Well, he is this year anyway.  :-)

All of the larger hearts are from the Wee Petites Heart Doodles and the smaller hearts are the negative portion of the Love Doily and are colored with Inka Gold paint (Rose mixed with a good bit of water).


The jar cap is also painted with Copper Inka Gold paint.  I die cut the Bug Jar twice, once in white cardstock and once in vellum.  I used the vellum inserts to simulate frosted glass.  Cupid is pop dotted above the jar rim, getting ready to fire off one of his arrows.  The sentiment was die cut from the Marker Micro font and adhered to one of the Heart Doodles.

I also distressed embossed the edges of the card with Distress Ink (Worn Lipstick) and Clear embossing powder.  I love that glazed icing-like look this technique gives the edges.

Be sure to check out the DV Blog and FB page daily for lots more great inspiration from the DV Dynamos.


Sunday, December 29, 2013

New Die-Versions 2014 Design Team


So glad to still be a part of this team (and the only original member left :-))!

Tuesday, December 24, 2013

Merry Christmas to All

front, closed

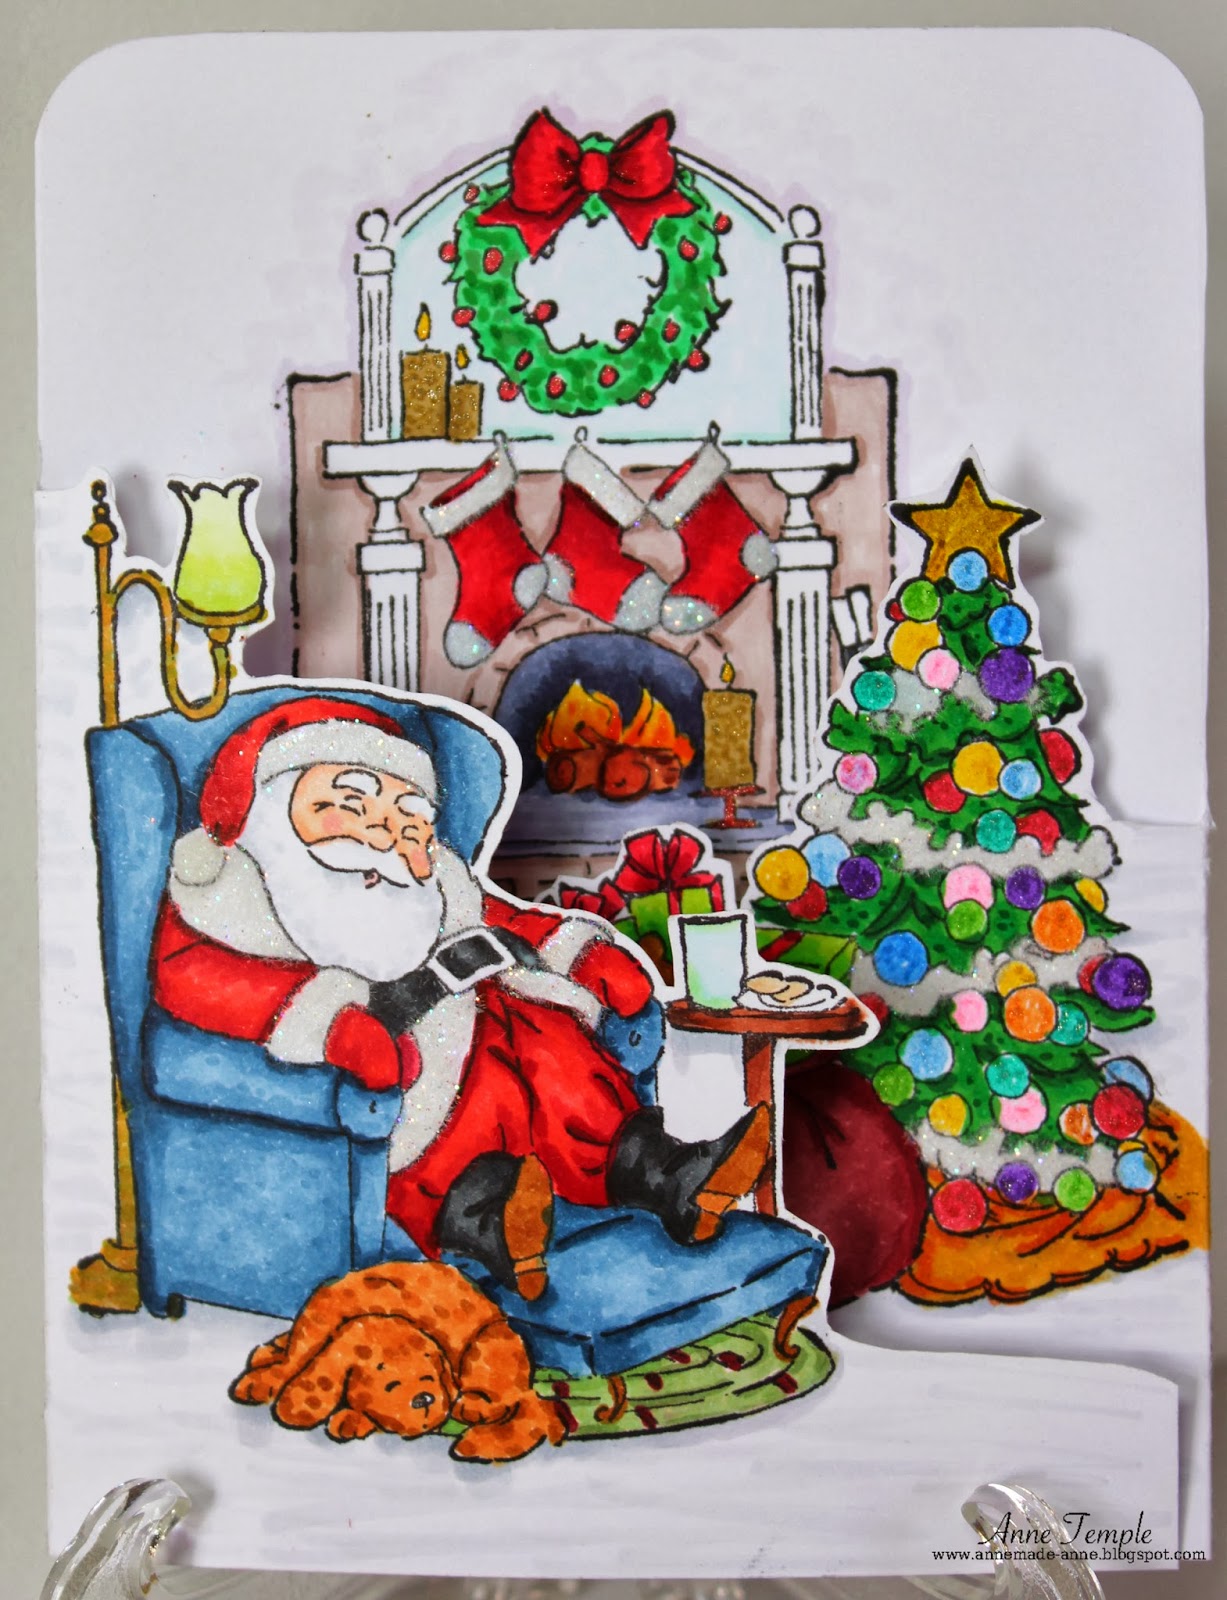
When I saw the new tryfold cards by Art Impressions, I had to have this one called Sleepy Santa (and maybe one or two others as well).  It comes with stamping position directions, which I didn't follow the first time I stamped these three images.  Oh well, at least I can use the images separately too.

inside, open
As you can probably guess from the inside view, I used Copic markers to color all the images.  If it bothers you that the colors bleed through, you can always adhere a piece of cardstock to cover it up.

left panel
I used Twinkling Clouds flock from Sparkle N Sprinkle on Santa's trim as well as the white trim winding around the Christmas tree.   The ornaments are colored with Spica glitter pens.

right panel

Twinkling Clouds was also applied to the white areas of the stockings that were hung with care.
center
The sentiment is part of the set and was stamped with Colorbox Gold pigment ink.

This is my wish to all of you too.  Have a very Merry Christmas and the happiest of New Year's.